
Introduction
Below you can see a screenshot of the single-page website you will create.
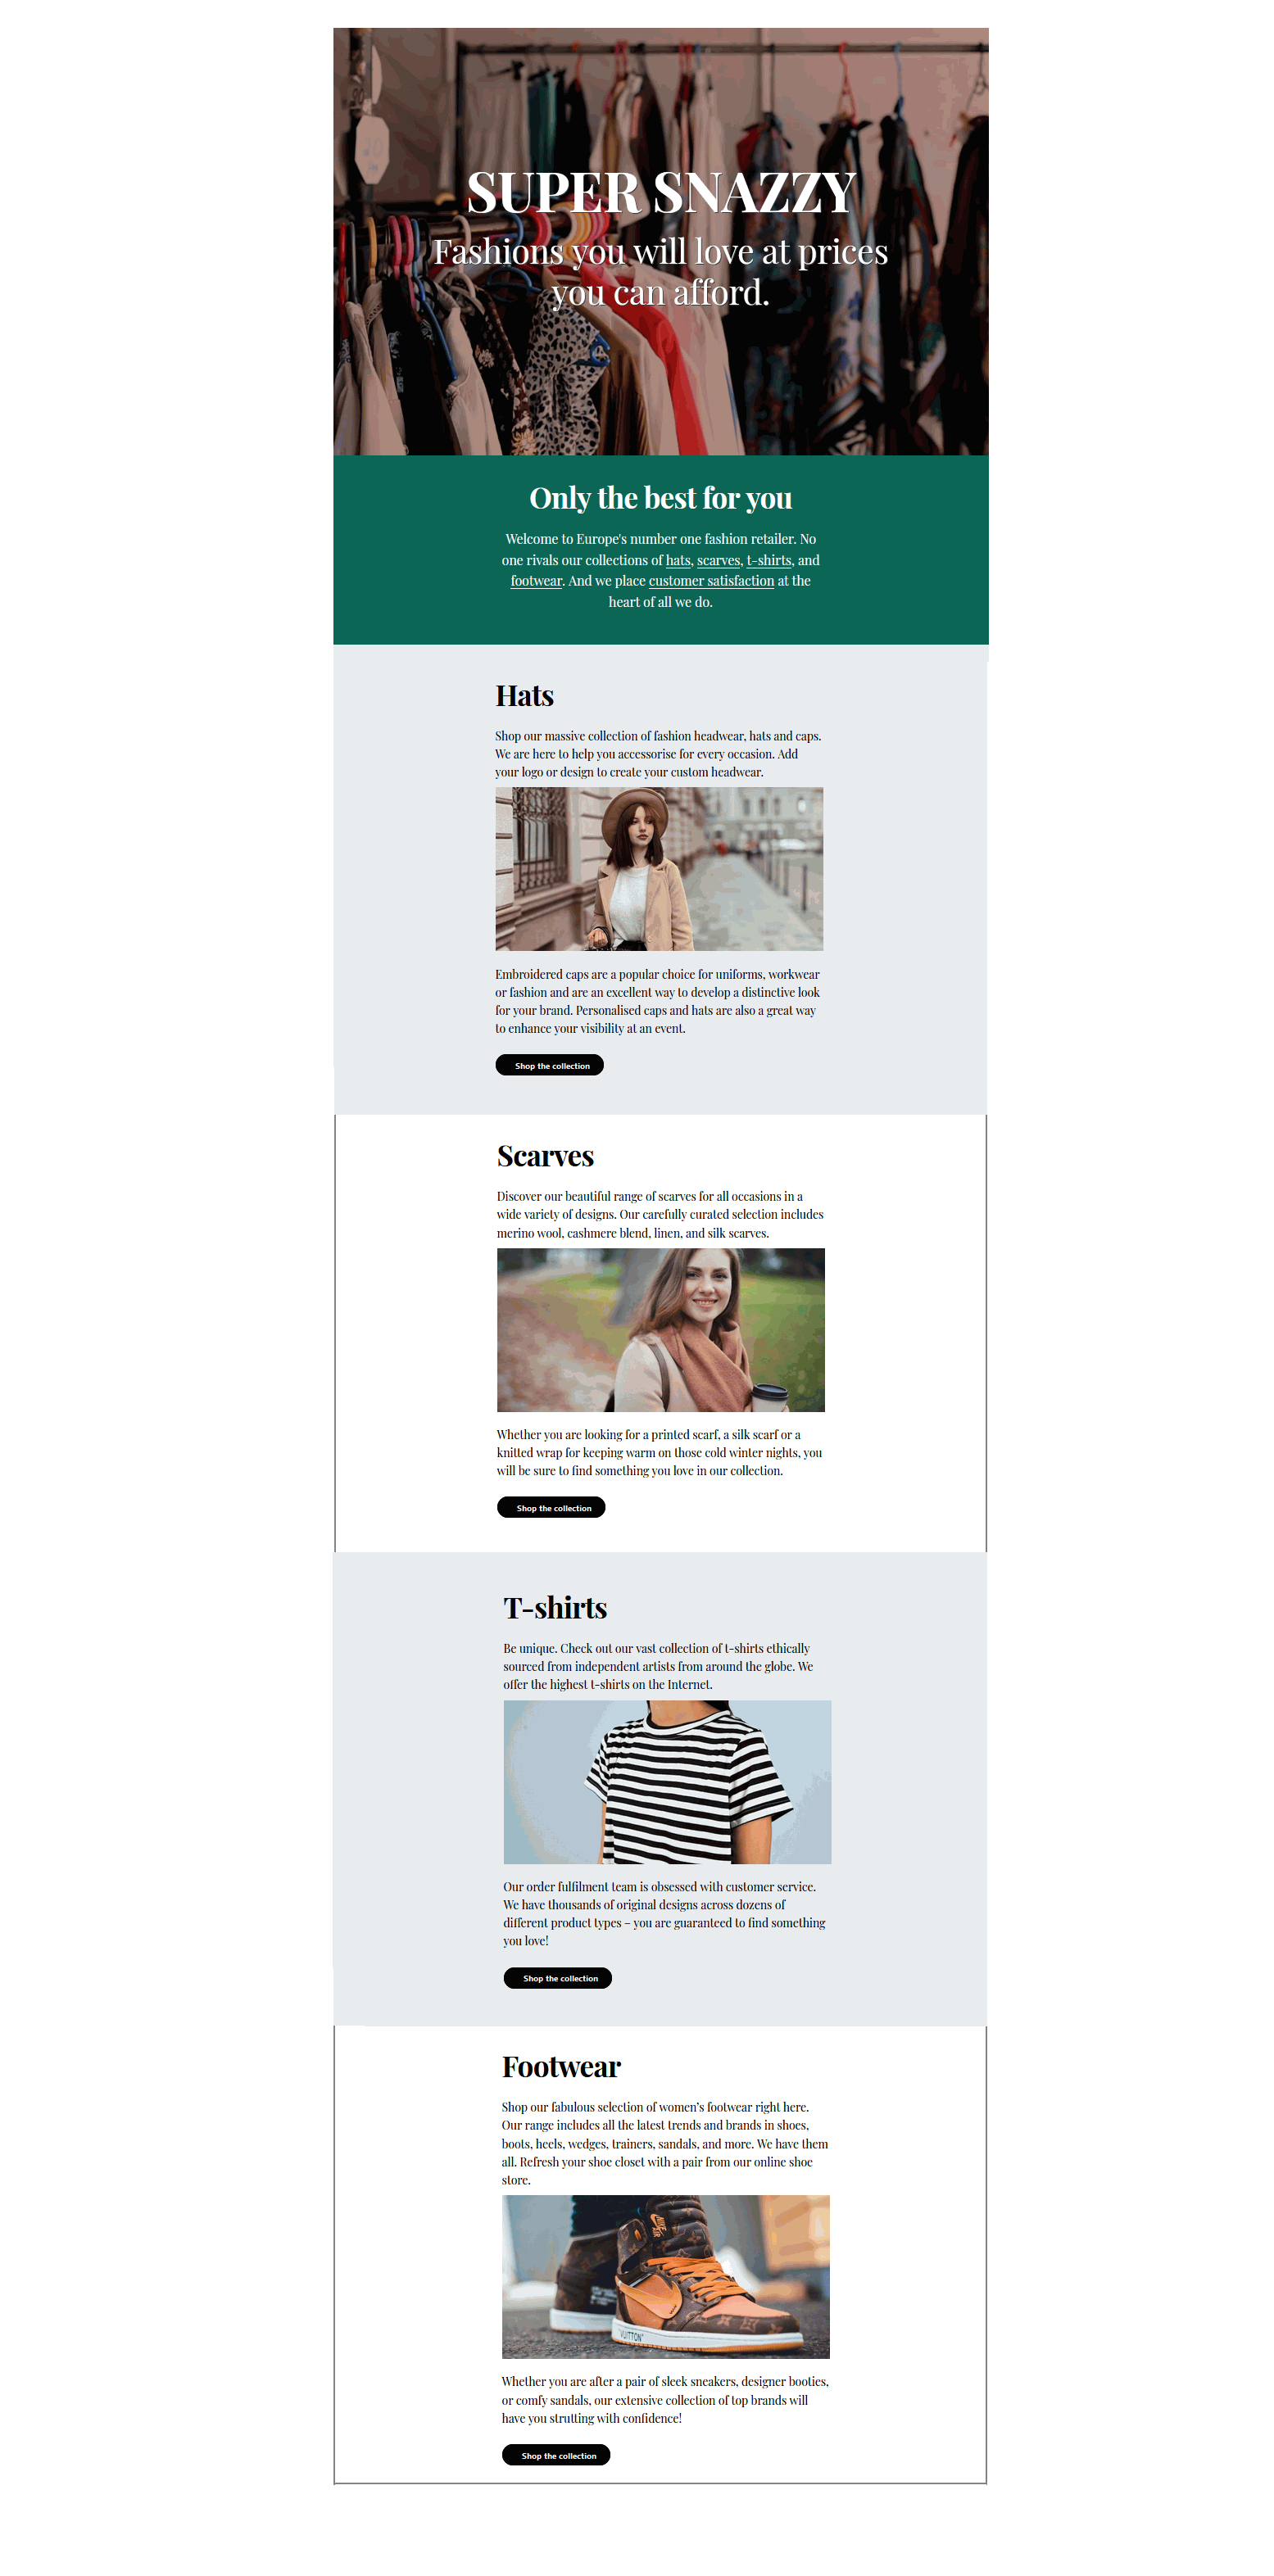
- In the <header> or 'hero block' is a background image.
- In the <main> part are five <section> blocks of content.
- All text on the web page is in the 'Playfair Display' font from Google Fonts.
Portfolio project folders and files
Your first task is to create the folders you need for this project.
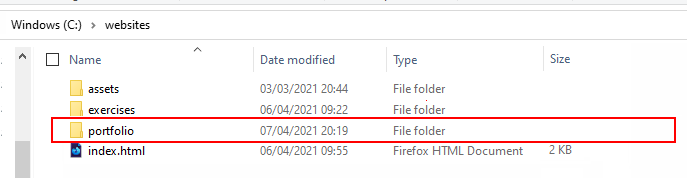
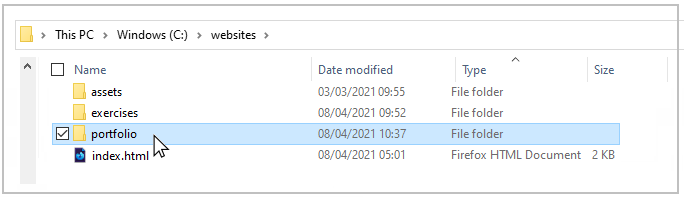
- For your first project, the Van Gogh project, you created a new folder named 📁 portfolio inside your ‘main’ 📁 websites folder.
 Inside this 📁 portfolio folder, create a sub-folder to hold the files for your Fashion project.
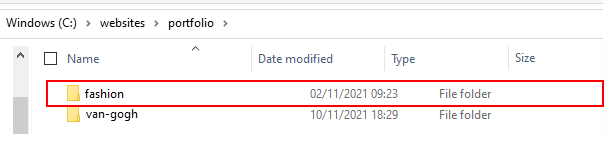 Name the new sub-folder as 📁 fashion (all small letters).
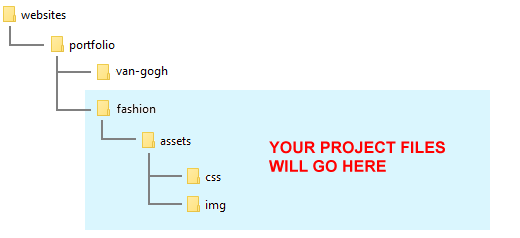
 - Inside this new folder, create an 📁 assets sub-folder.
And inside this, create a 📁 CSS sub-folder, an 📁 img sub-folder, and a 📁 js sub-folder.
✅ All done. You now have created the folder with sub-folders for your Fashion web page project.
Project resources
Your next task is to obtain the various files needed for your Fashion project.
Web page
Save the following 'starter' web page to your 📁 fashion folder:
Stylesheets
Save the following two stylesheet files to your 📁 fashion/assets/css sub-folder:
JavaScript file
Save the following JavaScript file to your 📁 fashion/assets/js sub-folder:
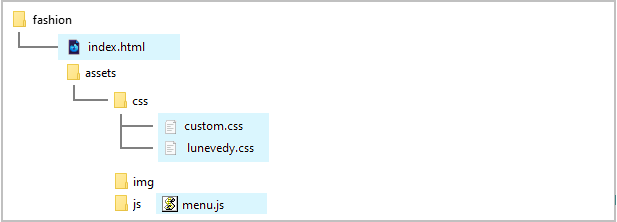
Your folders and four files (one web page, two stylesheets and one JavaScript file) should now look as shown below
Project text
All the text you need for this web page is in the file below. Only <p> tags have been used for basic formatting.
You do not need to download this file. You can simply copy-and-paste from it.
Project images
Download the following five images to your 📁 fashion/assets/img sub-folder.


✅ That's it. You now have all the resources you need to begin working on your Fashion project.
Launching the Lunevedy app and VS Code
Click the link below to open the Lunevedy app in a new tab of your web browser.
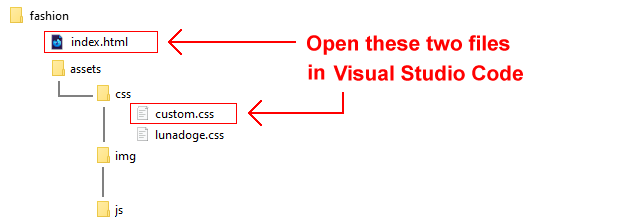
Next, start VS Code and open the two files below.
- fashion/index.html
- fashion/assets/css/custom.css

You are now ready to build the various content ‘blocks’ of your web page.
Creating the ‘hero block’ layout
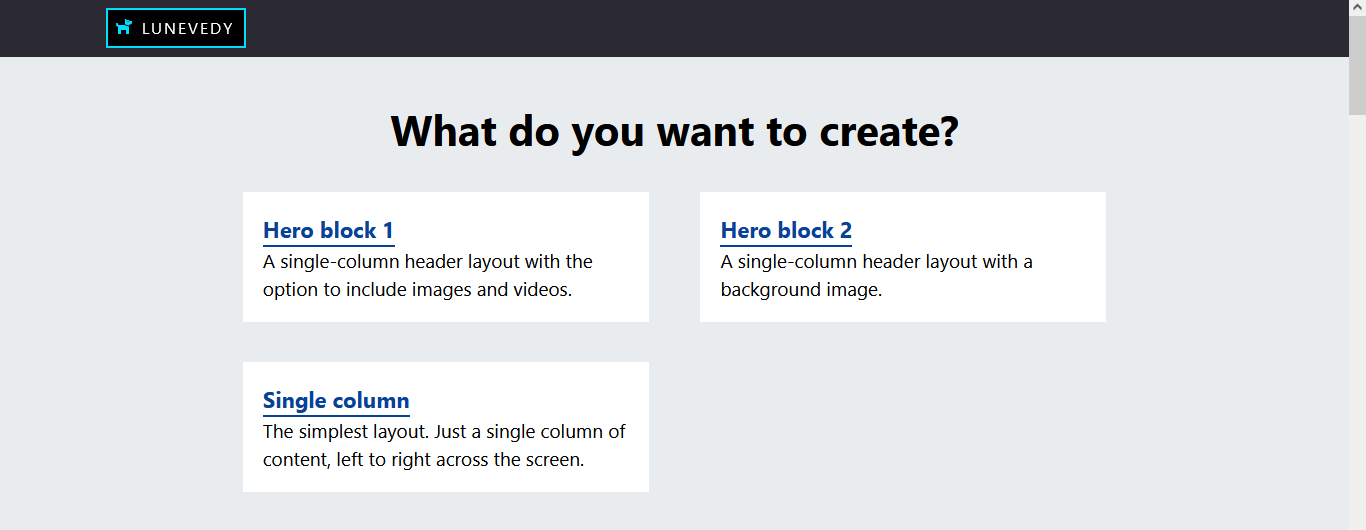
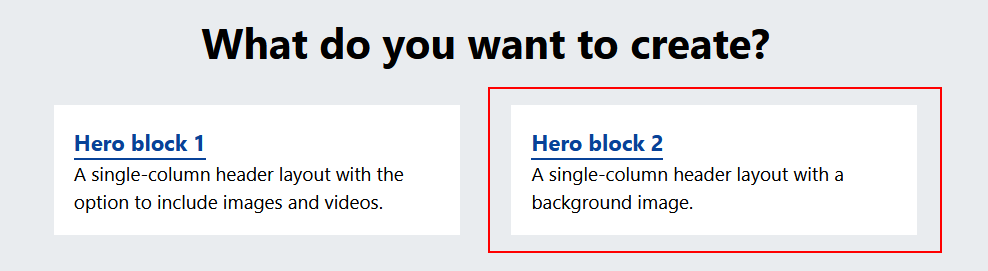
On the home page of the Lunevedy app, choose the Hero block 2 option.
On the next screen displayed, choose the following menus and options:
HERO TEXT
Animation
Choose Fade In
HERO BUTTONS
Buttons
Choose None
When finished, click the Copy HTML button near the bottom-right of the screen.

In VS Code, display the index.html web page.
Select the opening <header> and closing </header> tags.
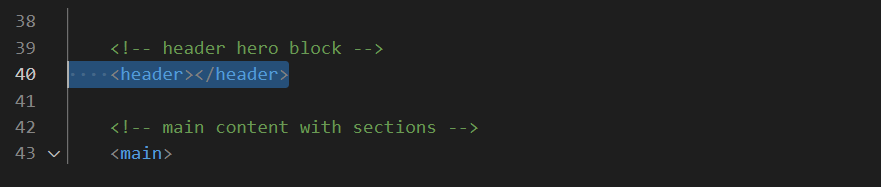
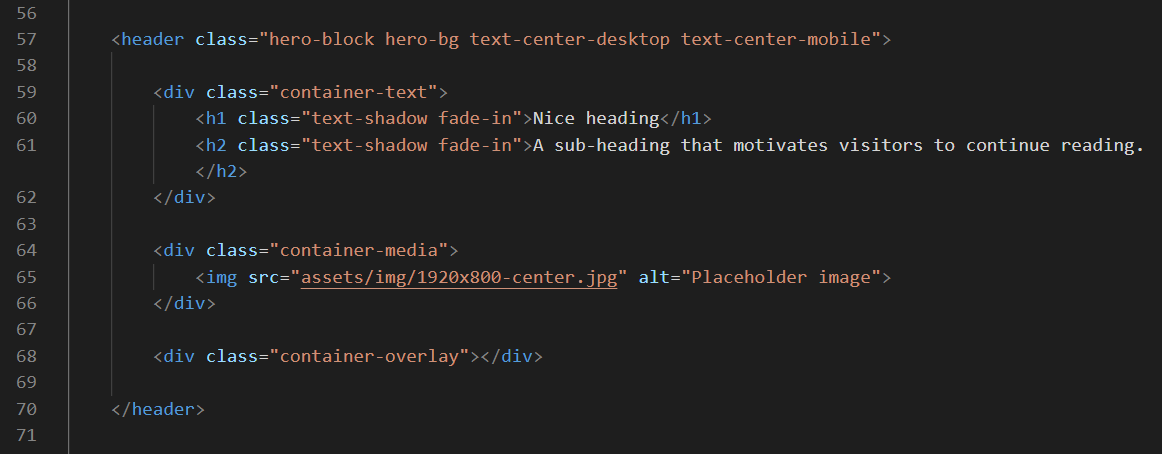
Now, paste in the copied text.
Your VS Code screen should now look as shown below.
Edit the <img> tag as shown below.

Because you have not updated any of the default colours in the 'hero block', the Copy CSS button at the bottom-right of the screen is not enabled.

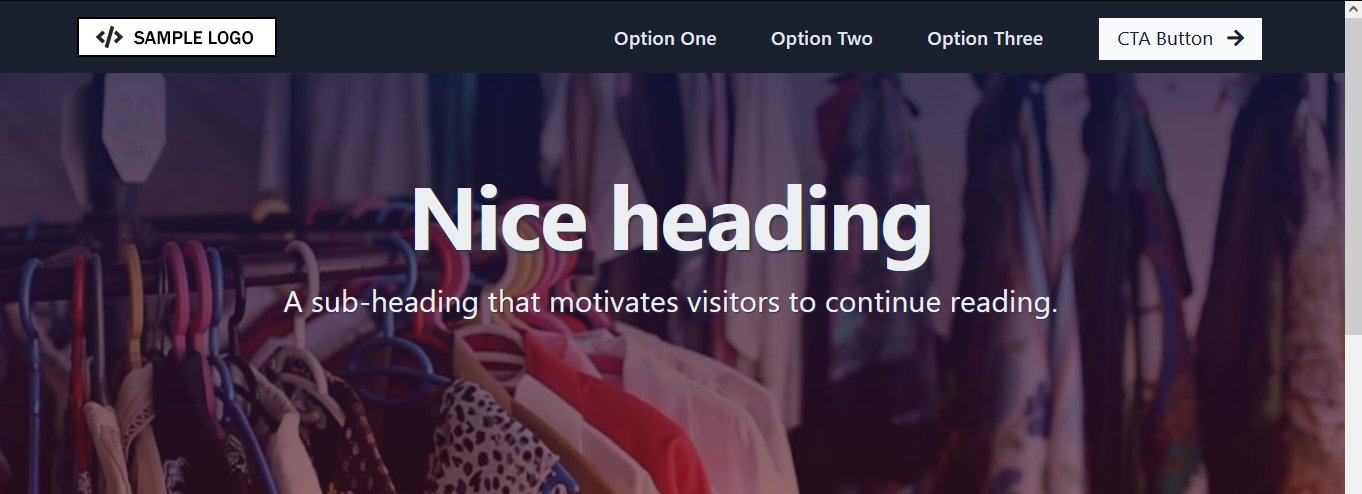
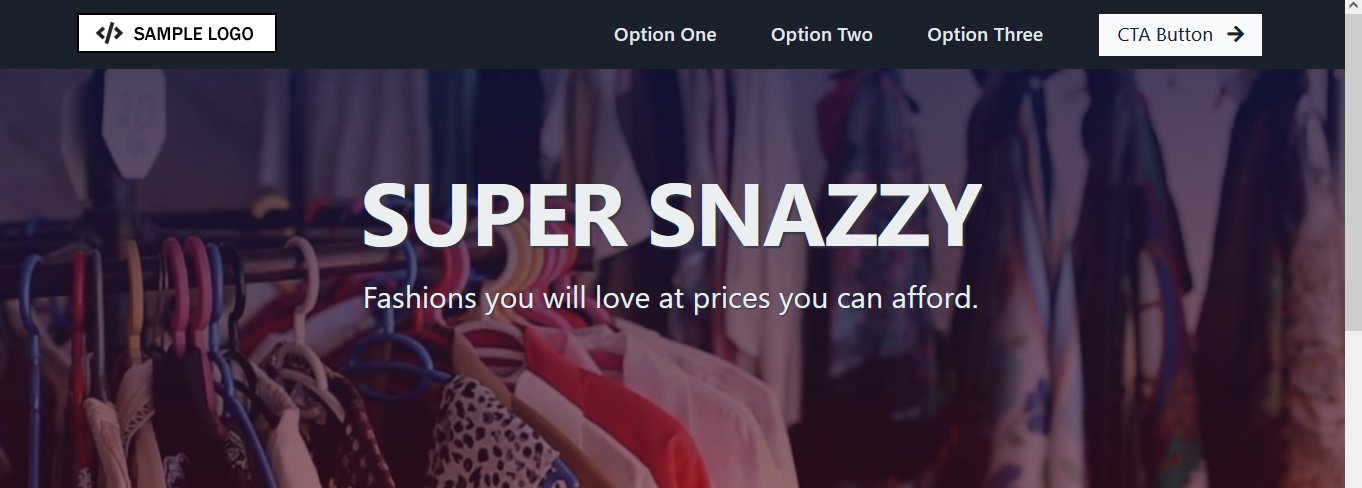
In VS Code, save your index.html file. Display it in your web browser. It should look as shown below.
Update the 'hero block' with the words from the text.html file.

Save your index.html page and reload it in your web browser.
To speed up the loading of the hero-still.jpg poster image for the background video, copy-and-paste the following code just after the "Preload hero image" comment line in the head.
<link rel="preload" href="assets/img/hero-still.jpg" as="image">
✅ Excellent. You have now completed the ‘hero block’ of your Fashion web page.
Creating the ‘deckhead’ layout
As a web page designer, you do not want to show visitors too much information too soon. So it's a good idea to place a short block of introductory text under the header 'hero block' before you list your products or services in detail.
In the US, this short introduction is called a 'deckhead'. In the UK, it's known as a 'standfirst'.
The 'deckhead' will be the first section block after the opening main tag.
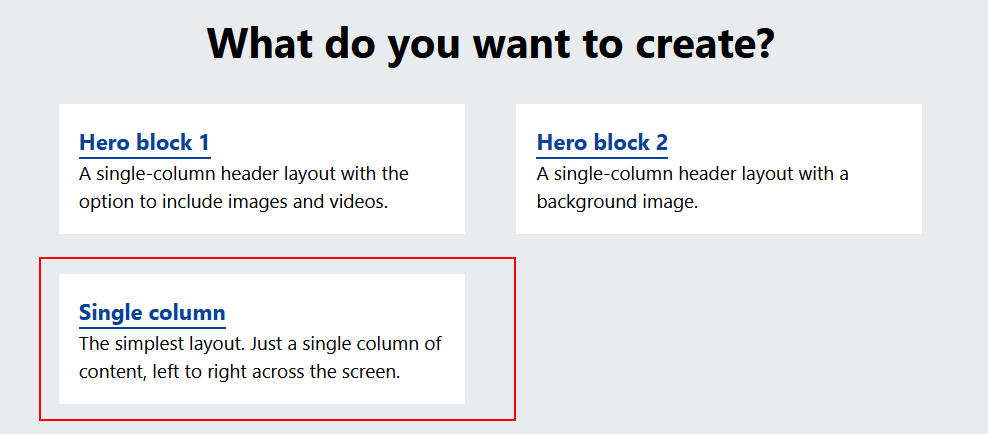
In the Lunevedy app, click the Back option near the top-left of the screen. On the home page, click the Single Column option.
On the next screen displayed, choose the following menus and options:
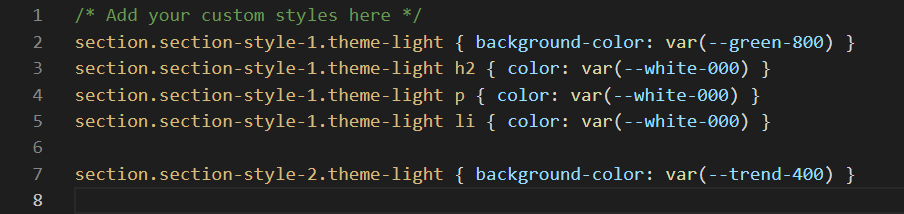
SECTION
Class Name
Leave this at section-style-1.
Horizontal Alignment
Choose Center and Center.
Background Color
Choose Solid and green-800.
TEXT
<h2>
Click Choose and white-000.
<p> and <li>
Click Choose and white-000.
Standfirst / Deckhead
Choose Yes.
You are now finished with the Text menu.
Next, click the Copy HTML button near the bottom-right of the screen.
In VS Code, display the index.html web page. Inside the opening <main> and closing </main> tags, paste in the copied text.
You can delete any unnecessary line breaks.
You can also delete the second and third paragraph of placeholder text.
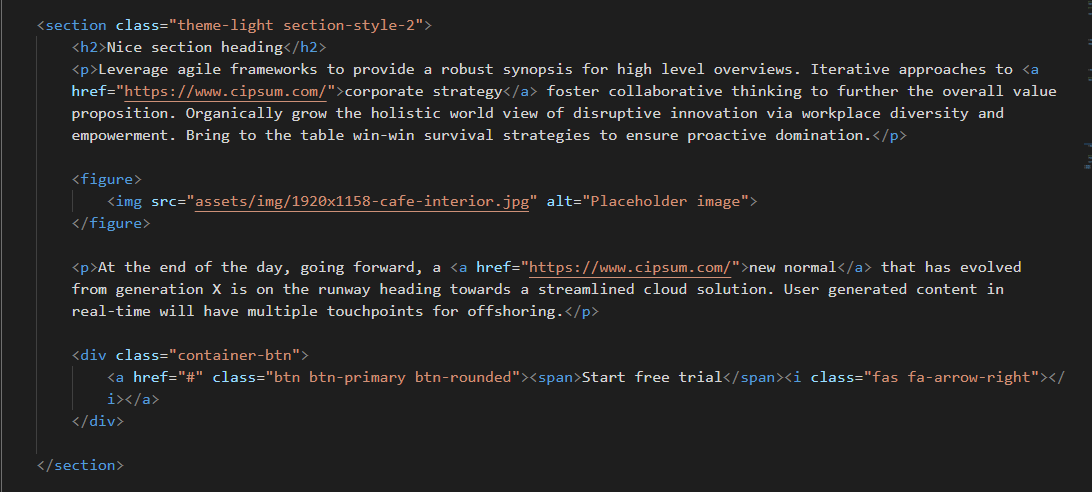
Your VS Code screen should now look as shown below.

Update the 'deckhead' with the words from the text.html file.

Save your index.html page.
Return to the Lunevedy app. At the bottom-right of the screen, click the Copy CSS button.
In VS Code, display the custom.css file and paste in the copied style rules. Your stylesheet should now look as follows.

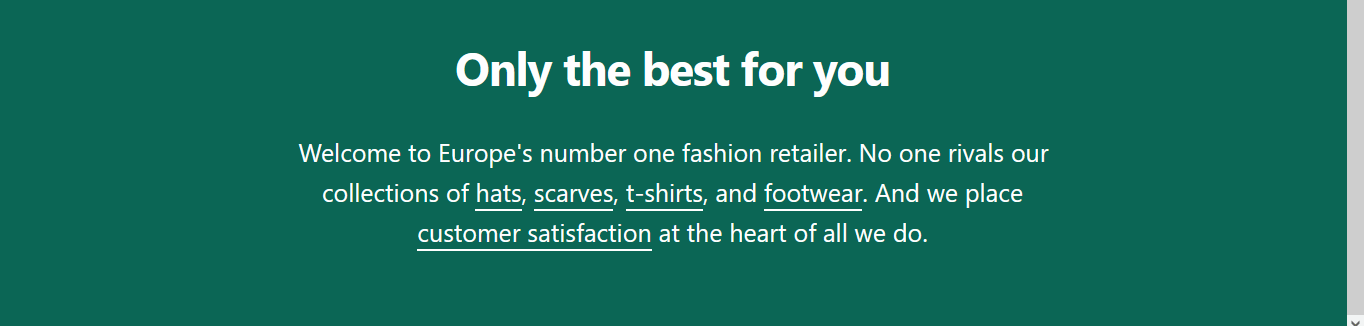
Save your custom.css file. In your web browser, your page should now look as shown below.

Next, add the following internal hyperlinks to the text of the 'deckhead.'

Save your index.html web page and reload it in your web browser.
✅ You have now completed the 'deckhead'/'standfirst' block of your Fashion web page.
Creating the main content layout
Now you will create four section blocks to hold the main content of your web page. You will use two sets of CSS style rules: section-style-2 and section-style-3.
In the Lunevedy app, click the Back option near the top-left of the screen. On the home page, click the Single Column option.
On the next screen displayed, choose the following menus and options:
SECTION
Class Name
Change this to section-style-2.
Horizontal Alignment
Choose Left and Left.
Background Color
Choose Solid and trend-400.
You are now finished with the Section menu.
BUUTONS
Buttons
Choose One.
Button Style
Choose Rounded.
You are now finished with the Buttons menu.
ILLUSTRATIONS
llustrations
Choose Yes.
IMAGE
Choose Picture.
You are now finished with the Illustrations menu.
Next, click the Copy HTML button near the bottom-right of the screen.
In VS Code, display the index.html web page. After the first 'deckhead' section, paste in the copied text.
You can remove any unnecessary line breaks and also the third paragraph of text.
Move the container-btn div to the bottom of the section
Then paste the copied text a second time below it. You now have two new section blocks in your web page, each with the same class name of section-style-2.
Save your index.html page.
Return to the Lunevedy app. At the bottom-right of the screen, click the Copy CSS button.
In VS Code, display the custom.css file, scroll down to the bottom, and paste in the copied style rule. Your stylesheet should now look as follows.
Save your custom.css file.
In the index.html file update the text and add the correct two images.
Repeat the above steps for two more section blocks, each with the class name of section-style-3. Use a background color of white-000.
In VS Code, display the index.html web page.
In the four buttons, enter the new text of 'Shop the Collection'.
In the opening section tag at the top of each block, enter the appropriate IDsto link each section to a hyperlink in the 'deckhead' near the top of the web page.
Adding the final touches
In the head of your web page, remove the links to the Font Awesome and Google Material Design icons.
Update the title and description as follows:
- Super Snazzy Fashion
- Europe's leading online retailer of quality fashion products at affordable prices.
Also, at about line 15, replace the link to the lunevedy.css stylesheet with the faster-loading, minified version of lunevedy.min.css.
<link rel="stylesheet" href="assets/css/lunadoge.min.css" />
Finally, add the Google Font of 'Playfair Display' as the global font for the web page.
Add the font to the head of the web page in the usual way. And then add this line to the custom.css stylesheet.

Uploading your files to GitHub
After finishing your web page and stylesheet, you are now ready to upload them to your account on GitHub.
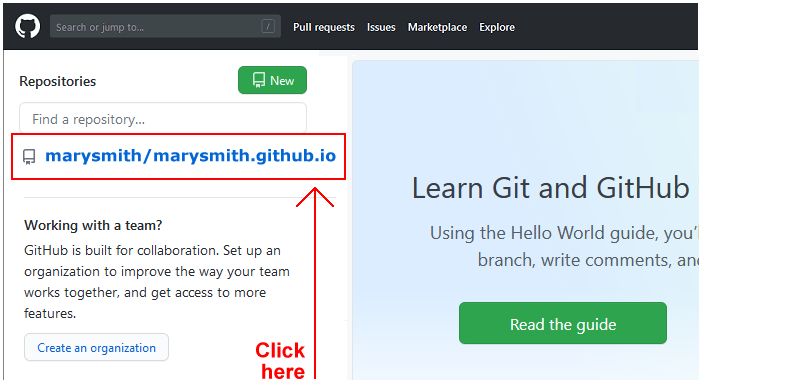
- Open a new tab in your web browser and go to GitHub.com. If you are not already signed in to your GitHub account, sign in now.

- On your GitHub home page, click the ‘repo’ that holds your web pages. Its name will look as follows, where username is your chosen username on GitHub.
username.github.io
- On the next GitHub screen displayed, near the right of the screen, you can see a button named Add file. Click on it.
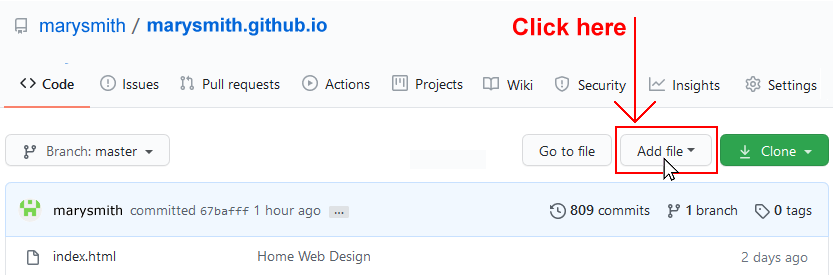
- From the dropdown list displayed, choose the option Upload files.

- In File Explorer (Windows 10) or Finder (Apple Mac), drag-and-drop your entire 📁 portfolio sub-folder to upload it to your repository on GitHub.
- Scroll down to the bottom of the GitHub screen, and accept or edit the short message (Add files via upload) in the Commit changes box.
- Finally, click the green Commit changes button to upload your files.
Your portfolio project web page is now published on GitHub at a web address similar to the following:
https://username.github.io/portfolio/fashion/index.html
or simply:
https://username.github.io/portfolio/fashion
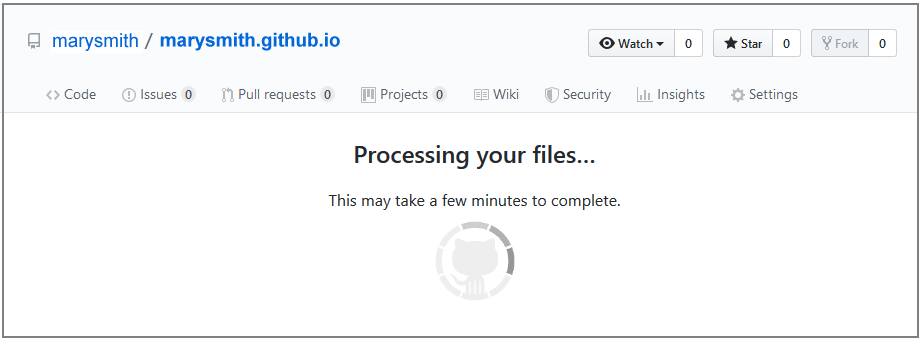
It may take a few minutes for your uploaded files to appear on GitHub.