Introduction
In this project you will create your personal website, based on the following four web pages:
- Home page (in main folder)
- Privacy page (also in main folder)
- Portfolio page (in 📁 portfolio sub-folder)
- Contact page (in 📁 contact sub-folder)

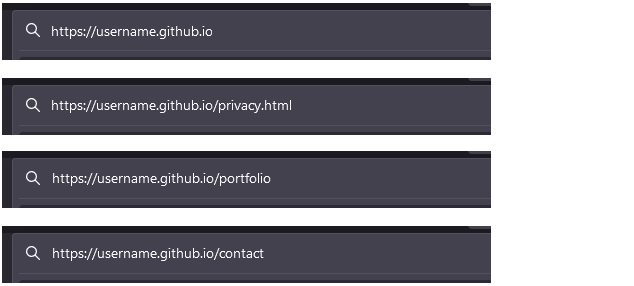
Your four pages will have the following web addresses.
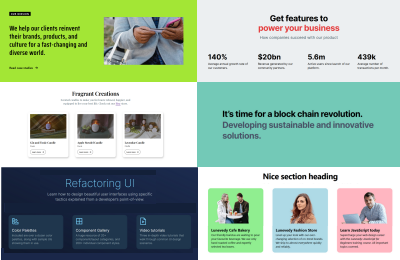
For your inspiration, here are some sample portfolio websites from web designers and developers.
This might be a good time to revisit these topics:
Portfolio project folders and files
Your first task is to create a sub-folder named 📁 contact to hold your new Contact web page.
Create this in your 'main' 📁 websites folder.
Project resources
Your next task is to obtain the text and visual content needed for this project.
Project Text
You will find some sample text for the pages in your portfolio website in the file below. Only <p> tags have been used for basic formatting.
You do not need to download this file. You can simply copy-and-paste from it.
Project web pages
In your 'main' websites folder, you already have a file named index.html. Before continuing, rename this file to exercises.html.

Download and save the following web page to three locations.
- Save one copy to your 'main' 📁 websites folder.
- Save one copy to your 📁 websites/portfolio sub-folder.
- Save one copy to your 📁 websites/contact sub-folder.
Project stylesheets
Download the following stylesheet file to your 📁 websites/assets/css sub-folder.
Project images
Download the following six images to your 📁 websites/assets/img sub-folder.
That's it. You now have all the resources you need.
Opening the web page and stylesheet in VS Code
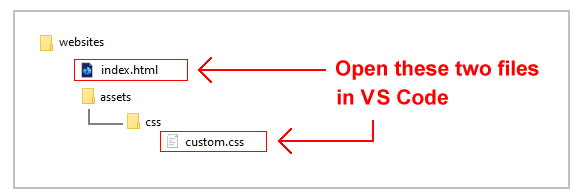
Open the following two files in VS Code.
- The index.html file in your 'main' websites folder.
- The custom.css file in your 'main' assets/css sub-folder.

You will copy-and-paste paste from the Lunevedy app into each of these two files.
Creating your new Home page
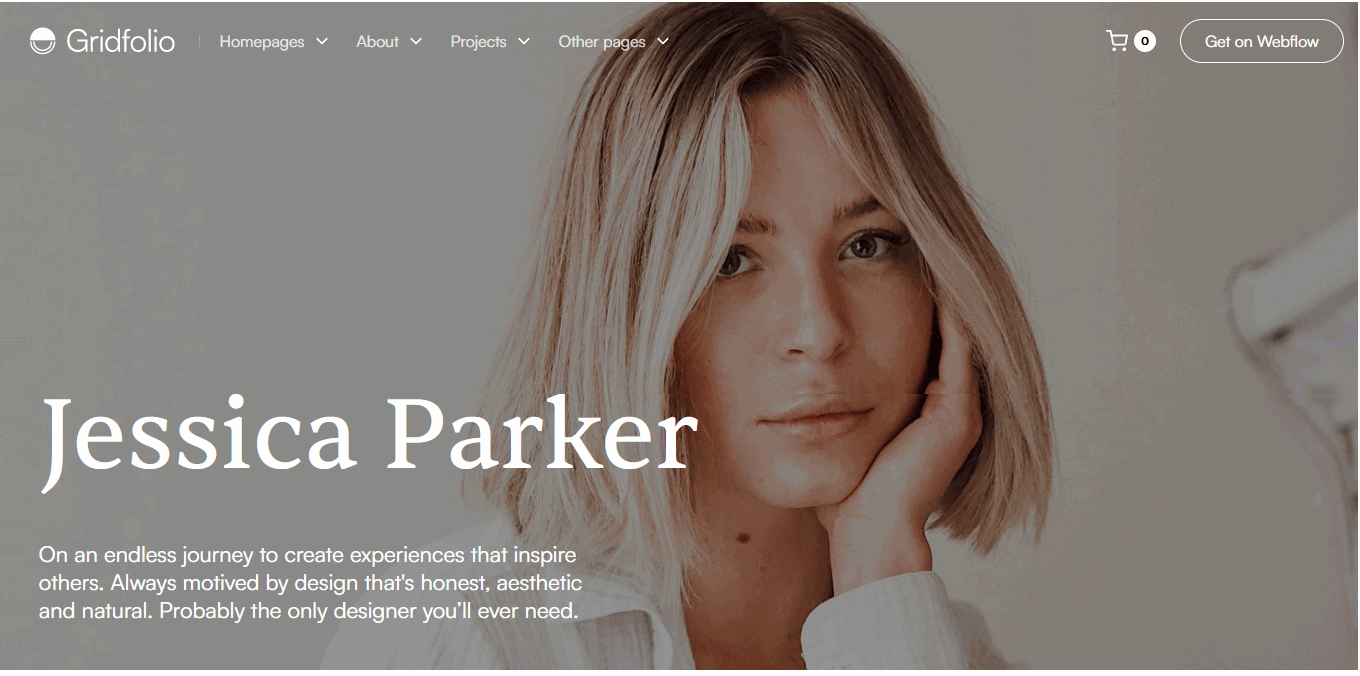
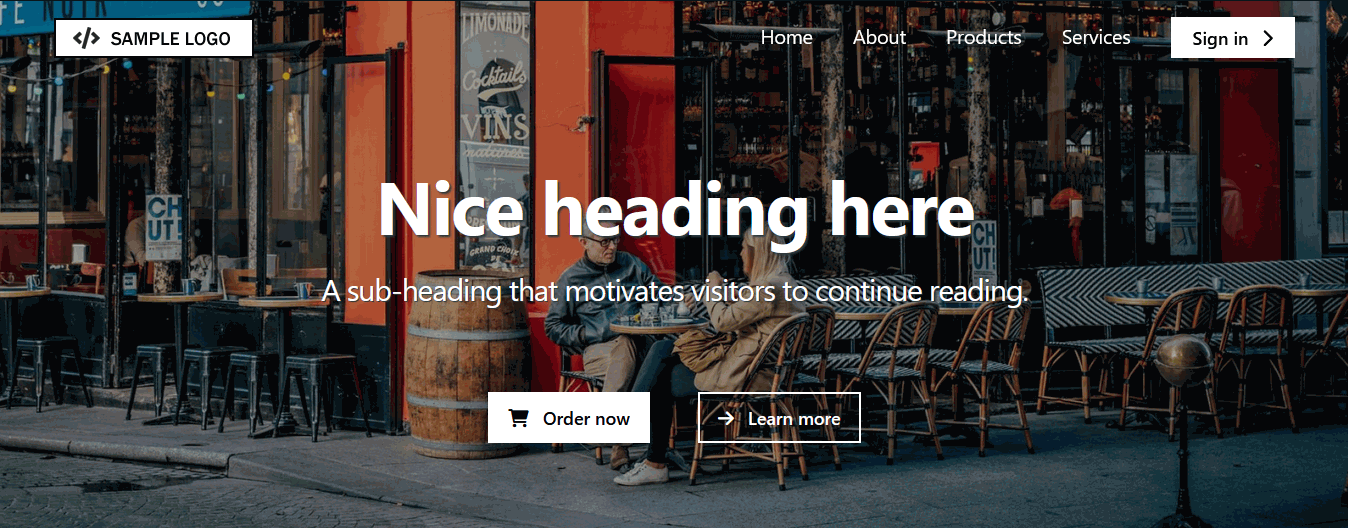
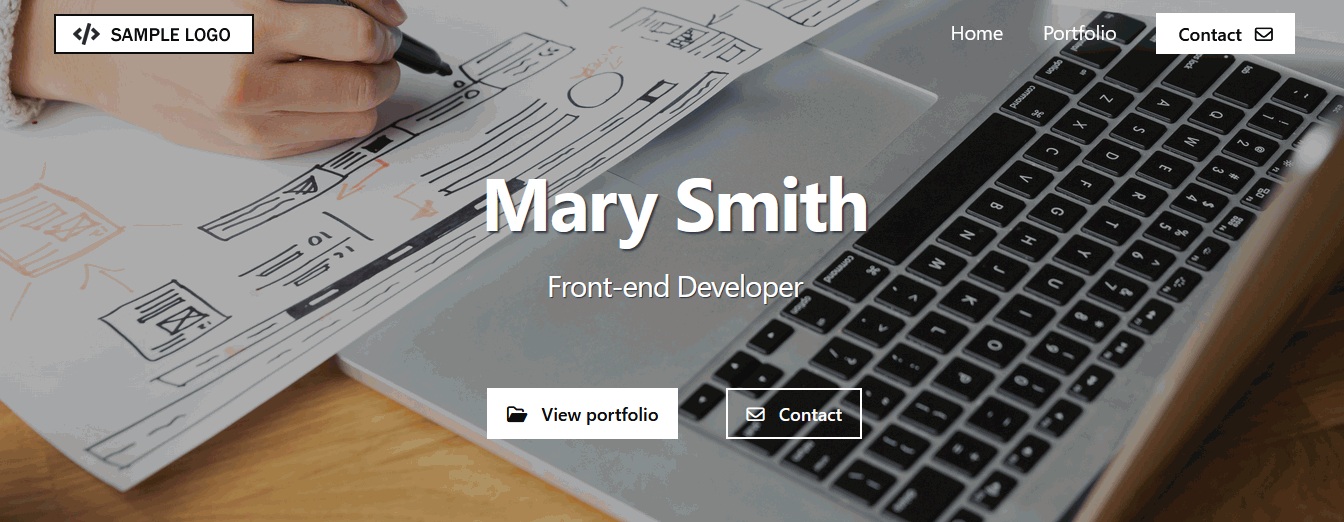
Two main layout options are popular Home page choices for front-end develpers and web designers. One is text in front of a full-width background image. You can create this layout type with the Hero Block 3 option in Lunevedy. See an example below.
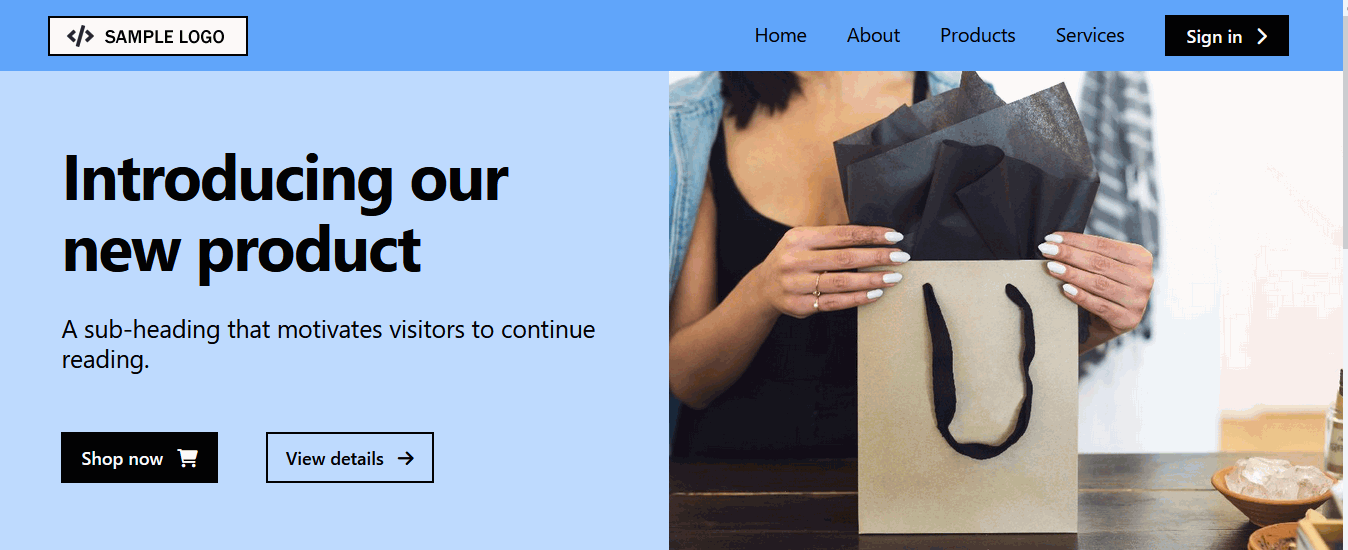
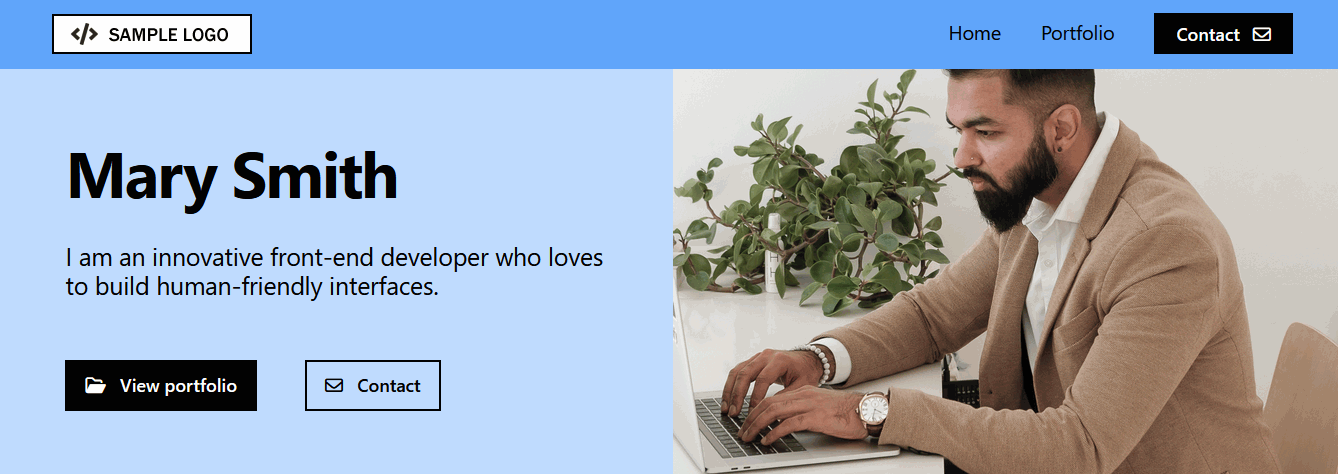
A second common choice is a two-column layout with text in one column and an image in the other. In Lunevedy, you can create this layout type with the Hero Block 2 option. See below.

Creating your Home header and menu (version one)
Follow the steps below:
- On the home page of Lunevedy, choose the Hero block 3 layout.
- On the Layout menu, choose the following option.
 Optionally, on the Layout menu, select your preferred Align and Animation options.
 - On the Text menu, select your preferred colour and other options.
- On the Buttons menu, select your preferred colour and other options.
- On the Lunevedy menu, switch from Work with Hero Block to Work with Menu.
- Select the following menus and options.

- On the Menu Sticky menu, select the Background, Menu Options and CTA Button colours you want to display when the user scrolls down the web page.
- Use the Menu Desktop and Menu Mobile menus to select your preferred colours and other options.
- Near the bottom-right of the screen, click the HTML button.
- Switch to VS Code, display the index.html web page and select the placeholder nav and header tags as shown below.

- Paste over the empty tags with the copied HTML.
- Return to the Lunevedy app, and click the CSS button at the bottom-right of the screen.
- In VS Code, in the custom.css file, paste in copied style rules.
Save your index.html and custom.css files. Your Home page should look similar to that shown below.
Creating your Home header and menu (version two)
Follow the steps below:
- On the home page of Lunevedy, choose the Hero block 2 layout.
- With Work with Hero Block option selected, use the menus to select your preferred colour and other options.
- On the Lunevedy menu, switch from Work with Hero Block to Work with Menu.
- On the Menu Sticky menu, set Menu Sticky to On, and select the Background, Menu Options and CTA Button colours you want to display when the user scrolls down the web page.
- Use the Menu Desktop and Menu Mobile menus to select your preferred colours and other options.
- Near the bottom-right of the screen, click the HTML button.
- Switch to VS Code, display the index.html web page and select the placeholder nav and header tags as shown below.

- Paste over the empty tags with the copied HTML.
- Return to the Lunevedy app, and click the CSS button at the bottom-right of the screen.
- In VS Code, in the custom.css file, paste in copied style rules.
Save your index.html and custom.css files. Your Home page should look similar to that shown below.
Updating the Menu content
In VS Code, display the index.html file and edit the placeholder menu text as follows.

Updating the Header content
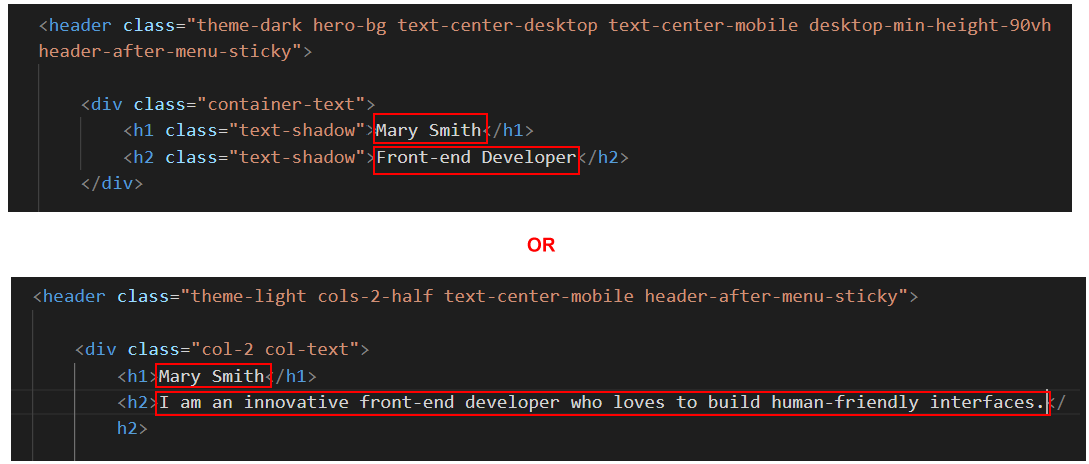
Also in the index.html file, edit the placeholder menu text as required. You can see some examples in the sample text file.
Update the two buttons as follows.

Adding your hero image image
Your next task is to find and add your own image to the hero block - that is, to the header of the web page.
- In your web browser, select a stock image from one of the copyright-free image sources. Alternatively, use an image you have created yourself.
- Use image editing software or a free online service such as BeFunky to resize or crop your chosen image so that it is (about) 1920px wide and 800px high for a full background image. For a half-screen image, about 900px x 900px is a good choice. If you are using an image you created yourself, use Tinyjpg or other free online service to minimise the file size of the image. Your image should be no more than 500KB in file size.
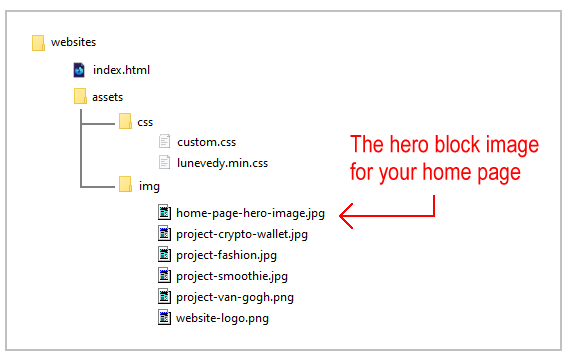
- Rename your image to something you will easy to remember, such as home-page-hero-image.jpg and save it in your 'main' 📁 assets/img folder. See below.
- In VS Code, edit the link to the background image of the hero block as follows.
 Changing the text in the alt attribute will make it easier for Google and other search engines to find your web page.
 - Save your index.html web page and view it in your web browser. Two examples are shown below.
Creating the three-column section
Your next task is to create a three-column section layout under the header. This will showcase three of your web projects. Here are the steps:
- On the home page of Lunevedy, choose the Three columns layout.
- On the Buttons menu, choose the following option.

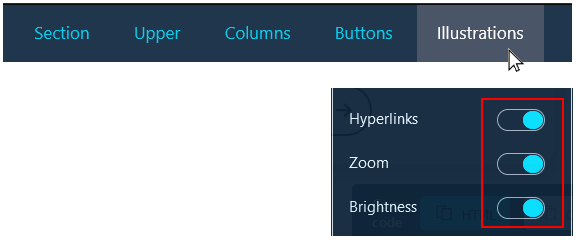
- On the Illustrations menu, choose the following options.
- Use the other menu options to select your preferred colours, button styles and other options.
- Near the bottom-right of the screen, click the HTML button.
- Switch to VS Code, display the index.html web page, and paste the copied HTML over the first empty <section> tag pair.
- Update the pasted content with the relevant words from the text.html file. See below.

- Add the correct hyperlinks to your three sample projects and replace the placeholder images with your project images. See below.
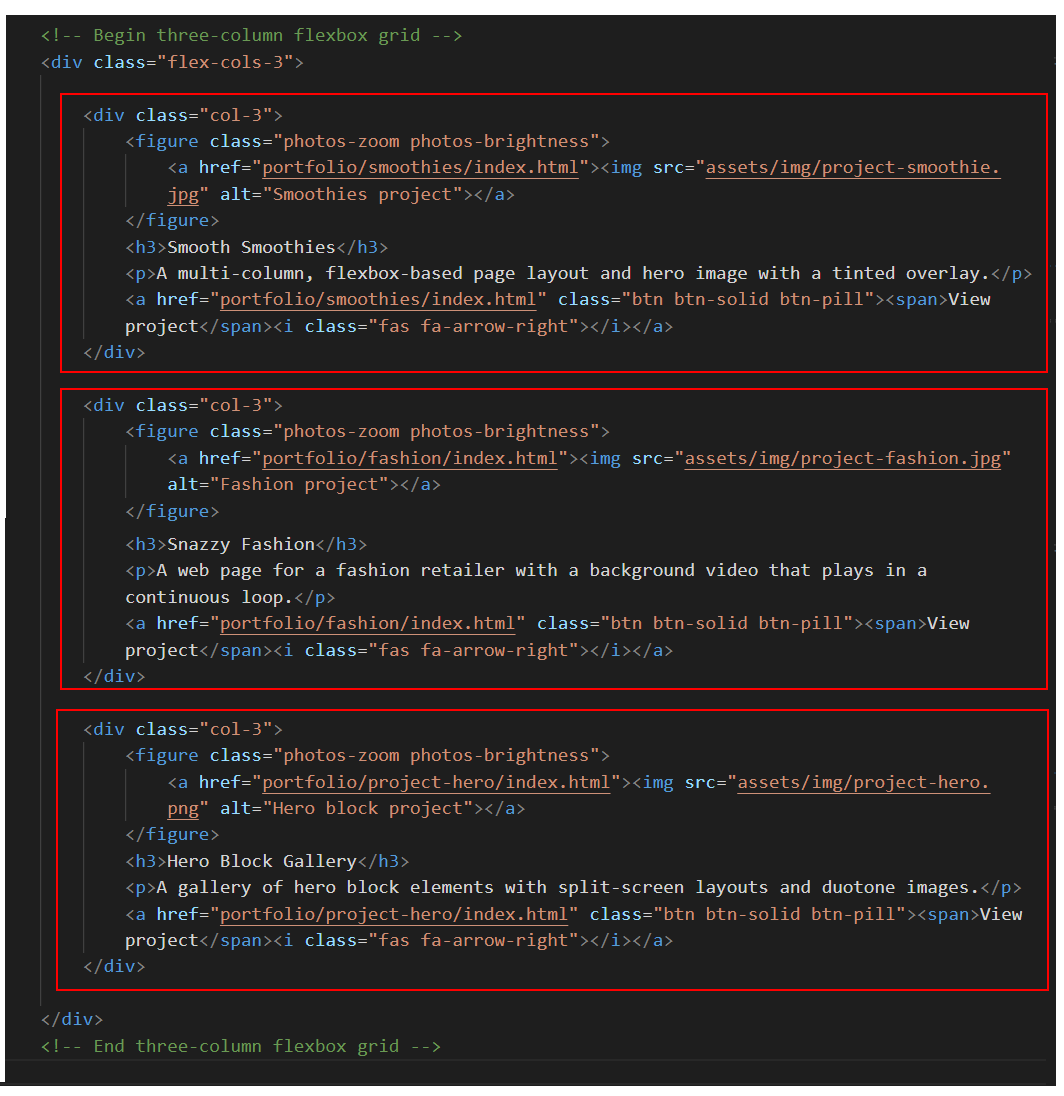
- Select and delete the three empty <section> tag pairs from the index.html file. You will not be using these.
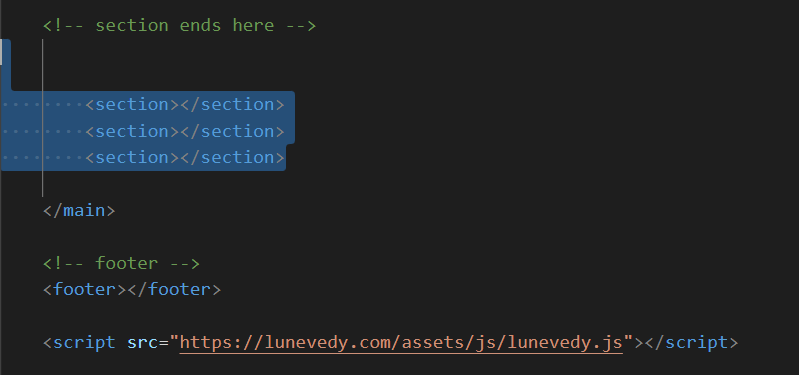
- Return to the Lunevedy app, and click the CSS button at the bottom-right of the screen.
- In VS Code, in the custom.css file, paste in copied style rules.
When finished, save your index.html and custom.css files. Your three-column section should look something like the sample below.
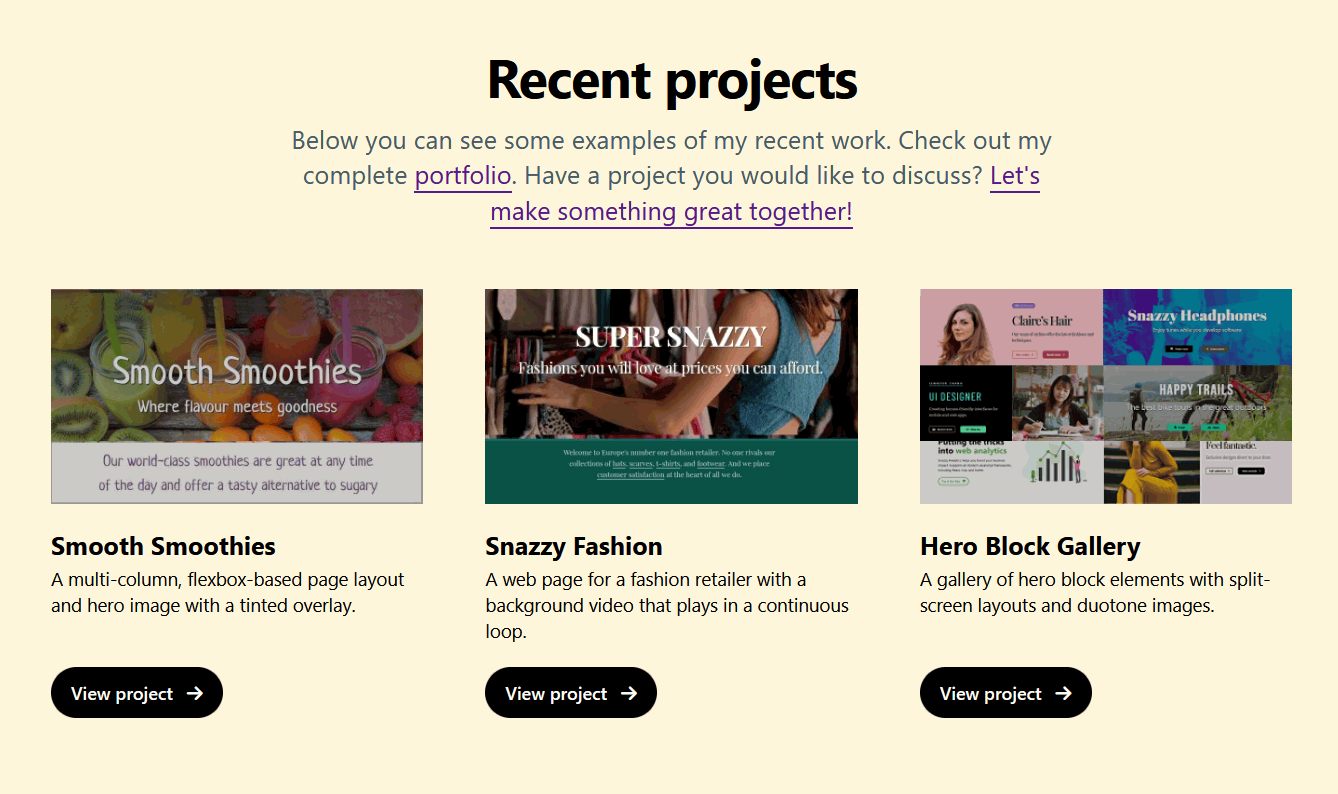
Creating your new Portfolio page
The purpose of this web page is to provide a gallery of your web design work.
Updating the CSS link in index.html
Follow these steps.
- Open your portfolio/index.html web page in VS Code.
- In the head of the page, edit the link to the custom.css stylesheet as shown below.

Creating your Portfolio page in Lunevedy
Follow the steps below.
- On the home page of the Lunevedy app, choose the layout Hero block one.
- Choose the following menus and options:
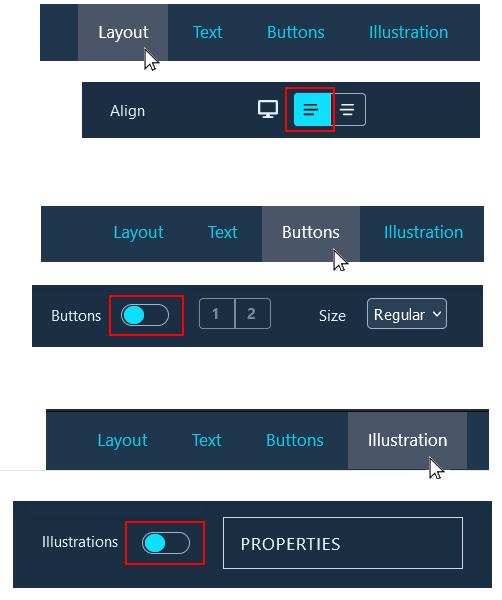
- Use the other menus and options to select your preferred colours and layout choices for the hero block and menu
- Near the bottom-right of the screen, click the HTML button.
- In VS Code, display the portfolio/index.html web page.
- Select the placeholder nav and header tags as shown below.

- Paste in the HTML you copied from the Lunevedy app.
You are now ready to make changes to your portfolio/index.html web page in VS Code.
Updating the content in VS Code
In VS Code, edit the pasted nav menu as shown below.


Using the examples from text.html, edit the pasted header hero block as shown below.

Updating the custom.html stylesheet
Follow these steps:
- Return to the Lunevedy app, and click the CSS button at the bottom-right of the screen.
- In VS Code, in the custom.css file, paste in your copied style rules.
When finished, save your index.html and custom.css files. Your Portfolio page should look something like the sample below.

Creating the three-column section
Your next task is to create a three-column section layout under the header. This will showcase all your web projects. Here are the steps:
- On the home page of Lunevedy, choose the Three columns layout.
- On the Section menu, choose the following option.

- On the Upper menu, choose the following option.

- On the Buttons menu, choose the following option.

- On the Illustrations menu, choose the following options.

- Use the other menu options to select your preferred colours, button styles and other options.
- Near the bottom-right of the screen, click the HTML button.
- Switch to VS Code, display the index.html web page, and paste the copied HTML over the first empty <section> tag pair.
- Update the pasted content with the relevant images and words from the text.html file.
- Add the correct hyperlinks to your projects. See one example below.

- Select and delete the three empty <section> tag pairs from the index.html file. You will not be using these.

- Return to the Lunevedy app, and click the CSS button at the bottom-right of the screen.
- In VS Code, in the custom.css file, paste in copied style rules.
When finished, save your index.html and custom.css files. Your three-column section should look something like the sample below.
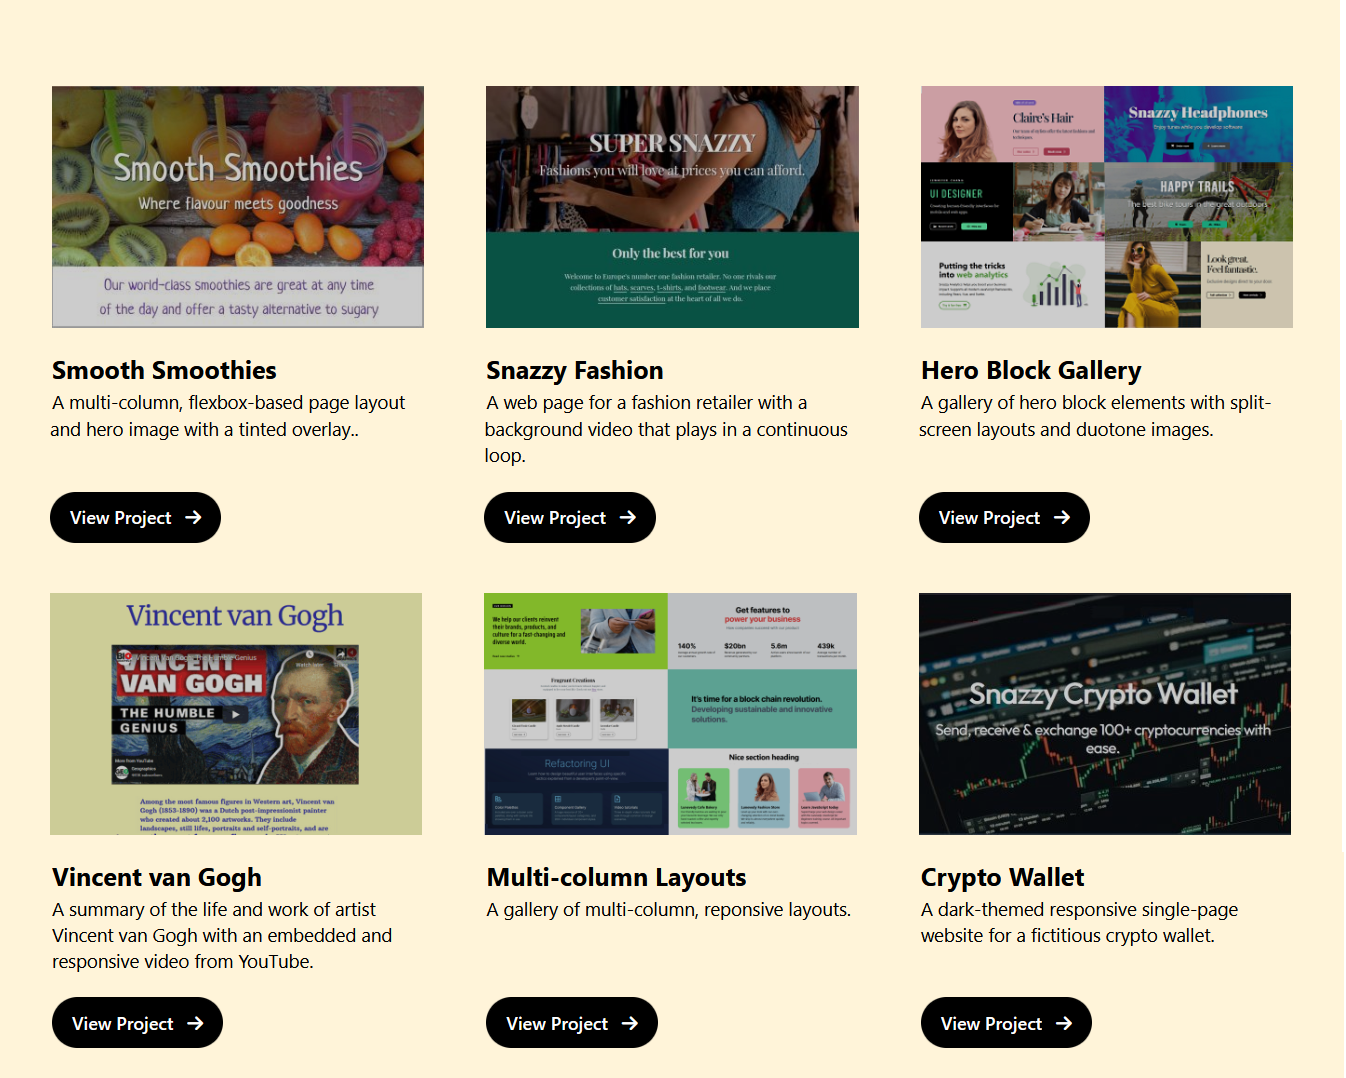
Creating your new Contact page
The purpose of this web page is to provide a contact form.
Updating the CSS link in index.html
Follow these steps.
- Open your contact/index.html web page in VS Code.
- In the head of the page, edit the link to the custom.css stylesheet as shown below.

Creating your Contact page content
Follow the steps below.
- In VS Code, from your Portfolio index.html page, select and copy the <nav> block.
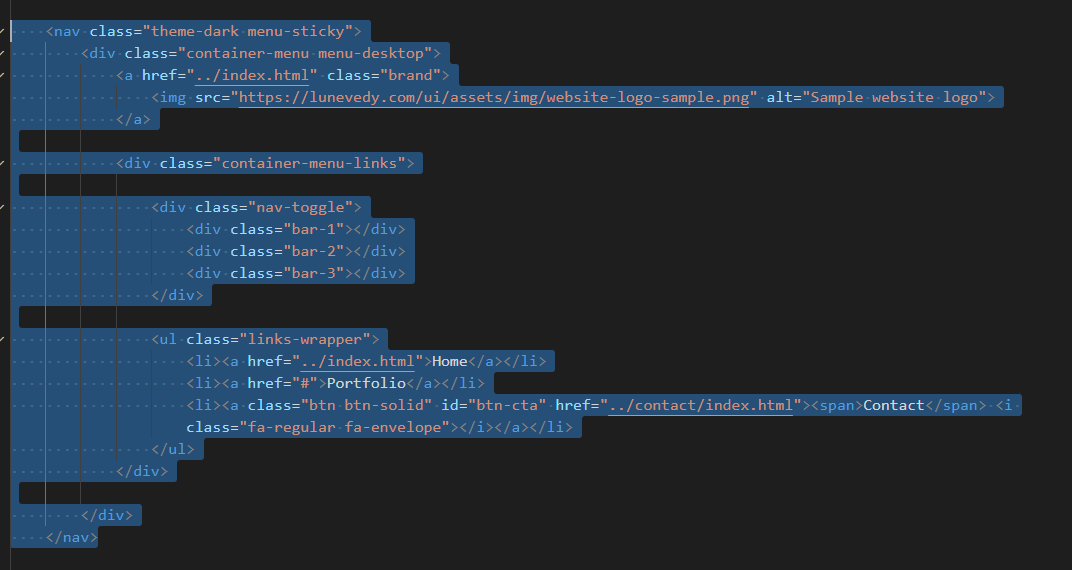
- In VS Code, open your Contact index.html page, select the empty <nav> block, and paste in the HTML you copied from your Portfolio page.
- Edit the <nav> block as shown below.

- Return to your Portfolio index.html page, and select and copy the <header> block.

- In VS Code, display your Contact index.html page, select the empty <header> block, and paste in the HTML you copied from your Portfolio page.
- Using the examples from text.html, edit the pasted header hero block as shown below.

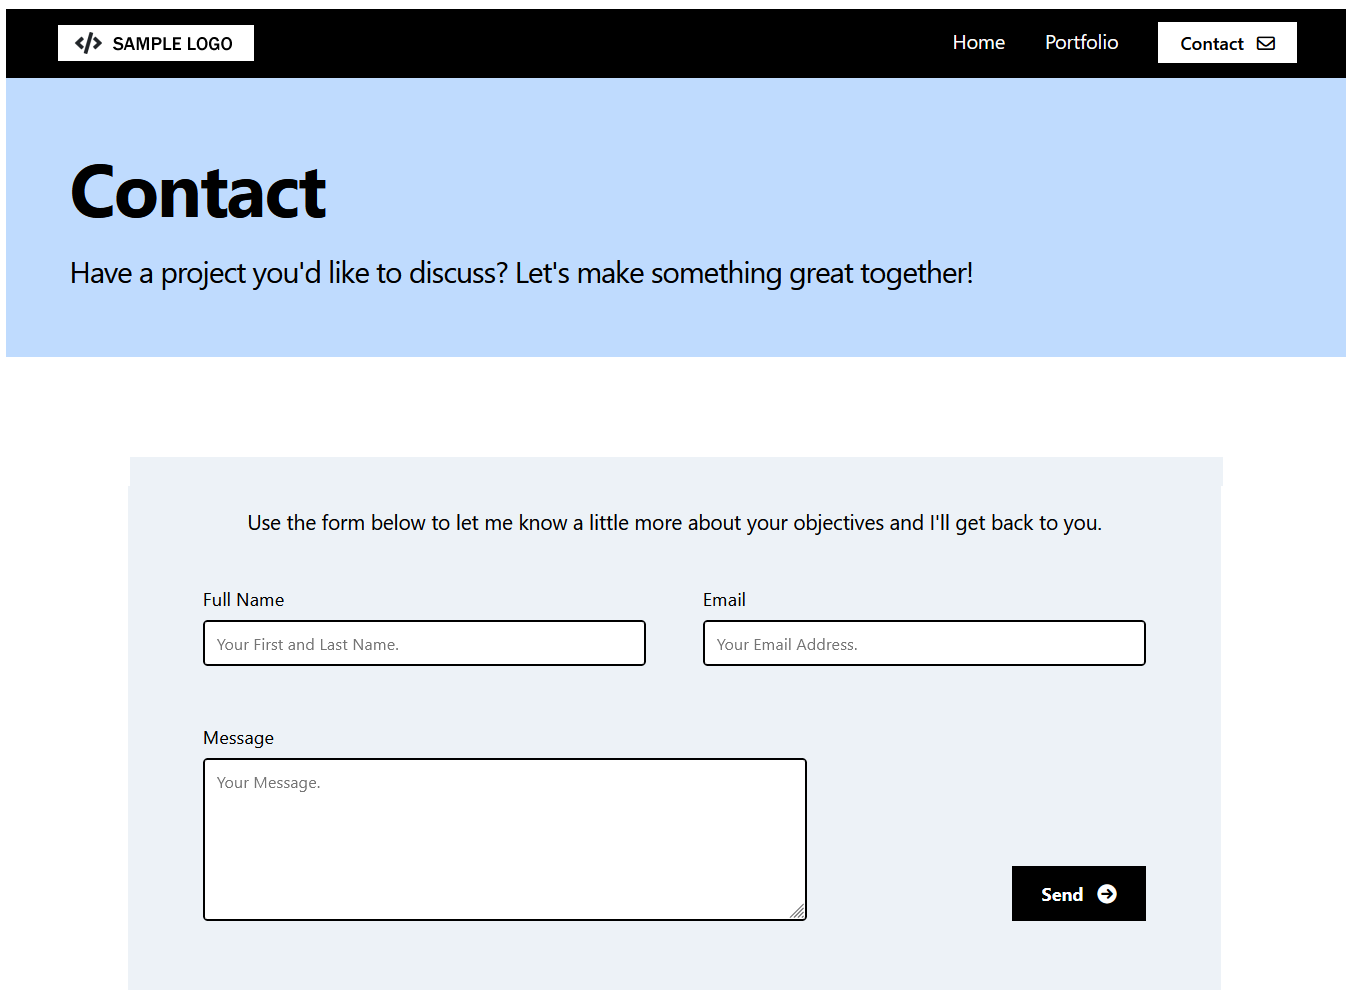
Save your Contact index.html page. It should look something like that shown below.

Creating the contact form
Under the hero block on your Contact page you will add the contact form.
Follow the steps below.
- Go to this web page: Contact Form.
- Near the top-right of the screen, click the HTML button.
- In VS Code, display the contact/index.html web page.
- Select the first empty <section> tag and paste in the HTML.
- Delete the remaining empty <section> tags.
- Edit the pasted contact from as shown below.

Save your Contact index.html page. It should look something like that shown below.
Updating the endpoint of your contact form
Your final step is to update your contact/index.html web page with the endpoint code you received from the Formspree website.
- In VS Code, display the contact/index.html web page.
- Update the form's action value by copying-and-pasting the endpoint value from Formspree. See the example shown below.

- Save your contact/index.html file.
You can check your form is working by entering some details and clicking the Send button.
Personalising your meta tags
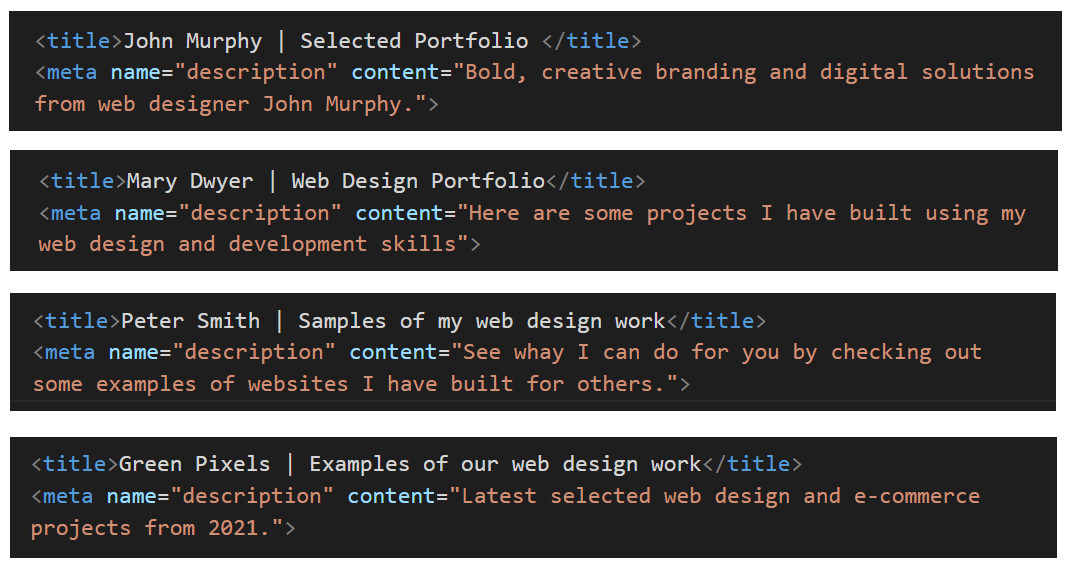
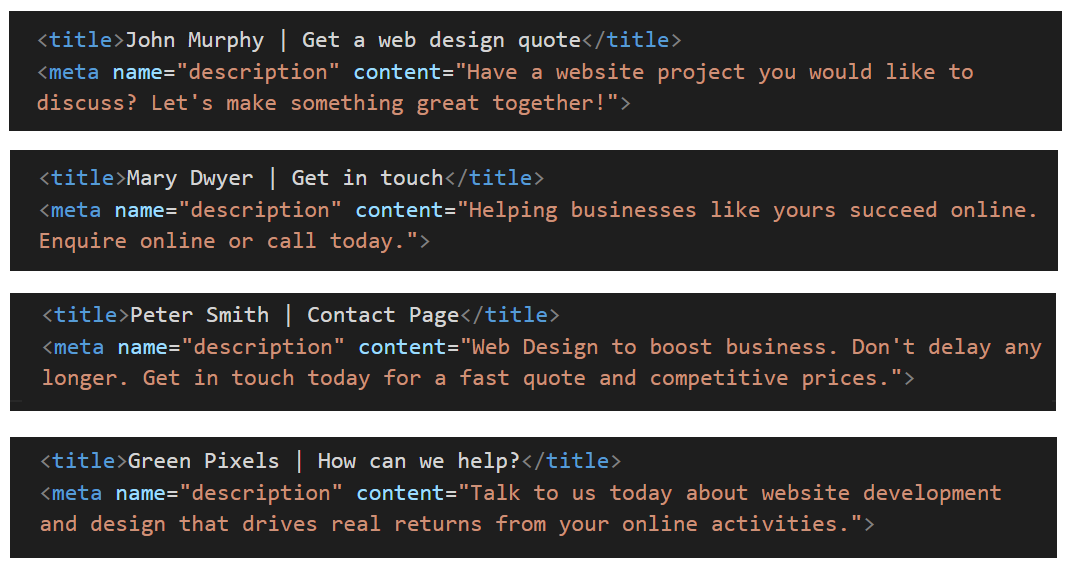
Each of your three sample web pages contains template text for the page's title and description tags. These two tags are examples of so-called meta-tags.
Your first task in personalising the sample web pages is to update the content of the meta tags with text of your own choice. Follow the steps below.
- In VS Code, open your web pages.
index.html
📁 contact/index.html
📁 portfolio/index.html - In the <head> of each web page, in the title and description tags, replace the sample text with your own details.
Here are a few examples.
Home page:
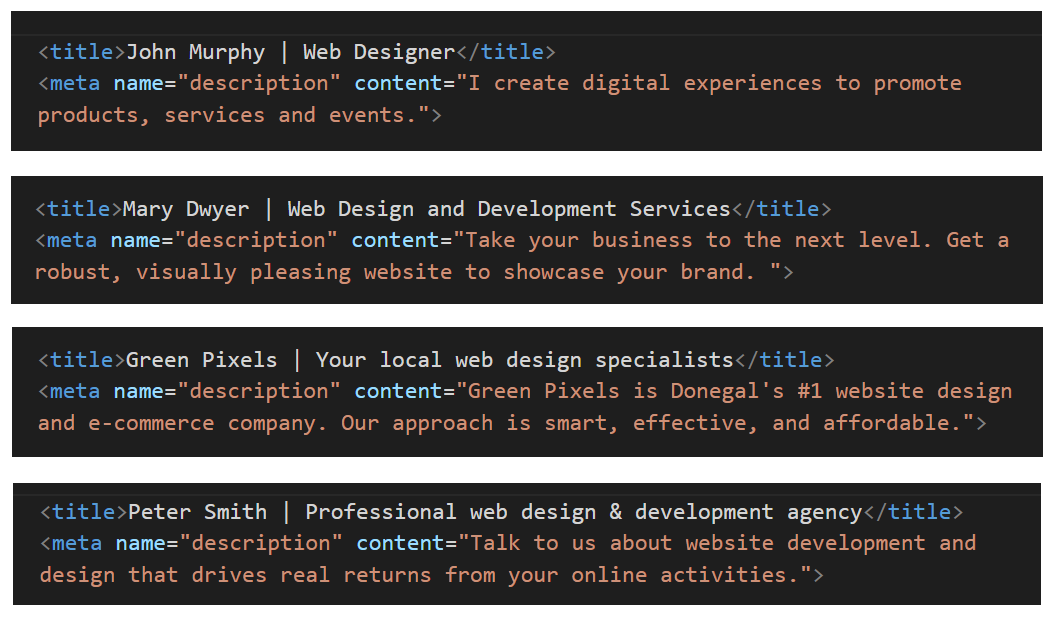
Portfolio page:
Contact page:
See the helpful links below for guidance on using the title and description meta tags on your web pages.
Meta tags: Further resources
What is a title tag?. From moz.com.
What is a meta description? From moz.com
Meta Tags for SEO: Definition, Examples, & Best Practices. From Neil Patel
Content Optimization Strategies: Meta Descriptions. From Brian Dean

DO NOT use the same meta tags on different web pages of the same website.
This 'confuses' Google and other search engines.
"When two, or more, of your pages contain similar title tags, it falls upon the search engine to try to determine which page the user really wants to see in their results. What happens is that some of your pages will get preferred ranking status, while others get ignored completely. " Source.
About your website logo
You will want to replace the sample logo with your own. A few points to note.
- Your Home page, Portfolio page and Contact page will have a logo image positioned at the top-left in the menu.
- Your logo should be a png file that is exactly 200px wide and 40px tall.
- You are not creating a roadside billboard, which typically measure 12 metres wide by 3 metres tall.
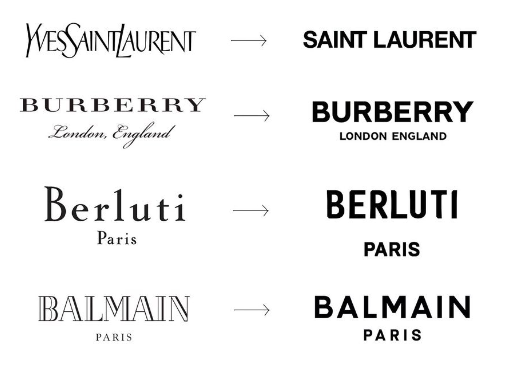
- You are designing a logo that must display legibly a mobile phone screen. Below you can see some examples of leading brands that have simplified their logos for modern digital screens.
When you have finished creating your logo, save in in your 'main' 📁 websites/assets/img folder and link to from your web pages.
Adding a favicon to your web pages
A favicon is a small icon (really a set of icons for different screens) that is displayed within the browser tabs and bookmarks bar of a web browser.
If you have not already done so, create a favion. The instructions are here.
Place your favicon files in your websites/assets/img sub-folder.
When finished, add the favicon code to your three sample index.html web pages, to just below the description meta tag in the head.
See the example below for your 'home' page.
<link rel="apple-touch-icon" sizes="180x180" href="assets/img/apple-touch-icon.png">
<link rel="icon" type="image/png" sizes="32x32" href="assets/img/favicon-32x32.png">
<link rel="icon" type="image/png" sizes="16x16" href="assets/img/favicon-16x16.png">
<link rel="manifest" href="assets/img/site.webmanifest">
For your Portfolio and Contact pages, your links will begin with "../assets".
Pre-upload checklist
Before uploading your files to GitHub, ensure you have performed all the updates in the following checklist.
- You have personalised the title and description meta tags in your three web pages. These two meta tags should be unique for each page.
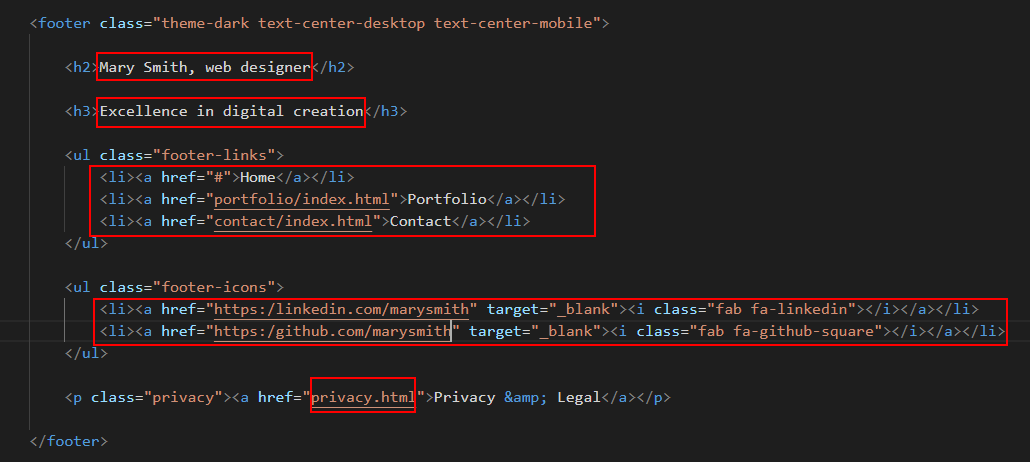
- You have personalised the footer on each of your three web pages.
- You have replaced the sample logo image with your own logo image.
- You have added a favicon to each of your three web pages.
- You have updated the endpoint of your contact form with your unique ID from Formspree.
After you have uploaded your web pages and asset files to GitHub, it is a good idea to check that the hyperlinks between your web pages all work correctly.
You can use the Dead Link Checker website for this purpose.

You can ignore the following two apparent errors. This is a fault with the online link checker.

After performing all these changes, you have two further updates you need to apply to your three web pages:
- Add a link to Google Analytics.
- Add a 'pop-up' cookie privacy message.
Uploading your files to GitHub
After finishing your updates, you are now ready to upload your files to your account on GitHub.
- Open a new tab in your web browser and go to GitHub.com. If you are not already signed in to your GitHub account, sign in now.

- On your GitHub home page, click the ‘repo’ that holds your web pages. Its name will look as follows, where username is your chosen username on GitHub.
username.github.io
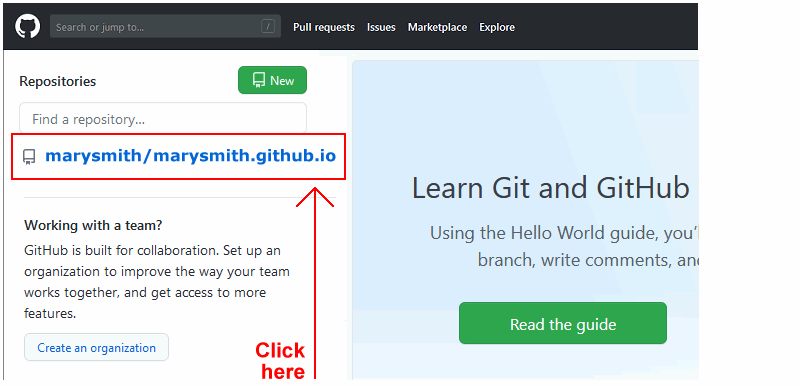
- On the next GitHub screen displayed, near the right of the screen, you can see a button named Add file. Click on it.

- From the dropdown list displayed, choose the option Upload files.

- In File Explorer (Windows 10) or Finder (Apple Mac), drag-and-drop your 'main' index.html file, and your 📁 portfolio, 📁 assets and 📁 contact sub-folders, to upload them to your repository on GitHub.
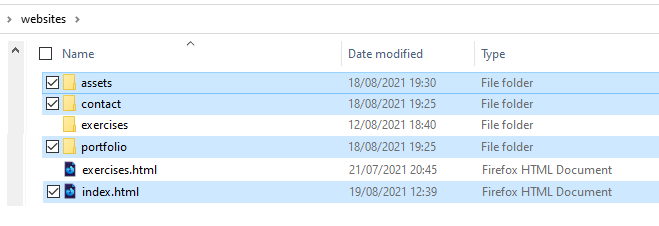
- Scroll down to the bottom of the GitHub screen, and accept or edit the short message (Add files via upload) in the Commit changes box.
- Finally, click the green Commit changes button to upload your files.
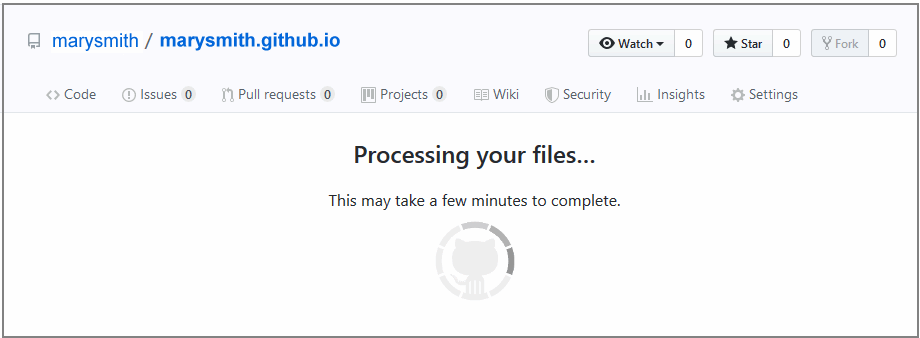
Your portfolio web pages are now published on GitHub at web addresses similar to the following:
https://username.github.io/index.html
https://username.github.io/portfolio/index.html
https://username.github.io/contact/index.html
Or, simply:
https://username.github.io
https://username.github.io/portfolio
https://username.github.io/contact
It may take a few minutes for your uploaded files to appear on GitHub.


