Introduction
Below you can see a screenshot of the single-page website you will create.

All text on the web page is in the font named Outfit from Google Fonts.
Note: This project includes an embedded YouTube video. However, instead of displaying the video, you may see the following message.
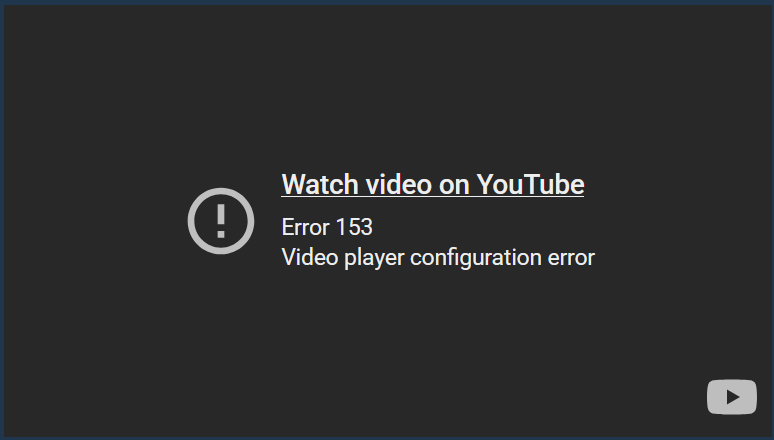
Do not be alarmed. According to ChatGPT:
Error 153 is (currently) a YouTube embed bug / policy change, not a coding mistake. The error is caused by how the browser + hosting environment talk to YouTube, not by HTML mistakes.
You are not doing anything wrong. Just continue with the project as normal.
Project folders and files
Your first task is to create the folders you need for this project.
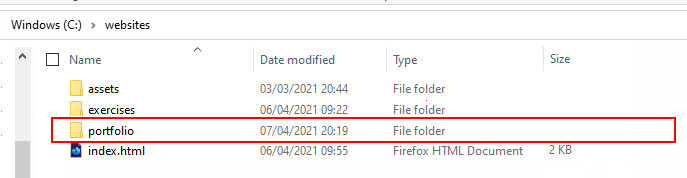
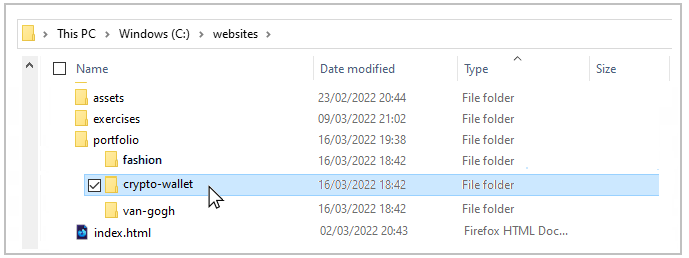
- For your first project, the Smoothies project, you created a new folder named 📁 portfolio inside your ‘main’ 📁 websites folder.
 Inside this 📁 portfolio folder, create a sub-folder to hold the files for your Crypto Wallet project.
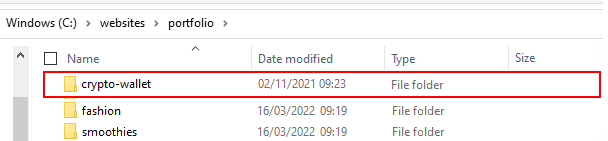 Name the new sub-folder 📁 crypto-wallet (all small letters, no spaces).
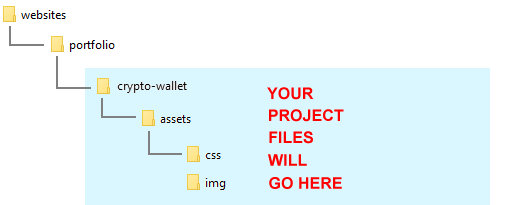
 - Inside this new folder, create an 📁 assets sub-folder.
And inside this, create a 📁 css sub-folder and an 📁 img sub-folder.
✅ All done. You now have created the folder with sub-folders for your Crypto Wallet web page project.
Project resources
Your next task is to obtain the various files needed for your Crypto Wallet project.
Web page
Save the following 'starter' web page to your 📁 crypto-wallet folder:

Ensure you set the Save as type: option to Web Page, HTML Only.
On the Apple Mac, Choose File | Save As, and then Format | Page Source.
Stylesheet
Save the following stylesheet file to your 📁 crypto-wallet/assets/css sub-folder:
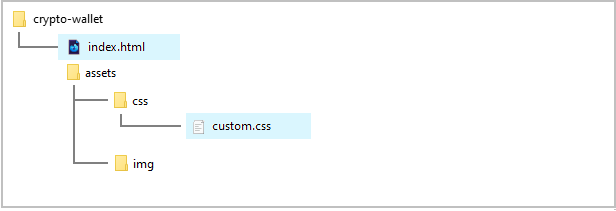
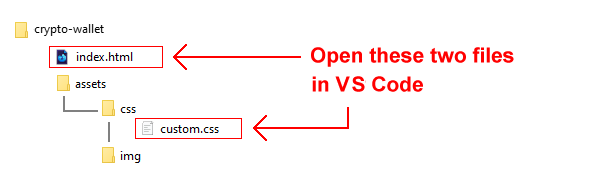
Your folders and two files (one web page and one stylesheet) should now look as shown below.
Project text
All the text you need for this web page is in the file below. Only <p> tags have been used for basic formatting.
You do not need to download this file. You can simply copy-and-paste from it.
Project YouTube video
Your web page will link to the following YouTube video:
Crypto.com Review (2021): Full Beginners Guide& Everything You Need To Know
Project images
Download the following images to your 📁 crypto-wallet/assets/img sub-folder.

Finally, download the Large (1920 x 2879) version of this image from pexels.com for use as the hero image for your web page.
person-using-macbook-pro-on-black-table-6772076

✅ That's it. You now have all the resources you need to begin working on your Crypto Wallet project.
Cropping the hero image
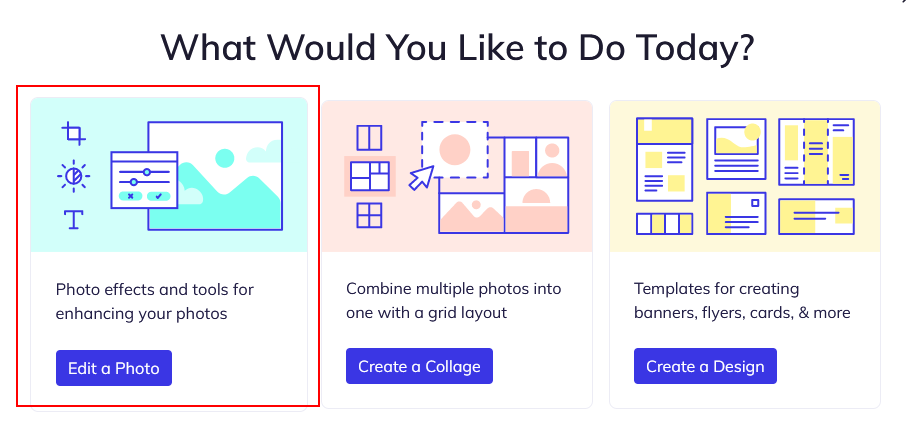
The hero image you downloaded is taller in size than you need. Let's reduce its height to about 800px. You can use some graphic editing software or the Befunky online photo editor as shown below.
- Go to the Befunky website and click the Get Started button.
- Choose the Edit a Photo option.
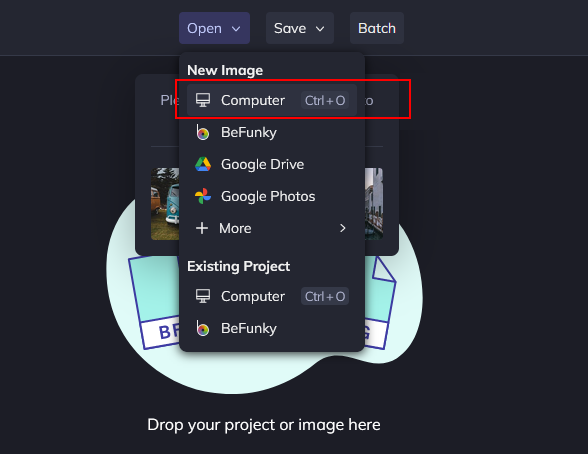
- Choose Open | New Image | Computer and upload your image file.
- At the left of the screen, click the Crop option.
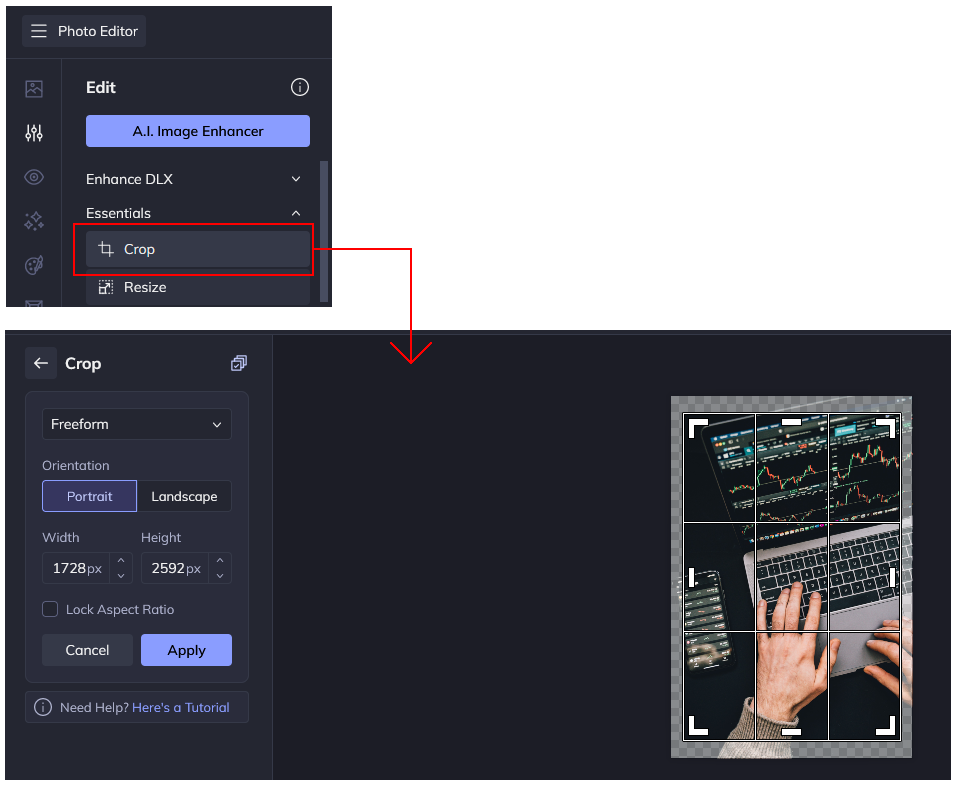
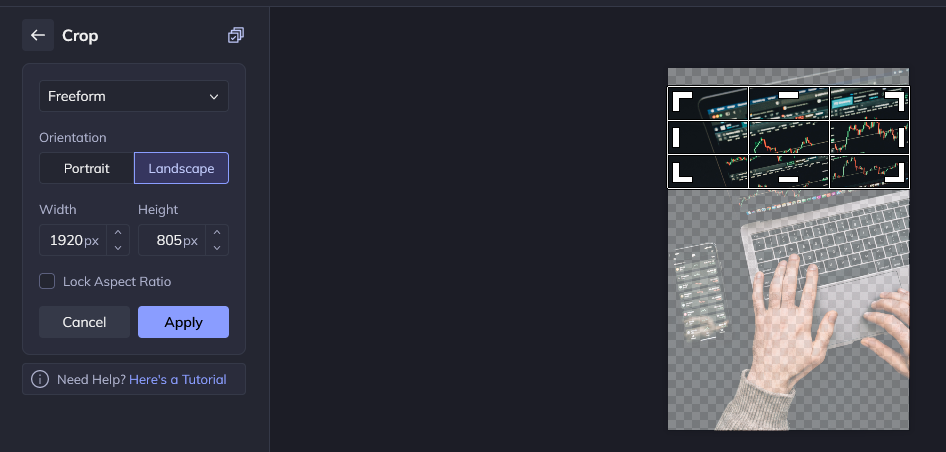
- Drag the handles on the image until its height is about 800px.
- When finished, choose Save | Save as Image | Computer to download the cropped image file.
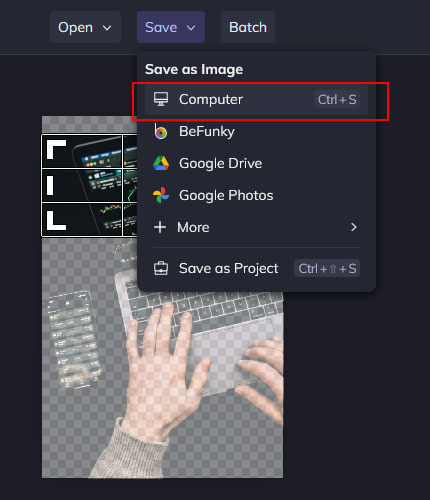
- Copy the file to your 📁 crypto-wallet/assets/img sub-folder.
- Rename the file as crypto-wallet-hero-image.jpg.
Launching the Lunevedy app and VS Code
Click the link below to open the Lunevedy app in a new tab of your web browser.
Next, start VS Code and open the two files below.
- crypto-wallet/index.html
- crypto-wallet/assets/css/custom.css

You are now ready to build the various content blocks of your web page.
Creating the hero block layout
You will begin by creating the hero block that is positioned at the top of the web page.
Working with the hero block in the Lunevedy app
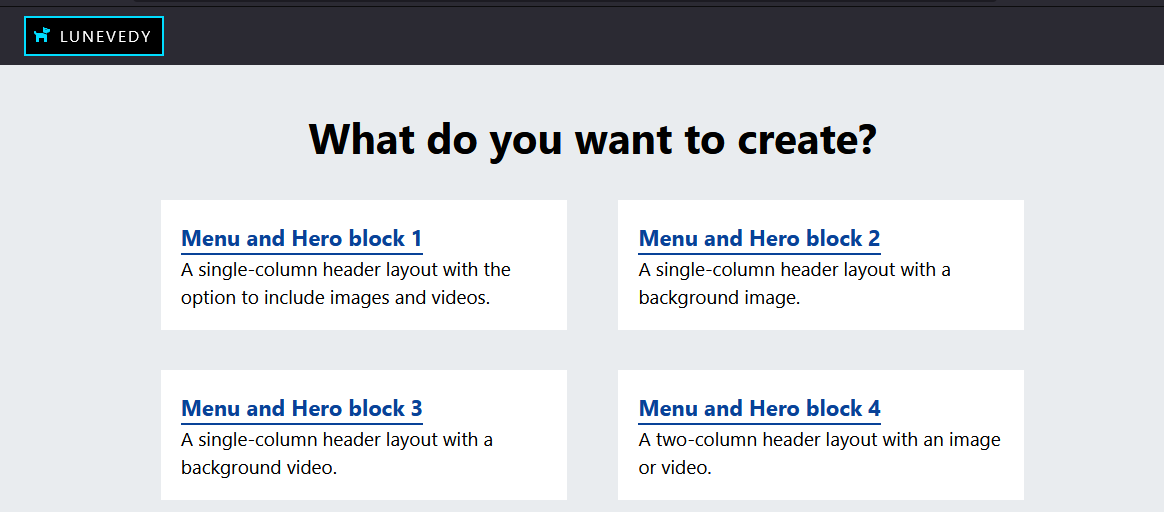
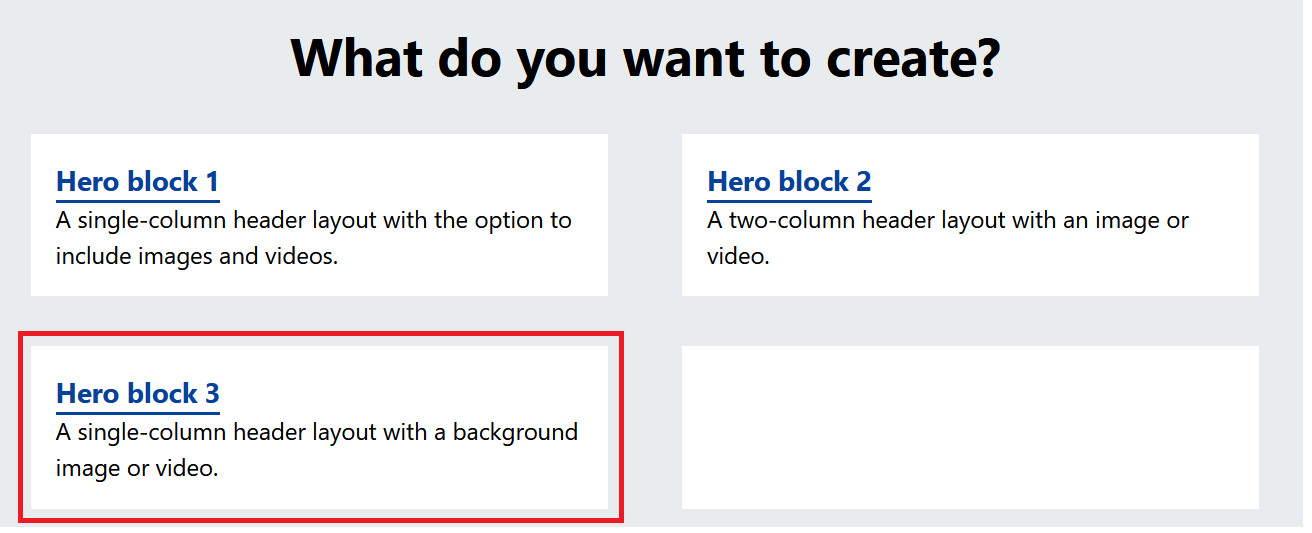
On the home page of the Lunevedy app, choose the Hero Block 3 option.
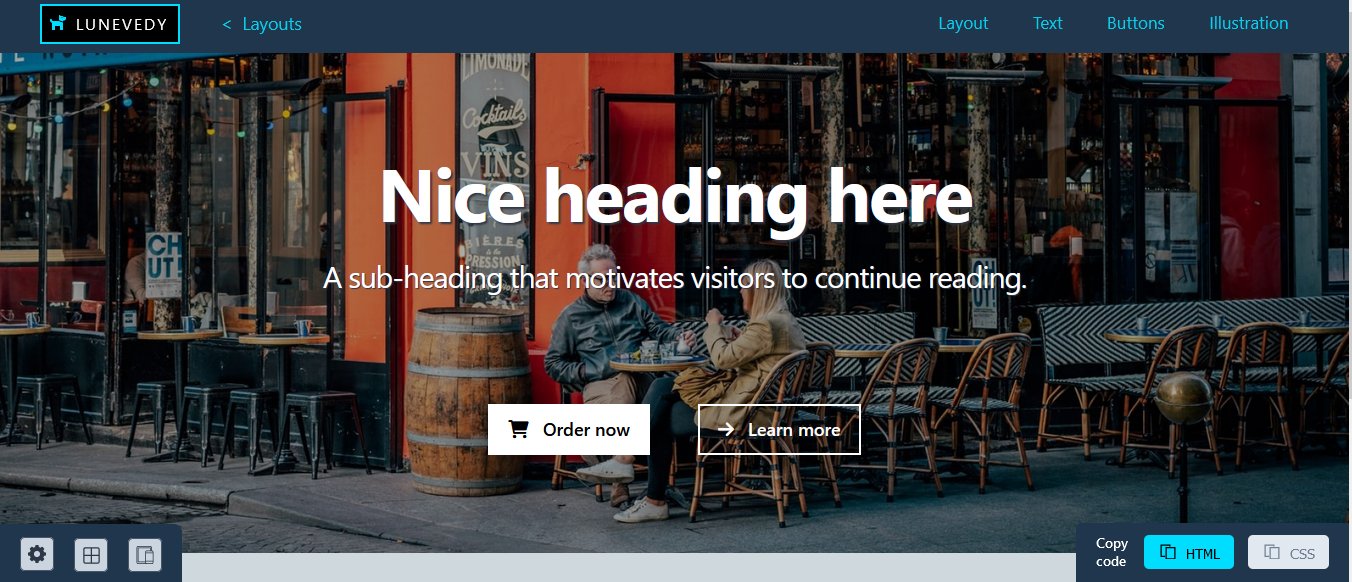
You should see a screen similar to the following.
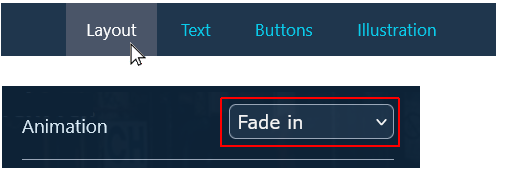
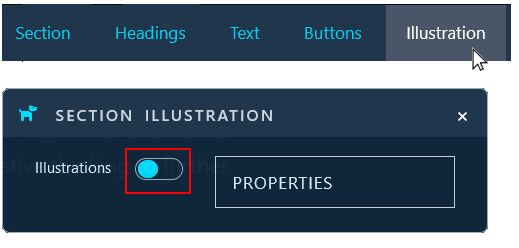
Choose the following menus and options:
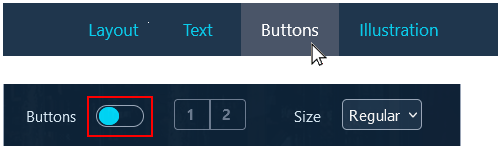
- On the Layout menu, choose an Animation option of Fade in.
- On the Buttons menu, set Buttons to Off
At the bottom-right of the screen, you can see that the CSS button is not enabled. That is because you have not updated any colours.
Click the HTML button.
Working with the hero block in VS Code
Switch to VS Code and view the index.html web page.
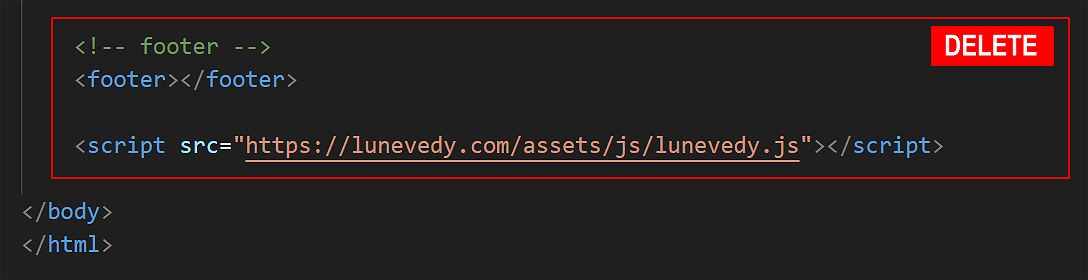
- You can delete the <nav> block at the top of the web page.

- Update the comment text as shown below.

- Also delete the <footer> block and JavaScript <script> tag at the bottom. These are not used in this project.
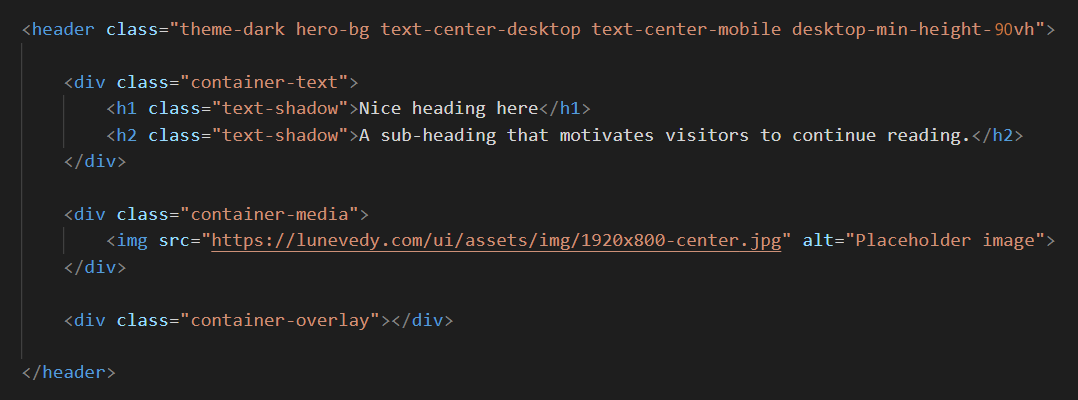
- Select the opening and closing <header> tags as shown below.

- Paste in the content you copied from the Lunevedy app.
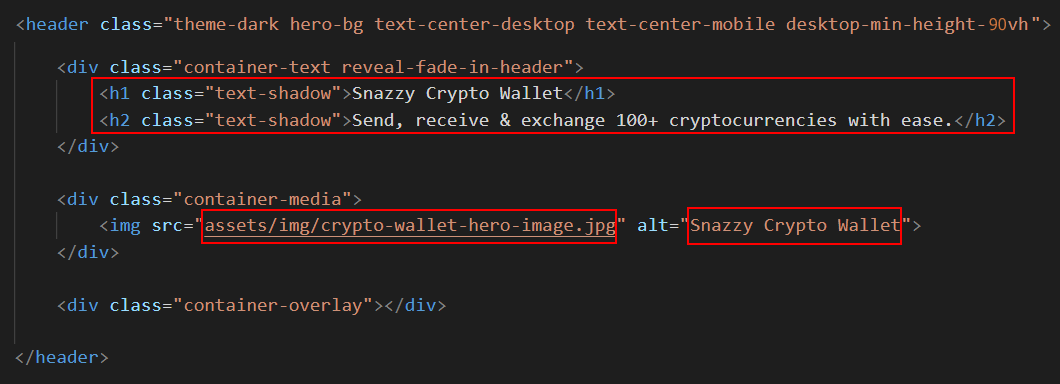
Your VS Code screen should now look as shown below.
Update the hero block with the words from the text.html file and the downloaded hero image.
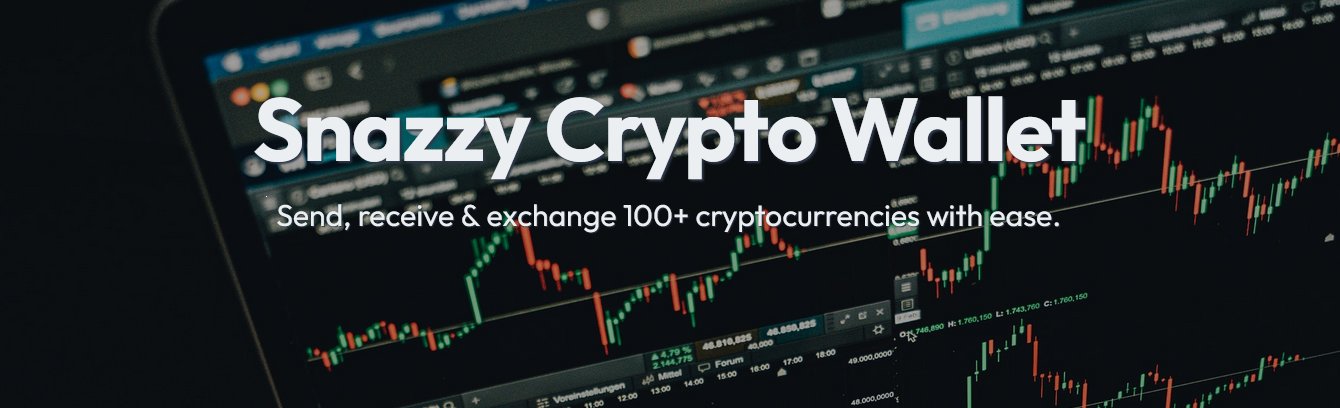
Save your index.html and display it in your web browser. It should look as shown below.

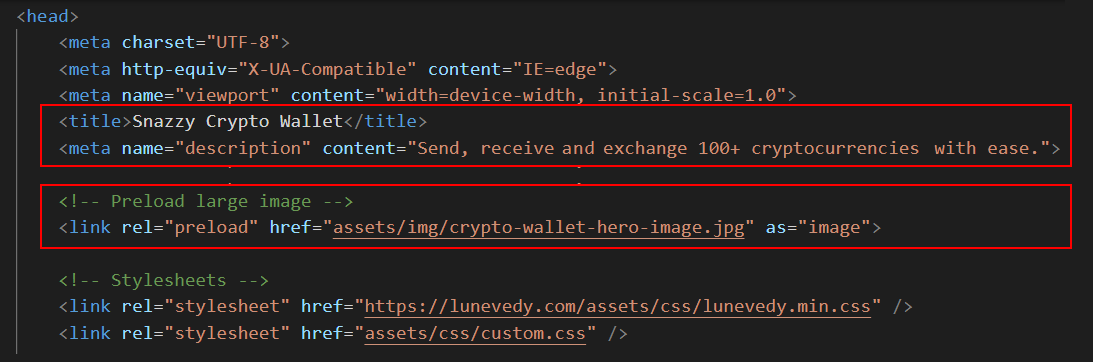
To speed up the loading of the large crypto-wallet-hero-image.jpg file, copy-and-paste the following code just after the "Preload large image" comment line in the <head>.
<link rel="preload" href="assets/img/crypto-wallet-hero-image.jpg" as="image">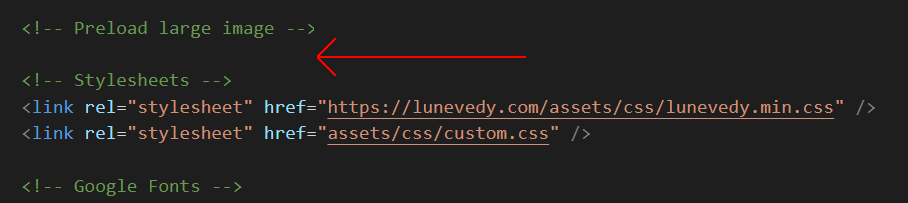
Also in the <head> of your web page, update the title and description as follows.
- Mary Smith | Portfolio Project | Snazzy Crypto Wallet
- Send, receive and exchange 100+ cryptocurrencies with ease.
Replace ‘Mary Smith’ with your own name.
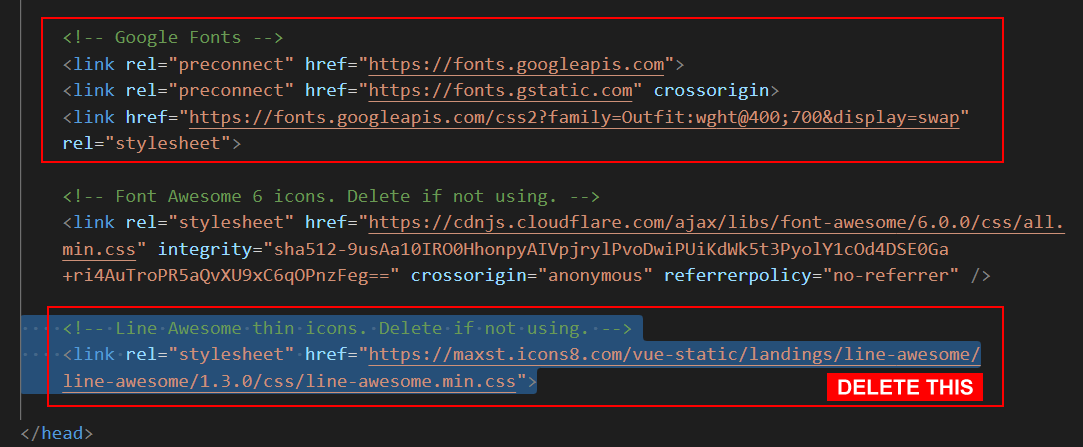
For this project you will use the Outfit font from Google Fonts. Add the following code to just before the closing </head> tag.
<link rel="preconnect" href="https://fonts.googleapis.com">
<link rel="preconnect" href="https://fonts.gstatic.com" crossorigin>
<link href="https://fonts.googleapis.com/css2?family=Outfit:wght@400;700&display=swap" rel="stylesheet">You will not be using the Line Awesome icons for this Crypto Wallet project, so you can delete them.
In VS Code, switch to the custom.css style sheet and add the following two style rules.
/* Add your custom CSS rules */
body { font-family: 'Outfit', sans-serif; }
header h1 { font-size: var(--font-size-xxxl) }
✅ Excellent. You have now completed the hero block of your Crypto Wallet web page. It should look as shown below,
Creating the deckhead layout
Now it's time to create a deckhead/standfirst section that will be positioned under the hero block.
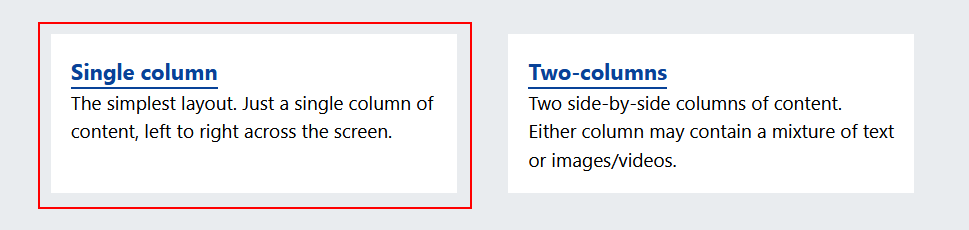
On the Lunevedy app, click the Single column option.
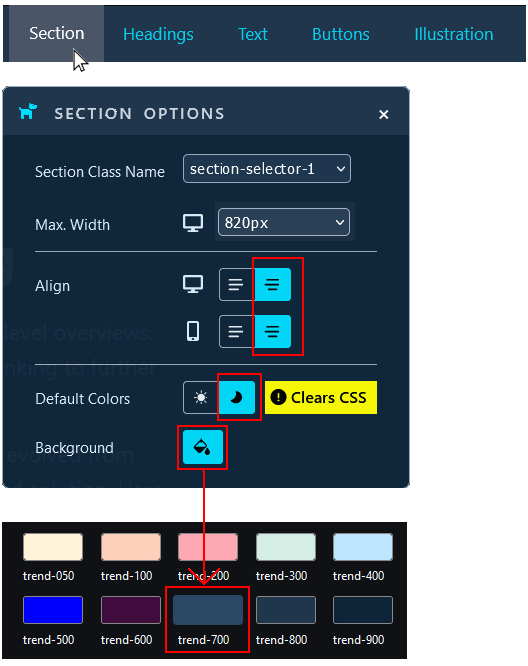
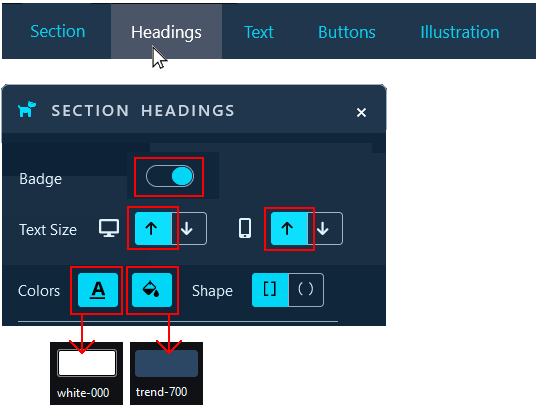
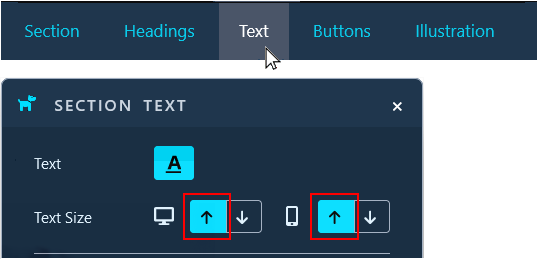
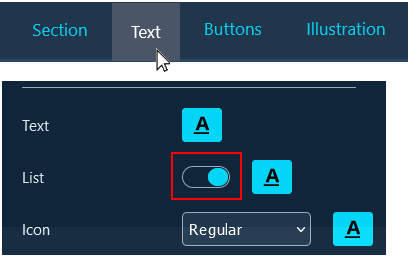
On the next screen displayed, choose the following menus and options:
When finished, click the HTML button at the bottom-right of the screen.
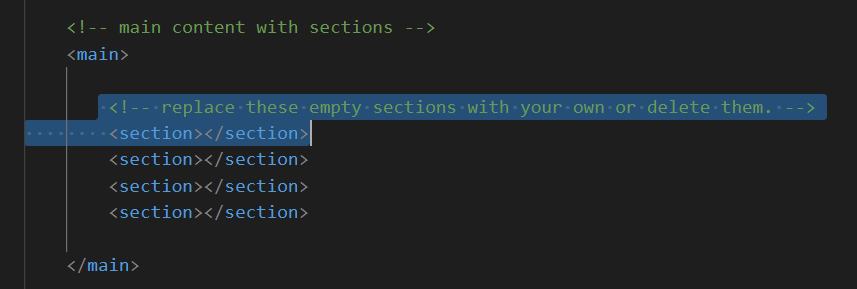
In VS Code, display the index.html web page. Inside the opening <main> and closing </main> tags, select the first section block.
Now paste in your copied content.
Delete the third paragraph of sample text. Your VS Code screen should now look as shown below.
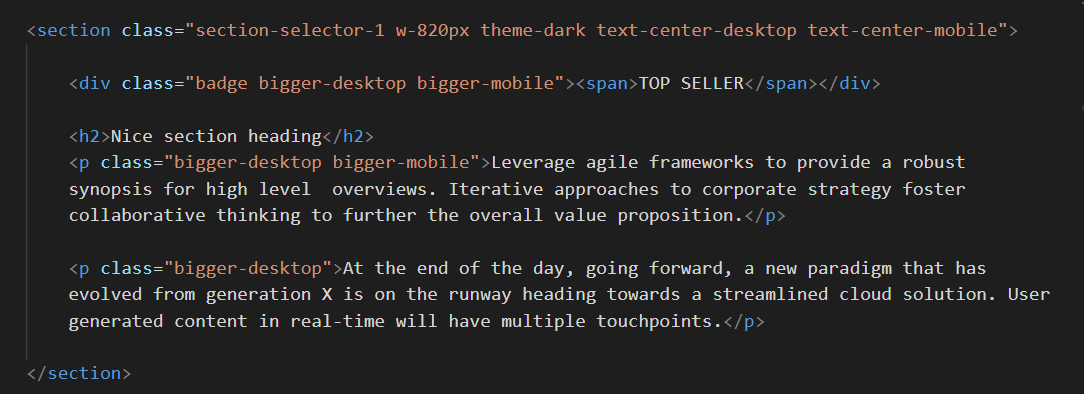
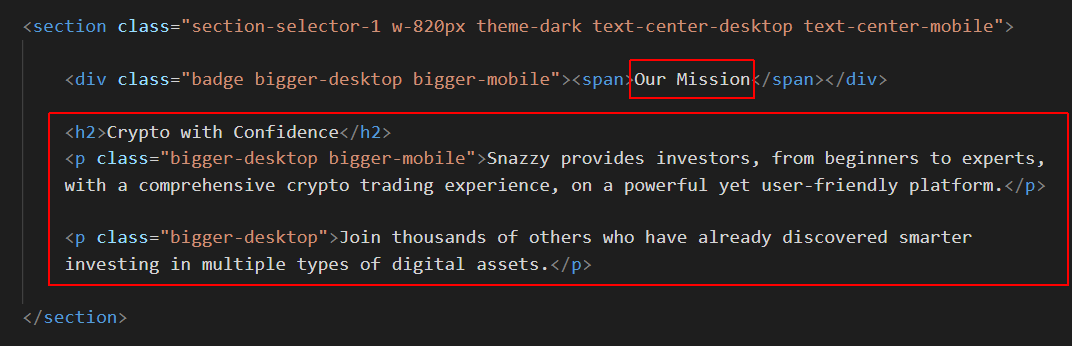
Update the deckhead with the words from the text.html file.
Switch to the Lunevedy app and click the CSS button near the bottom right.
In VS Code, display the custom.css stylesheet. Paste in the CSS. Your file should now look as shown below.
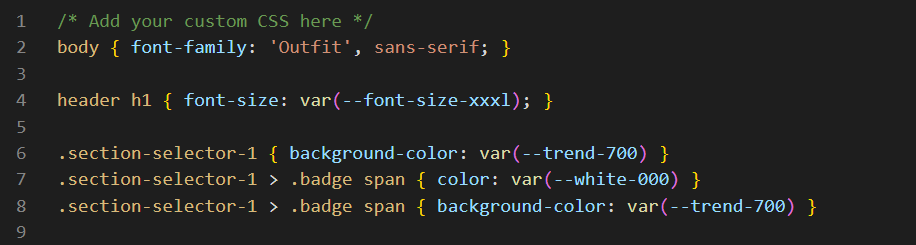
Add the following new style rule.
.section-selector-1 > .badge span { text-transform: uppercase }You could rewrite the last three style rules as follows:

Save your custom.css file and display the web page in your browser. It should look as shown below.

✅ You have now completed the deckhead/standfirst block of your Crypto Wallet web page.
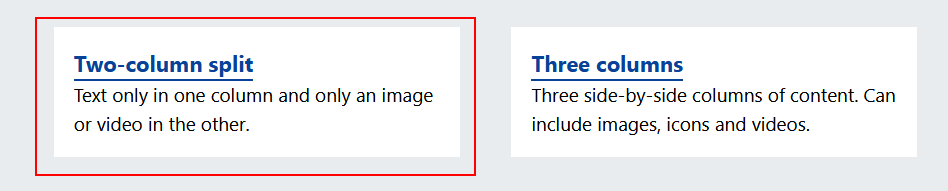
Creating the two-column sections
Under the deckhead, your web page contains three sections with two columns in each section.
So you can use the Lunevedy layout below.
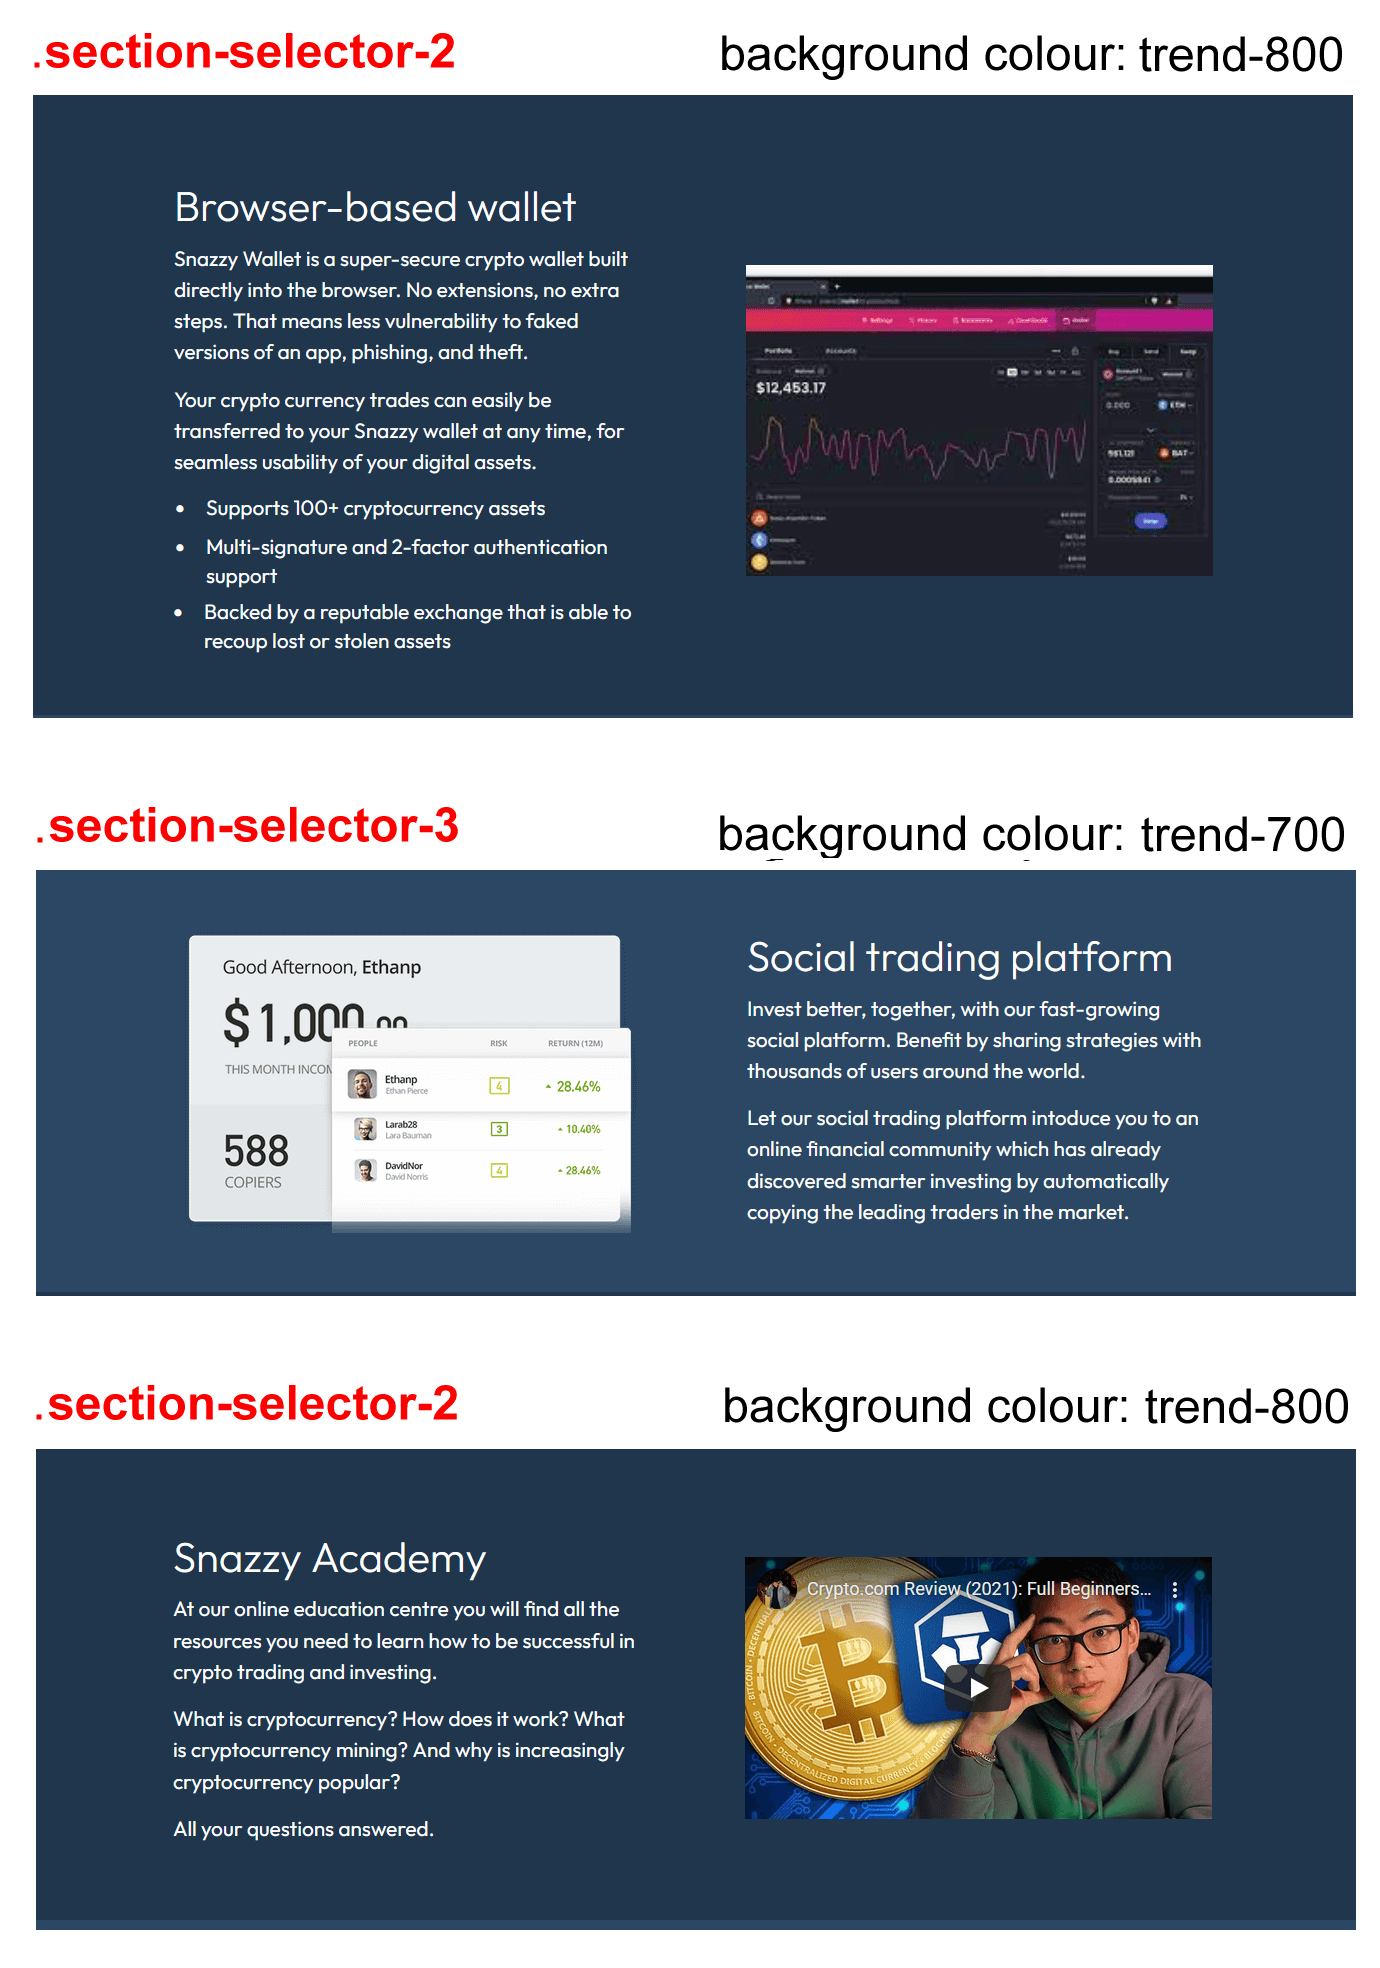
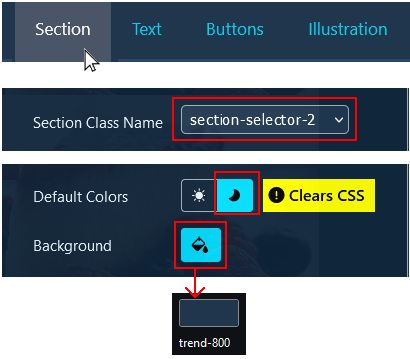
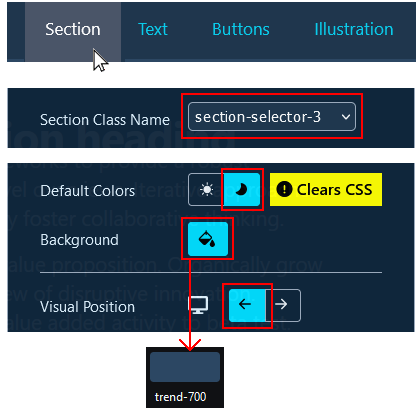
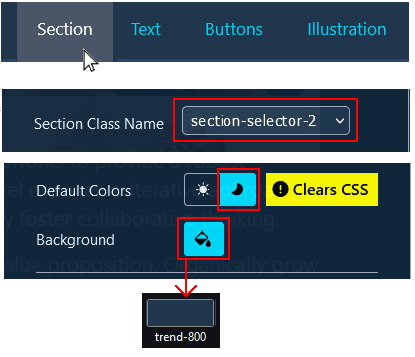
The first and third two-column sections have the same background colour (trend-800). So you can use the same section-selector-2 for both.
The second two-column section has a background of trend-700, the same as the deckhead section. So you will need to use a new section-selector-3 for this.
Working with the first two-column section
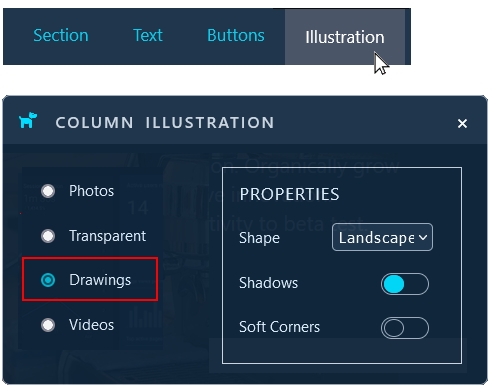
After you have chosen the Two-column spilt layout on the Lunevedy home page, select the following menus and options.
When finished, click the HTML button at the bottom-right of the screen.
In VS Code, display the index.html web page, and select the next empty <section> block.
Paste in the HTML from the Lunevedy app.
Update the content with the words from the text.html file and the wallet.jpg image file you downloaded earlier. See below.

Return to the Lunevedy app and click the CSS button near the bottom right.
In VS Code, display the custom.css stylesheet and paste the CSS at the end of the file. Save your work and view your web page in your browser.
Working with the second two-column section
After you have chosen the Two-column spilt layout on the Lunevedy home page, select the following menus and options.
When finished, click the HTML button at the bottom-right of the screen.
In VS Code, display the index.html web page, select the next empty <section> block, and paste in the HTML.
Update the content with the words from the text.html file and the copy_trader.png image file you downloaded earlier. See below.

Return to the Lunevedy app and click the CSS button near the bottom right.
In VS Code, display the custom.css stylesheet and paste the CSS at the end of the file. Save your work and view your web page in your browser.
Working with the third two-column section
After you have chosen the Two-column spilt layout on the Lunevedy home page, select the following menus and options.
When finished, click the HTML button at the bottom-right of the screen.
In VS Code, display the index.html web page, select the next empty <section> block, and paste in the HTML.
Update the content with the words from the text.html file.
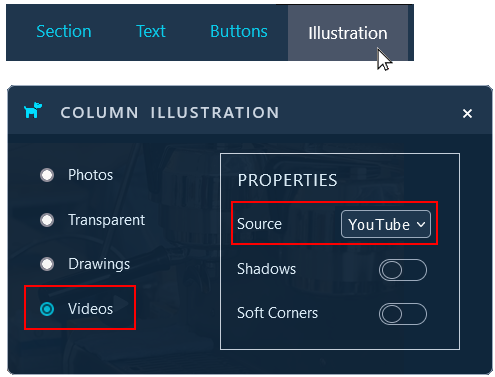
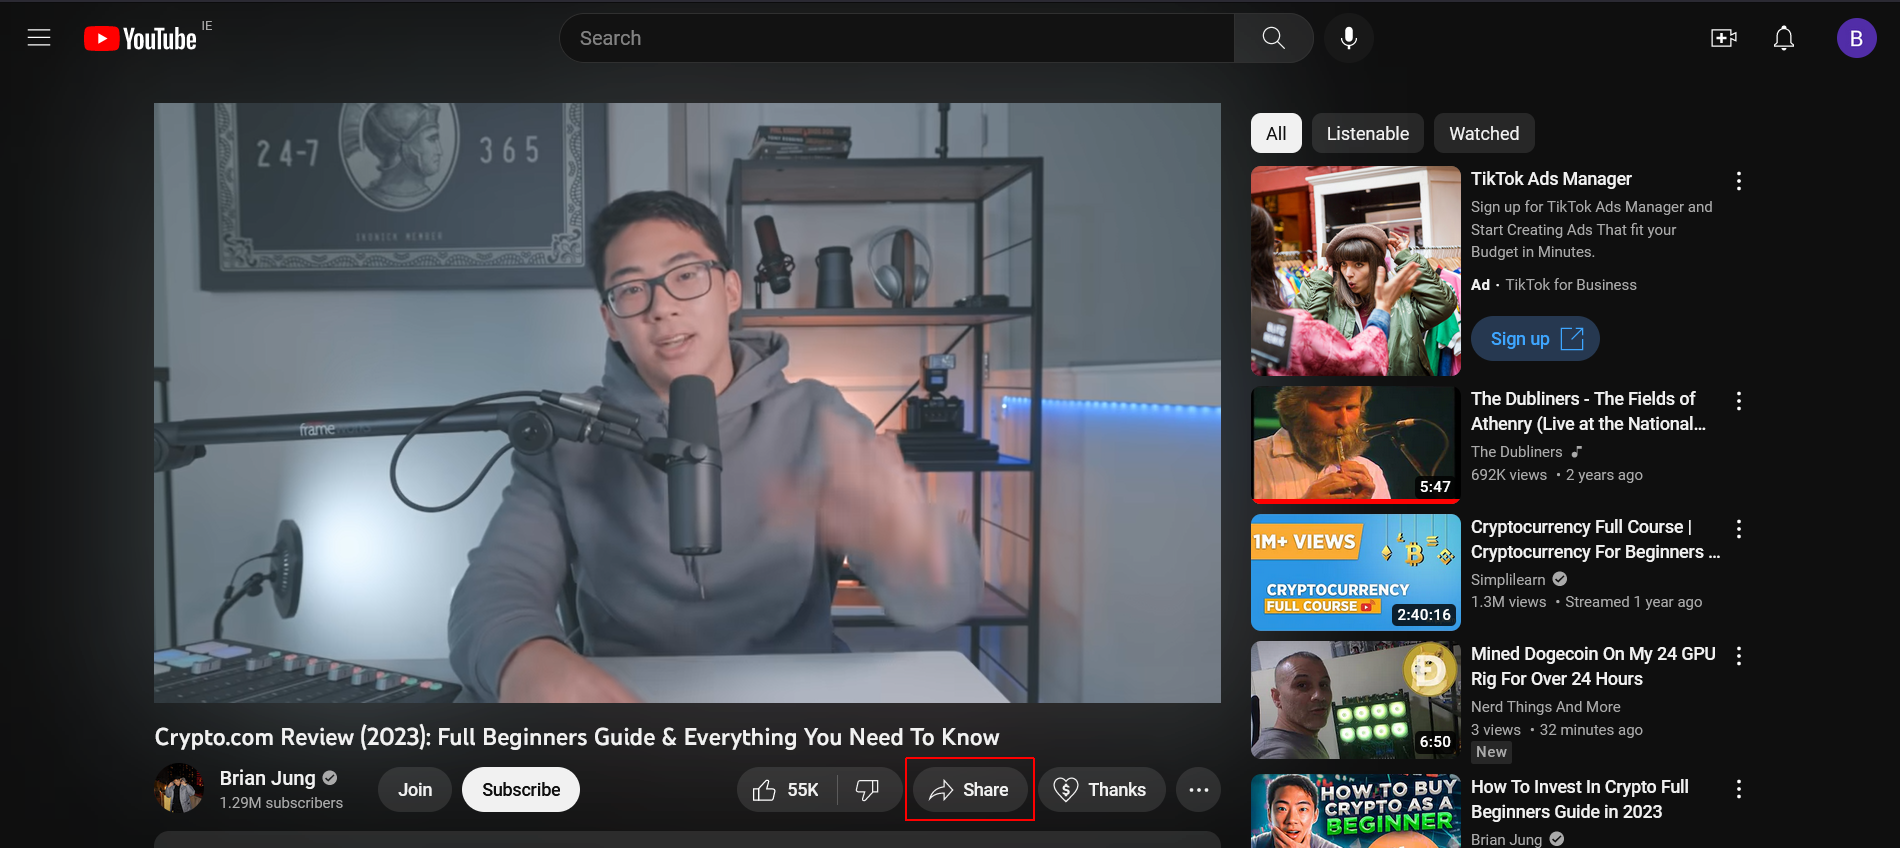
Next, open the following video from YouTube:
Crypto.com Review (2021): Full Beginners Guide & Everything You Need To Know.
Just under the video, click the Share option.
From the dialog box now displayed, choose the Embed option.
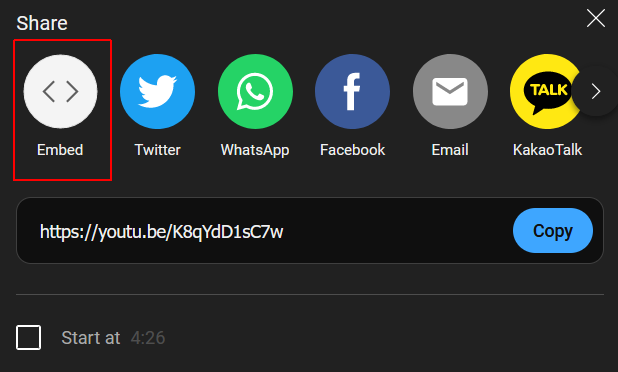
This will display a new dialog box. At the bottom-right, click the Copy button.
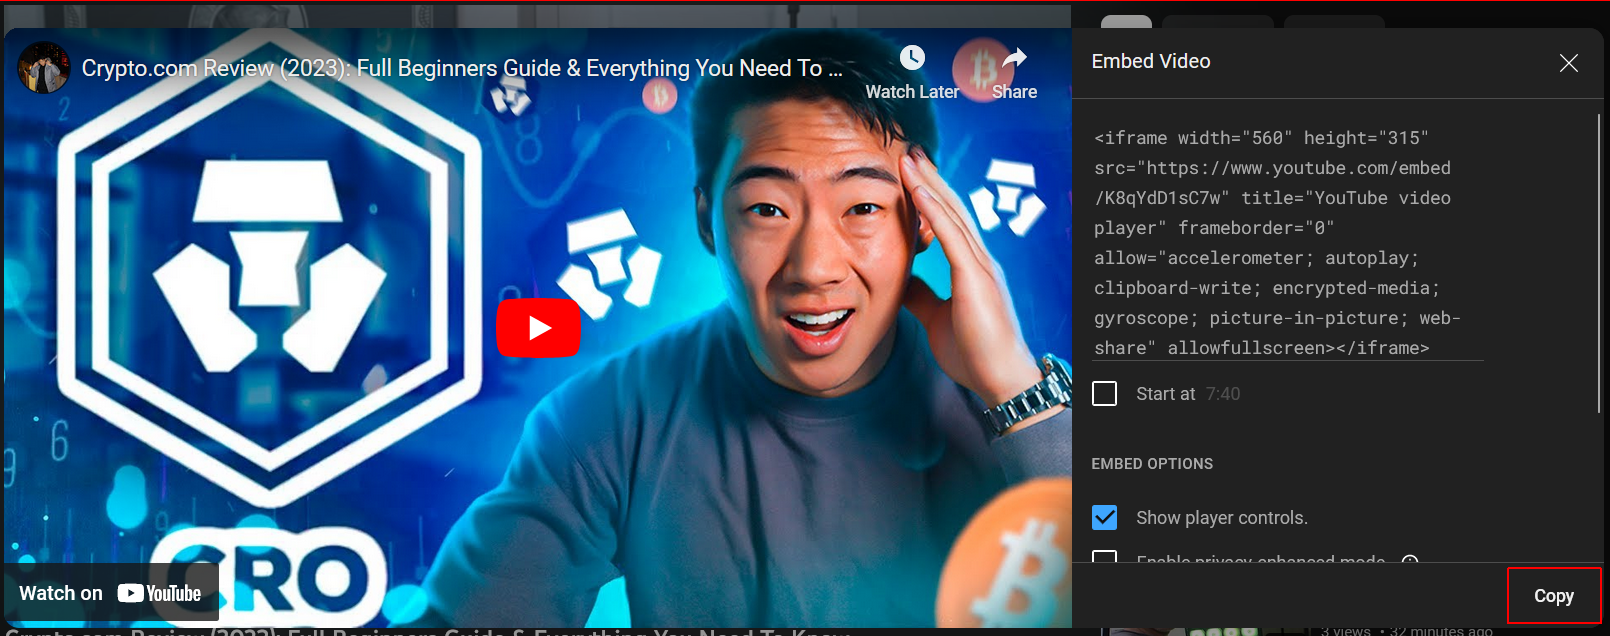
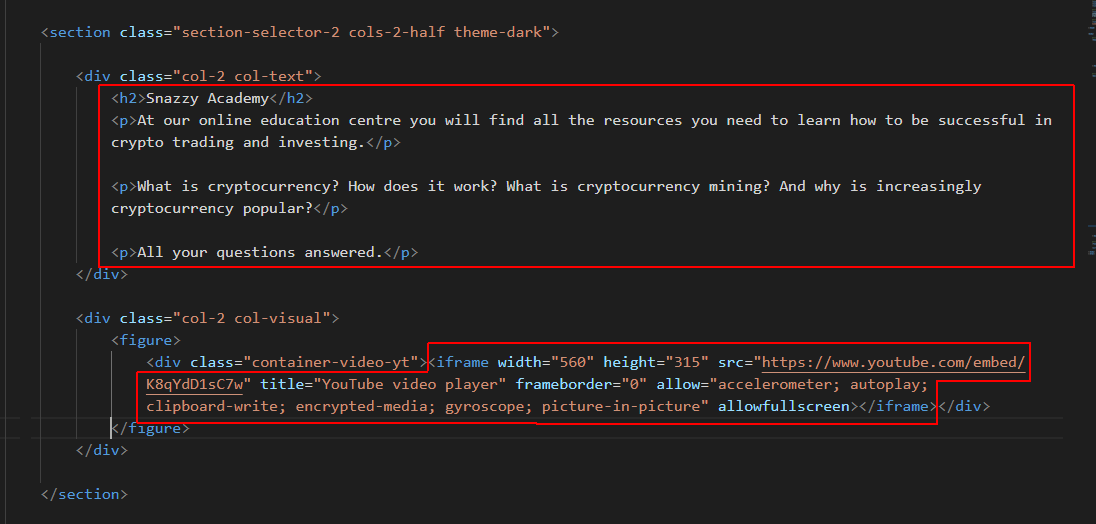
In VS Code, select the opening and closing iframe tags, and then paste in the code from YouTube.
Switch to the Lunevedy app and click the CSS button near the bottom right.
In VS Code, display the custom.css stylesheet and paste the CSS at the end of the file. See below.
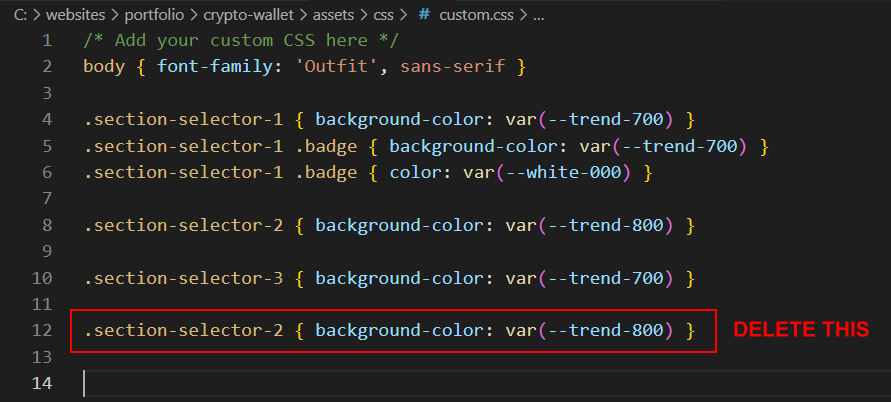
As you can see, the custom.css stylesheet contains the same style rule for .section-selector-2 twice. So you can delete the last line you have pasted.
✅ You have now completed three two-column sections of your Crypto Wallet web page.
Creating the three icons section
Lastly, you will create a three-column section with three icons from Font Awesome and an trend-700 background colour.
The three Font Awesome icons have a blue-300 colour. Follow the steps below.
Choose the Three columns layout on the Lunevedy home page.

Next, select the following menus and options.
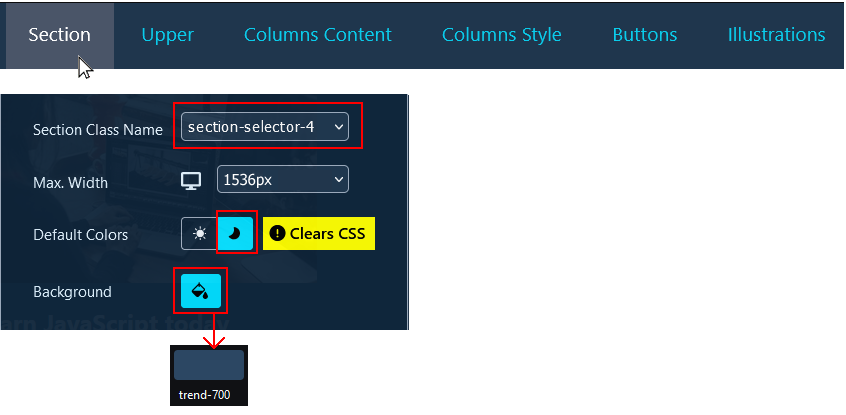

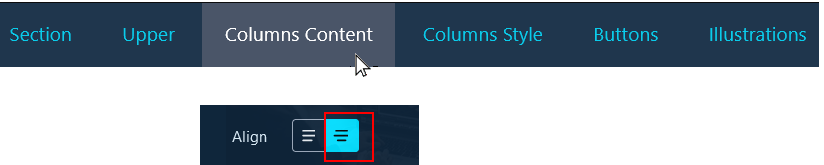

When finished, click the HTML button at the bottom right of the screen.
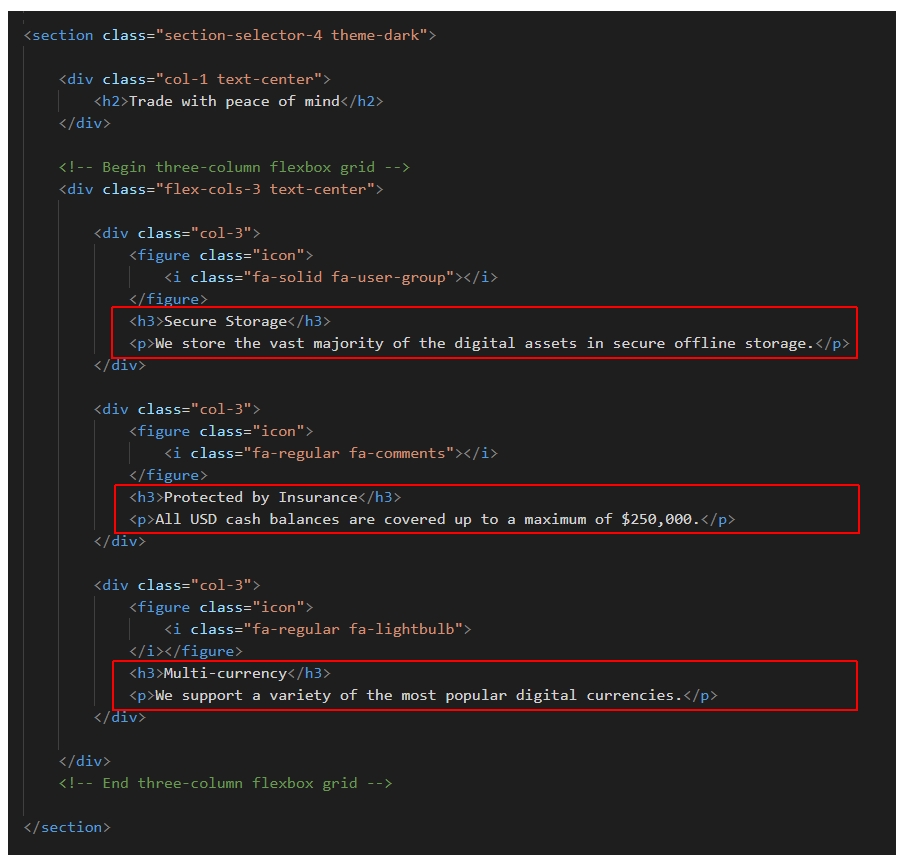
In VS Code, display the index.html web page and paste in the HTML before the closing </main> tag.
Update the content with the words from the text.html file. See below.
Switch to the Lunevedy app and click the CSS button near the bottom right.
In VS Code, display the custom.css stylesheet and paste the CSS at the end of the file. See below.

Updating the Font Awesome icons
Follow the steps below to update the three icons.
- Browse to Font Awesome website.
- In the menu across the top of the screen, click the Icons option.

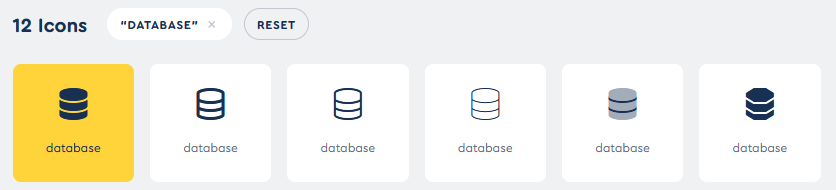
- In the Search box, enter 'database' (without quotes).
- Click on the first item found to select it.
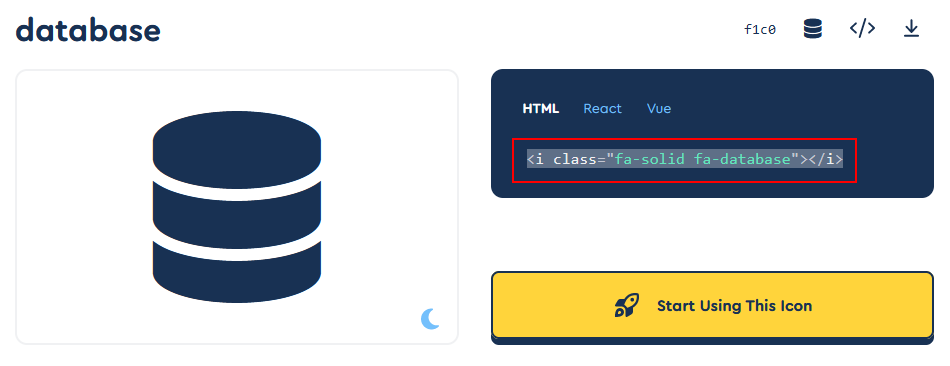
- On the next screen displayed, select the HTML code for the icon and copy it.
- Return to VS code and your index.html file.
- Select the first of the three sample icons, and then paste the new icon you copied from the Font Awesome website.
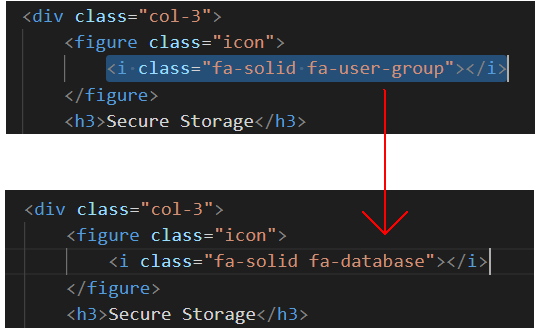
- Repeat the above steps for two more icons, user lock and Bitcoin
When finished, save your index.html file and view it in your web browser.

✅ You have now completed this final content block of your Crypto Wallet project web page.
Adding the final touches
The <h2> sub-headings in all four <section> blocks are by default displayed in a font-weight of bold (700). They may look nicer in regular font weight (400). Add the CSS rules below to the end of your custom.css file.
.section-selector-1 h2,
.section-selector-2 h2,
.section-selector-3 h2,
.section-selector-4 h2 { font-weight: 400 }
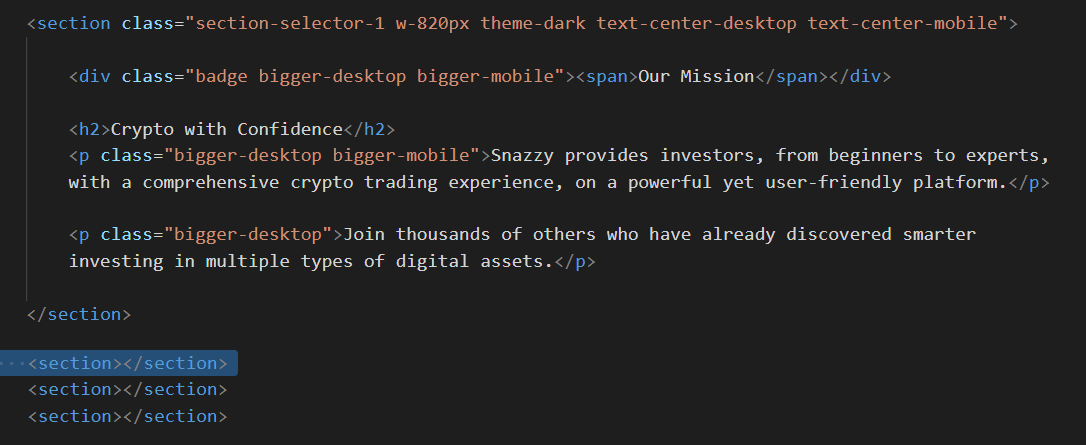
Finally, remove any empty <section> tags from the index.html file.
Uploading your project folder to GitHub
After finishing your project, you are now ready to upload the entire folder to your account on GitHub.
- Open a new tab in your web browser and go to GitHub.com. If you are not already signed in to your GitHub account, sign in now.

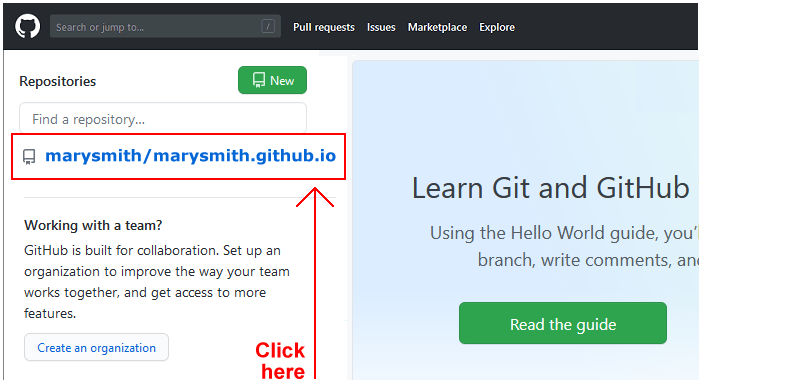
- On your GitHub home page, click the ‘repo’ that holds your web pages. Its name will look as follows, where username is your chosen username on GitHub.
username.github.io
- On the next GitHub screen displayed, click the portfolio folder.
- With your portfolio folder displayed on GitHub, click Add file button.
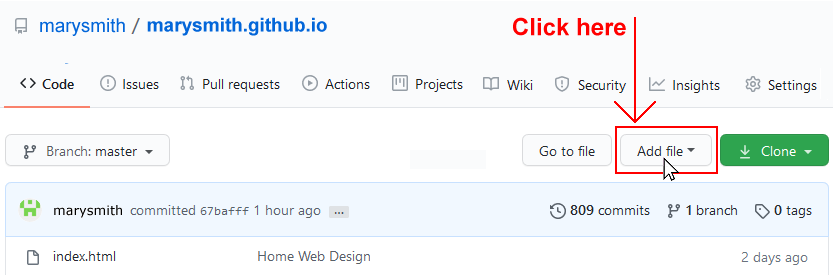
- From the dropdown list displayed, choose the option Upload files.
- In File Explorer (Windows) or Finder (Apple Mac), drag-and-drop your 📁 crypto-wallet folder to upload it to the portfolio folder within your repository on GitHub.
- Scroll down to the bottom of the GitHub screen, and accept or edit the short message (Add files via upload) in the Commit changes box.
- Finally, click the green Commit changes button to upload your files.
Your portfolio project web page is now published on GitHub at a web address similar to the following:
https://username.github.io/portfolio/crypto-wallet/index.html
or simply:
https://username.github.io/portfolio/crypto-wallet
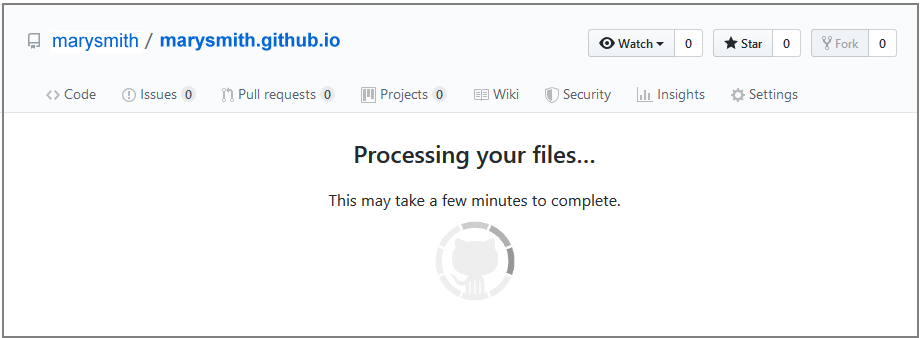
It may take a few minutes for your uploaded files to appear on GitHub.