
At the end of this Lesson you will be able to:
You can view a finished version of this exercise by clicking the image below.
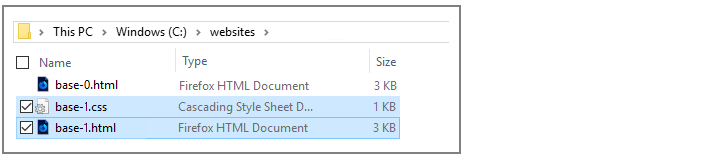
In this Lesson you will work with these two files:
First, let’s edit the HTML file from your previous Lesson:
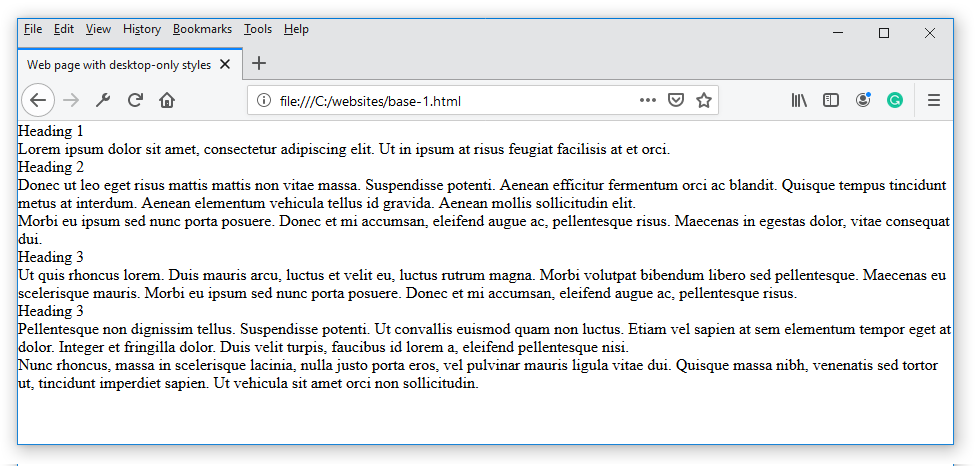
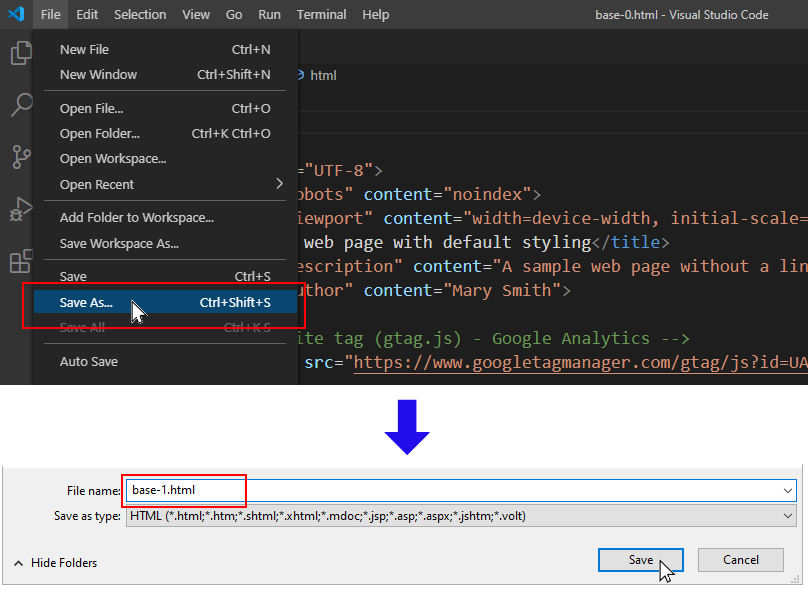 You can now make changes to this new base-1.html file without affecting the base-0.html file from your previous exercise.
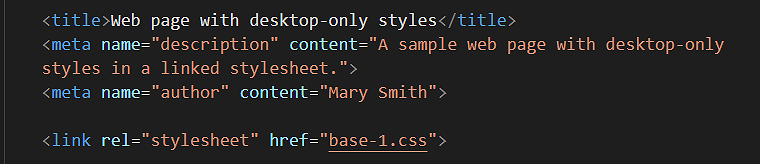
<title>Web page with desktop-only styles</title>
<meta name="description" content="A sample web page with desktop-only styles in a linked stylesheet.">
<link rel="stylesheet" href="base-1.css">Typically, this line is added after the author line.
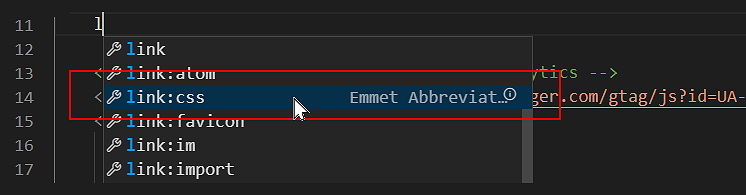
 In Visual Studio Code, you can use the following shortcut to add a link from an HTML file to a CSS stylesheet.


Next, we will create a new, empty CSS file.

You are now ready to work with your new web page (base-1.html) and stylesheet (base-1.css).
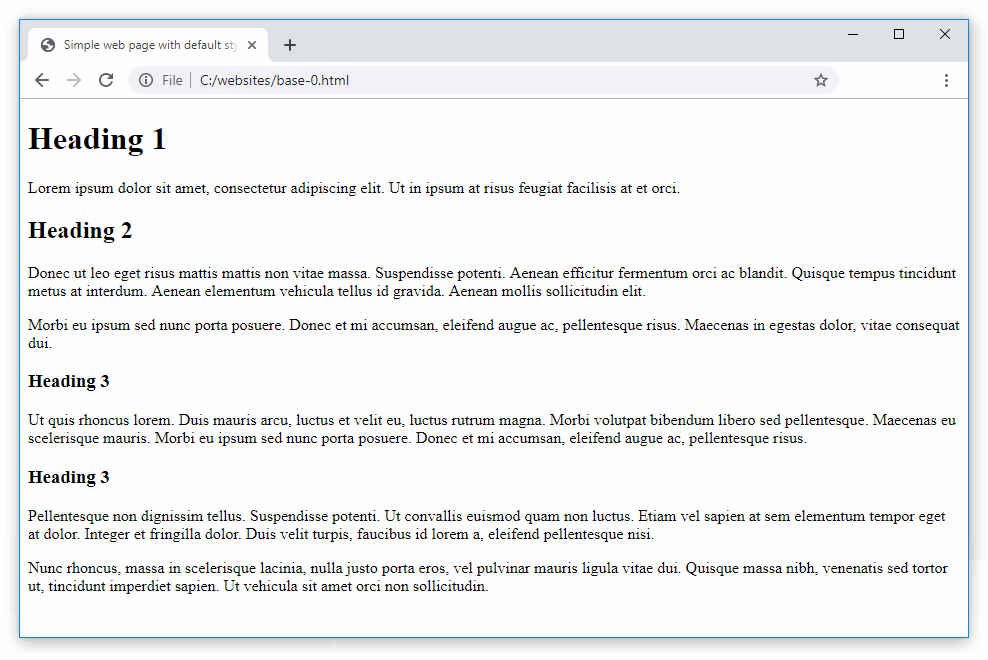
In the previous Lesson, you added some markup to the text of your HTML file. When you saved your file and displayed it in a web browser, you could see the text styled with headings and paragraphs.
Where did these styles come from?
The answer is that these are default styles created by the web browser.
To create and apply your own styles to a web page, you need to follow these steps:
Let’s begin by resetting the web browser default styles. After you do this, the only styles that will be applied to your web page will be the ones you create yourself.
/* ==== BROWSER RESETS  ==== */
* { padding: 0; margin: 0; border: 0; font-weight: normal; font-size: 16px }
The first line is simply a comment to remind you of the purpose of this part of the stylesheet file. The second line contains the actual style resets.
Let’s begin by adding styles for the three levels of heading (h1, h2 and h3) to your CSS file.
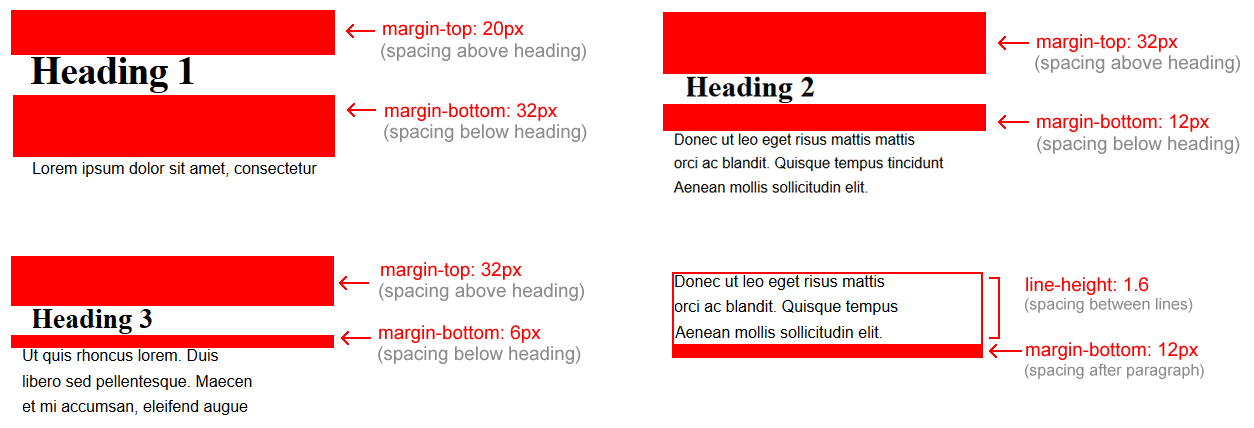
/* ==== HEADINGS ==== */
h1 {
   font-family: serif;
   font-weight: bold;
   font-size: 40px;
   line-height: 1.3;
   letter-spacing: -1px;
   margin-top: 20px;
   margin-bottom: 32px;
}

h2 {
   font-family: serif;
   font-weight: bold;
   font-size: 32px;
   line-height: 1.3;
   margin-top: 40px;
   margin-bottom: 12px;
}

h3 {
   font-family: serif;
   font-weight: bold;
   font-size: 28px;
   line-height: 1.3;
   margin-top: 32px;
   margin-bottom: 6px;
}
/* ==== PARAGRAPHS ==== */
p {
   font-family: sans-serif;
   font-weight: normal;
   font-size: 16px;
   line-height: 1.6;
   margin-bottom: 12px;
}

By default, web browsers add a small amount of ‘white space’ at the left and right of the web browser window. You can see this in the base-0.html web page you created in an earlier Lesson.
In your current base-1.html file, however, you have removed all the default web browser styling by including web browser resets at the top of the base-1.css stylesheet. You therefore need to add some left and right ‘white space’ to the stylesheet.
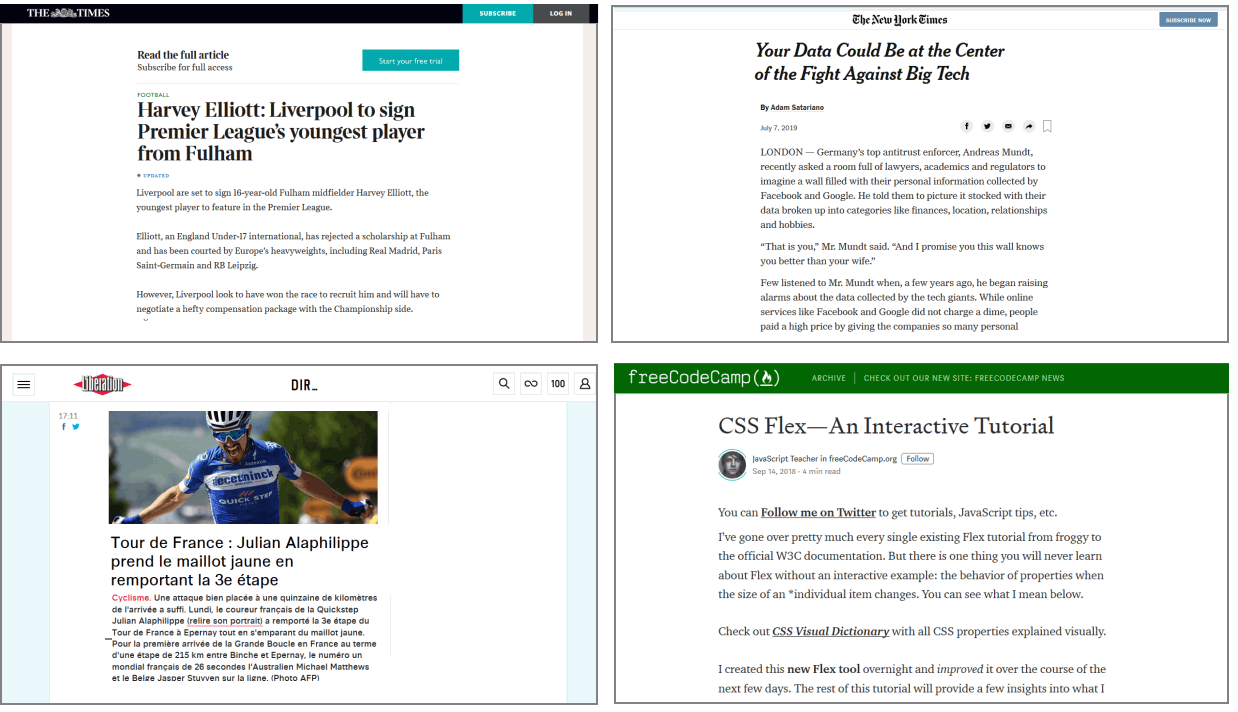
As you can see from the four examples below, modern websites with a single column of text and images typically have generous left and right margins when displayed on desktop/laptop screens.
Let’s add some ‘white space’ at the left and right of your web page.
/* ==== PAGE WIDTH ==== */
body {
   padding-left: 20%;
   padding-right: 20%
}
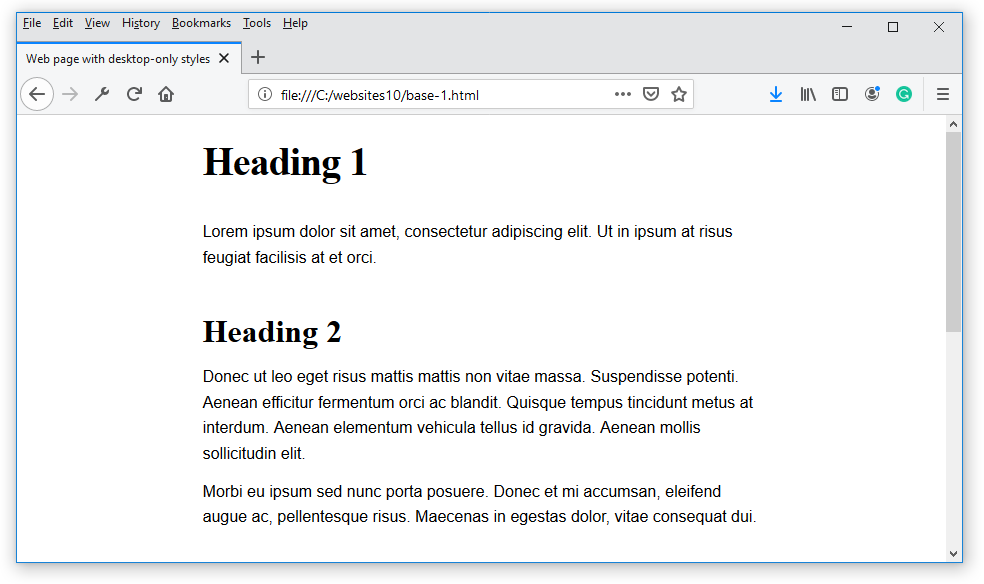
You added 20% of white space to the left and right of the web page content. The width of the single column of content is now 60% of the total screen width.
Some CSS files are only 30-50 lines long. Others may have as many as 50,000 lines. In every case, they all have a similar structure.
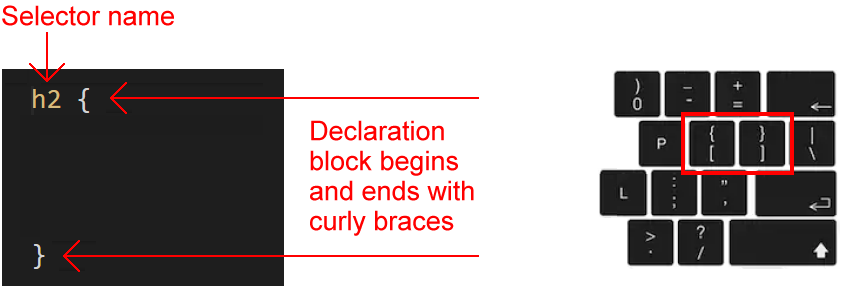
All CSS files consist of so-called selectors. Each has a selector name (such as h1 or p). They begin with an opening curly brace ( { ) and end with a closing curly brace ( } ).
A selector and its two braces is known as a declaration block.
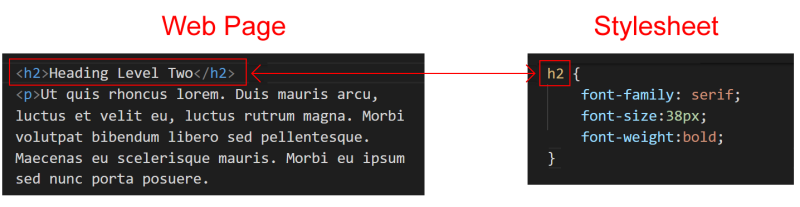
You use a selector in a CSS file to ‘target’ elements in a linked web page. For example:
In the simplest case:
Inside every CSS declaration is at least one style rule that consists of two parts: a property and a value. Below you can see two sample rules, each on a line of its own. The font-weight and font-size are the properties, and normal and 16px are the values.
   font-weight: normal;
   font-size: 16px;
Every property must be separated from its associated value by a colon (:) character.

As you can see from the example below, it makes no sense to enter a property on its own without a value.
 /* Any particular value? 16px maybe? Or perhaps 64px */
 h2 {
    font-size
 }
Conversely, a value entered on its own without a property also makes no sense. As the following example makes clear.
 /* Size of what? Font? Bottom margin? Left margin? */
 h2 {
    24px
 }
Rules must be separated from one another by a semi-colon character (;). Otherwise, the web browser cannot tell when one rule ends and the next rule begins.
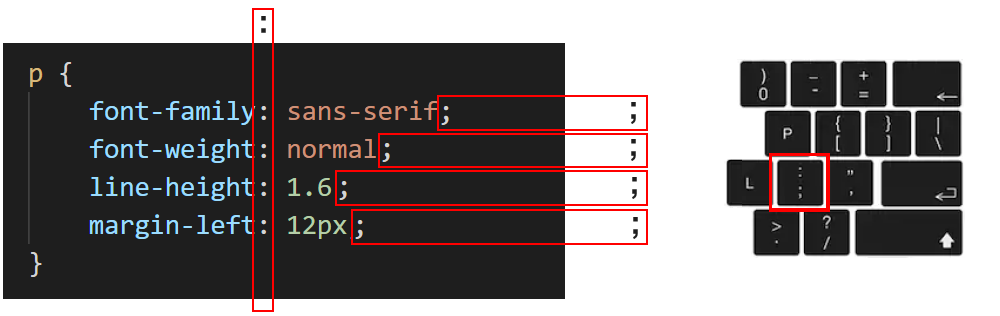
As for the last rule before a closing curly brace, you can follow it with a semi-colon. But it is unnecessary. The following two examples have exactly the same effect.
   font-weight: normal;
   font-size: 16px;
}
   font-weight: normal;
   font-size: 16px
}
When a selector contains just one, two or three rules, it is often typed on a single line. See the example below.
p {
   font-family: sans-serif; font-size: 16px; margin-bottom: 12px
}
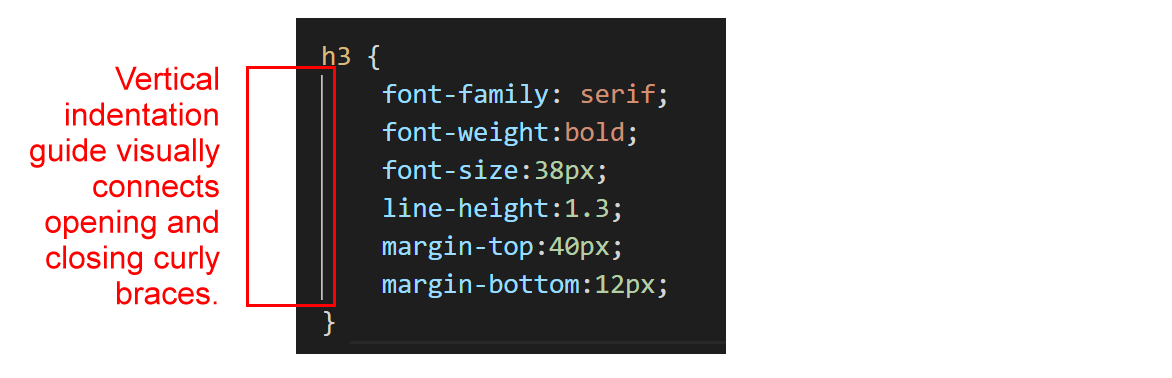
Both Visual Studio and Sublime Text display vertical lines called indentation guides to help you visually organise blocks of indented text.
Indented text is text that is ‘pushed’ in from the left margin, either by pressing the Spacebar or the Tab key.
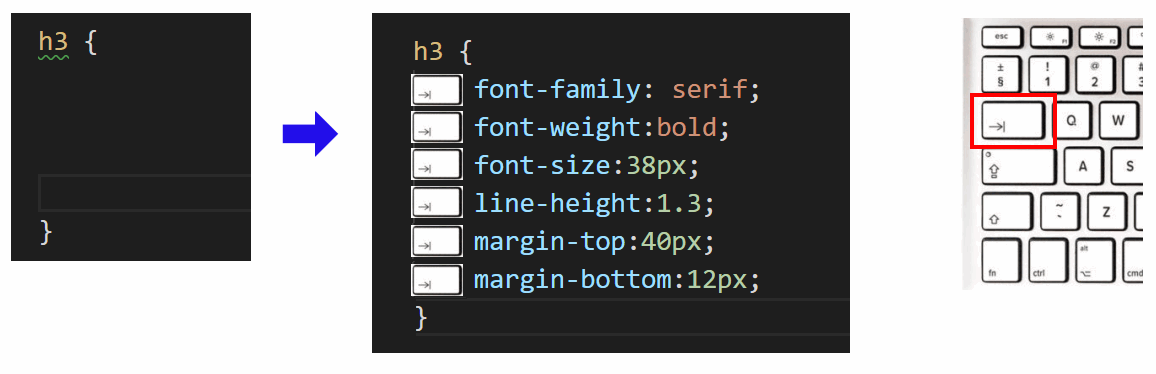
Here are the steps to following when creating a new style in a CSS file:

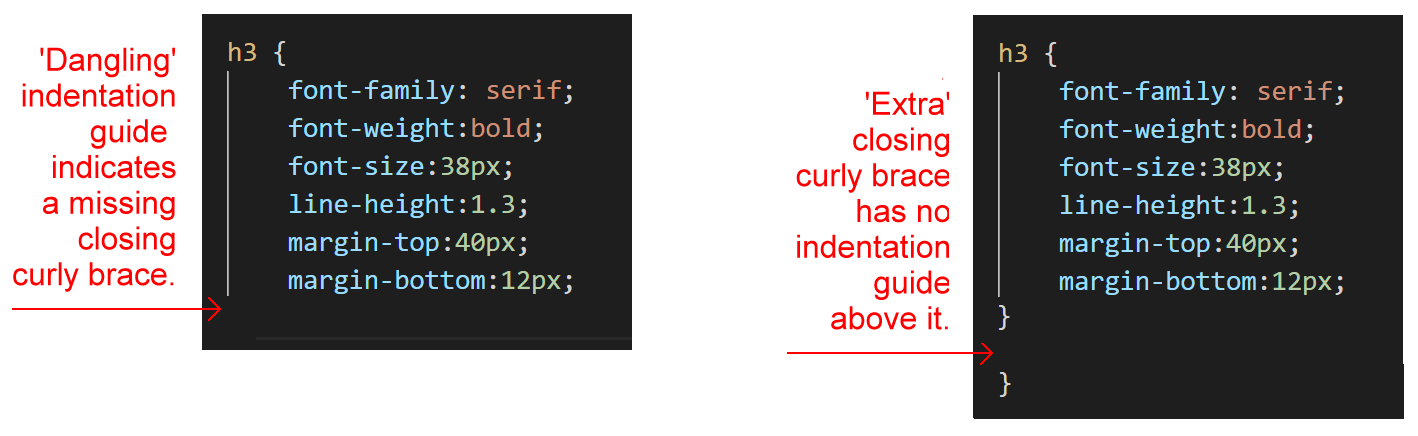
Indentation guides can also help you identify errors such as missing (or extra) opening or closing curly braces. In the example below, you can see that the opening and closing curly braces line up correctly.
In the two examples below, the first is missing a closing curly brace, while the second has two closing braces.
Let’s examine the various style values for paragraphs of text in your CSS file – font-family, font-size, font-weight, line-height and margin-bottom.
The two basic values for font-family are serif and sans-serif. Serif fonts have small lines or ‘squiggles’ at the ends of their characters. ‘Sans’ is French for ‘without’. Sans-serif fonts do not have these features on their characters.

For printed documents – books, newspapers, magazines and so on – serif fonts are generally used for long paragraphs of text. This is because the serifs help the human eye to recognise whole words rather than sequences of individual letters. For headings and short blocks of text, either serif or sans-serif fonts are equally appropriate choices.
In web pages, however, there is no evidence that paragraphs of text are more readable in serif fonts. So you will see fonts of either the serif or sans-serif family used for various elements of web pages.
font-family: sans-serif;
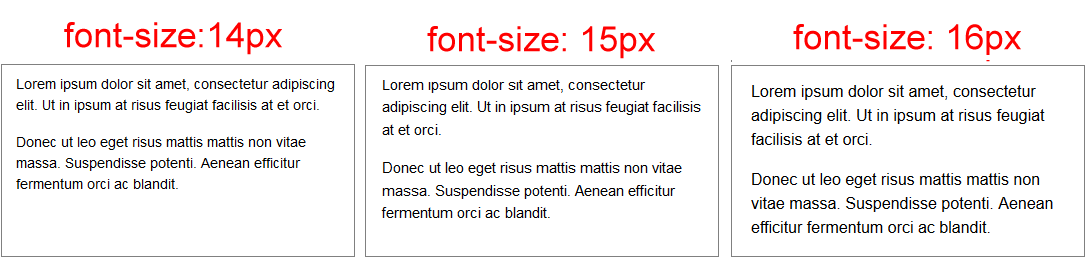
The ‘standard’ font-size of text displayed by web browsers is 16 pixels (px). For mobile phone screens, web designers often reduce this to 15px or even 14px. Smaller values can be difficult for users to read.
font-size: 16px;
Below you can see three examples of font-sizes for text paragraphs. All are shown for a 360 pixels-wide mobile phone screen. This is the width of the Apple iPhone 6, the HTC One and the Samsung Galaxy Nexus.
The two basic values of font-weight are normal and bold. Typically, text paragraphs are set to normal weight and headings are set to bold.
font-weight: normal;
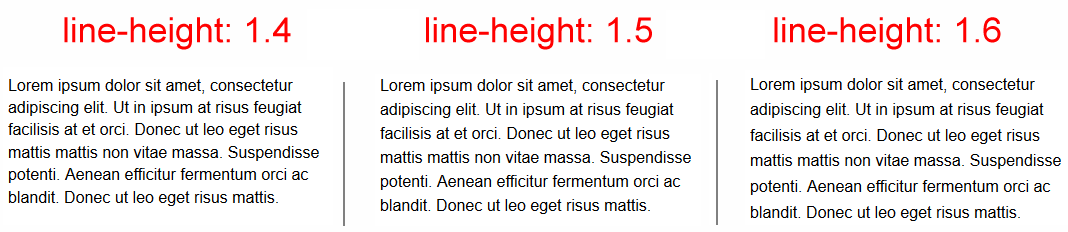
This controls the spacing between lines of text with the same style. For text paragraphs on desktop screens, the most readable values of line-height are in the range from 1.4 to 1.7. On mobile phone screens, the inter-line spacing may be set to slightly smaller values.
line-height: 1.6;
The margin-bottom sets the vertical spacing that follows a particular style. For paragraphs of text, a typical value would be in the range 12px to 18px.

margin-bottom: 12px;
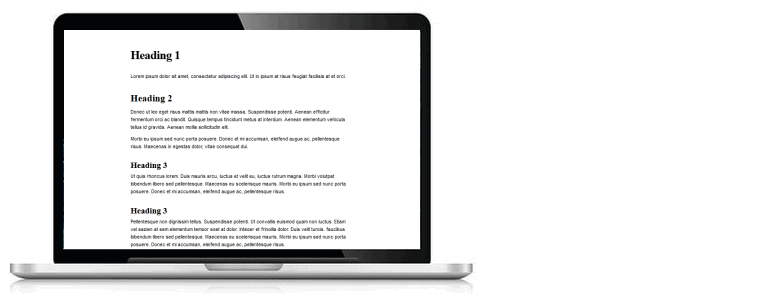
Below is a visual guide to the heading and paragraph styles you have created in your CSS file.
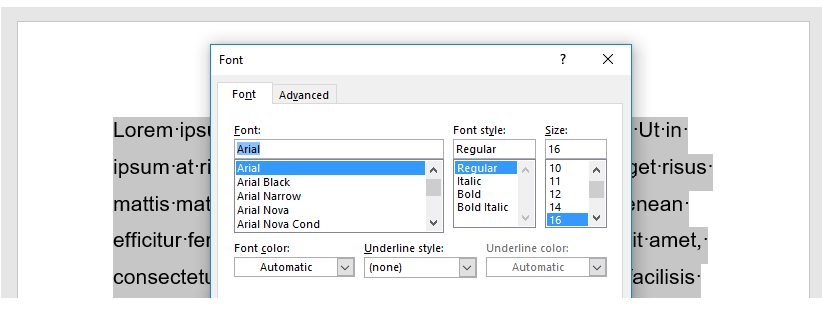
If you are familiar with Microsoft Word, you would recreate these CSS values for the text paragraphs in your web page using the dialog boxes displayed with the Font and Paragraph commands.
In the example of the Microsoft Word Font dialog box below, the CSS equivalents would be:
And in the example of the Microsoft Word Paragraph dialog box below, the CSS equivalents would be:
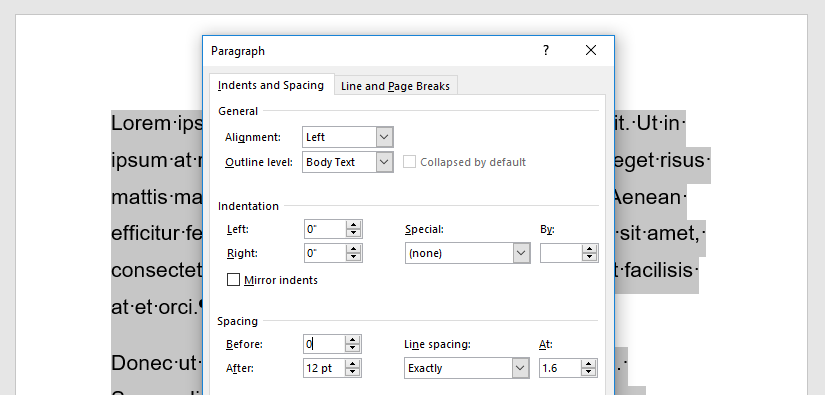
In its Paragraph dialog box, you can see that Microsoft Word offers four values for the Alignment setting: Left, Centered, Right and Justified.
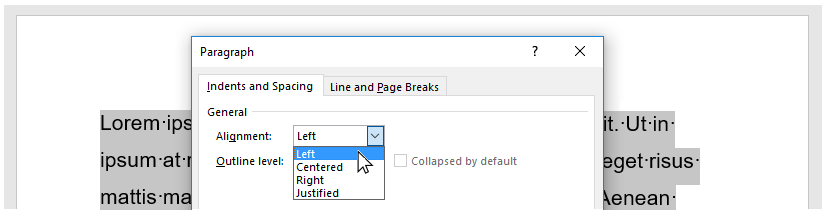
In CSS, the equivalent alignment values are:
   text-align: left;
   text-align: center;
   text-align: right;
   text-align: justify /* Not recommended */;
Below are examples of the left, center and right values of the text-align property in CSS.
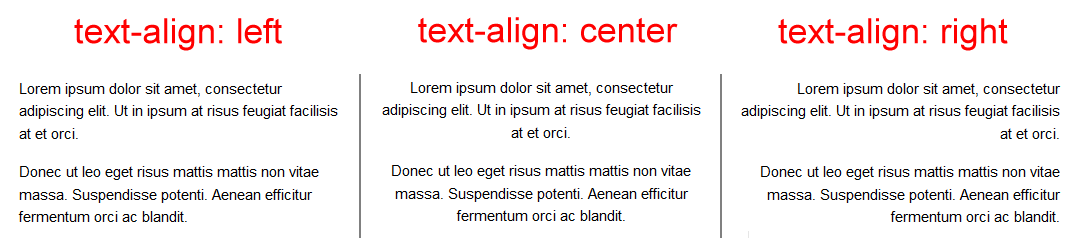
The justify value for text-align is not recommended because web browsers do not distribute spacing between characters and word proportionally.
In a typical CSS file, there are a number of differences between styles for text paragraphs and those for headings:
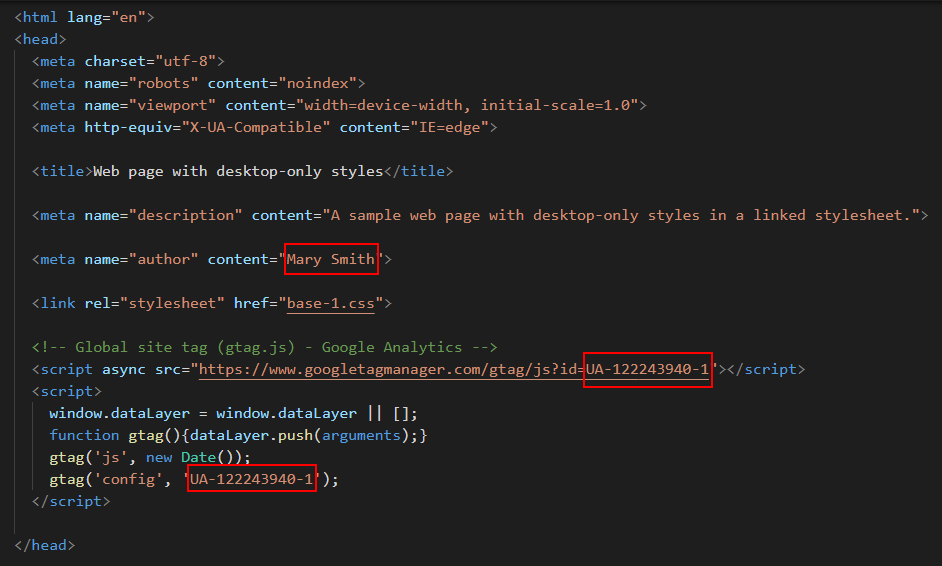
Before you validate your web page and upload it to GitHub, ensure the following details are correct within the <head> of your base-1.html file.
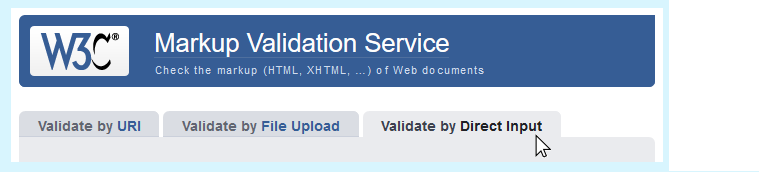
To check the HTML in your web page is correct or valid, use the official W3C Markup Validation Service as follows.

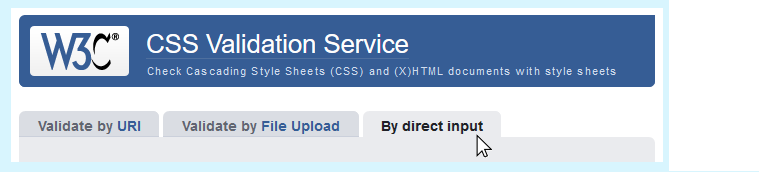
To check your CSS is correct, use the official W3C CSS Validation Service. Follow these steps.
After validating your web page and stylesheet, you are now ready to upload them to your account on GitHub.


Your web page is now published on GitHub at a web address similar to the following, where username is the username you have chosen for your GitHub account:
https://username.github.io/base-1.html
It may take a few minutes for your uploaded files to appear on GitHub.
Hello CSS
From Interneting is Hard
Fundamental text and font styling
From the Mozilla Developer Network
Tutorial: CSS for absolute beginners
By Luke Fabish at the Luke Fabish Blog
Return to Contents.