Learning Goals
In this Lesson you will learn how to:
- Create an HTML input field to capture a value entered by a user.
- Assign the user-entered value to a JavaScript variable.
- Display the variable's value on a web page.
- Convert a string variable to a numeric variable with a integral or floating point value using the parseInt() or parseFloat() method
- Format the number of decimal places in a numeric variable using the toFixed() method
Exercise Files
In this Lesson you will work with the following web pages:
Contents
Using HTML input fields to capture user-entered data
Exercise 5.1: Capturing a user-entered value with an input field
Exercise 5.2: Adding a Reset button to your web page
Exercise 5.3: Working with numeric user data
The parseInt() and parseFloat methods
Using HTML input fields to capture user-entered data
In previous Lessons you learnt how to assign values to string and numeric variables with JavaScript statements such as the following.
let username ="Pamela";
let profit = 12000;
In the above examples the values were assigned to the variables by you, the creator of the web page.
The real usefulness of JavaScript, however, is its ability to capture and manipulate values entered by the visitor to a web page.
The most common way to capture user-entered values on a web page is with a HTML input box.

The type of text means that the field can be used to capture any keyboard characters, such as letters, numbers, spaces or currency symbols.
Capturing information from a web page visitor is just the first step of a two-step process.
The second is assigning the entered value to a variable in JavaScript code. To do that, you need to give a unique id to the input field. In the example, above, the id is fName for 'First Name'.
In JavaScript, you can then create a new variable such as userInput, and use the getElementById() method to assign the entered value to the variable as follows:
let userInput;
userInput = document.getElementById("fName").value;
Or, on a single line:
let userInput = document.getElementById("fName").value;
You can see that the above two statements follow an important rule governing all use of the assignment operator (=):
The variable goes on the left hand side (LHS), and the value for assignment to the variable goes on the right hand side (RHS).
Exercise 5.1 takes you through the steps of assigning a user-entered value to a variable, and then displaying that value on the web page.
Exercise 5.1: Capturing a user-entered value with an input field
In your websites/js-exercises/user-input sub-folder, open the following file in VS Code and your web browser:
It should look as shown below.
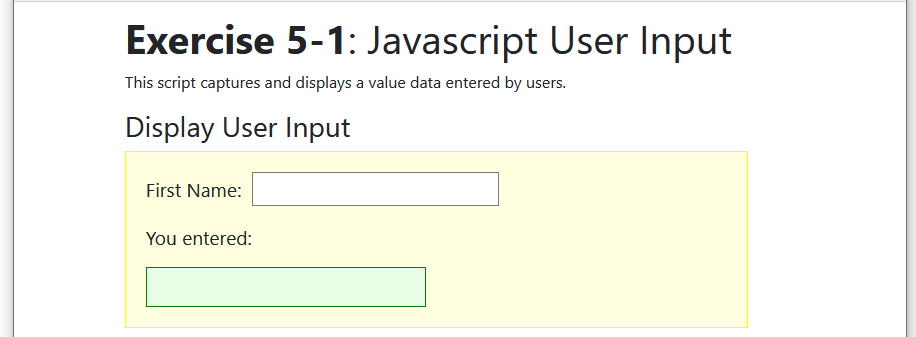
In the HTML, you can see:
- An input field with a type of text and an id of fName.

- A div element with an id of resultBox. This is where you will display the value entered by the user.

In VS Code, scroll down to the bottom of the web page, to just before the closing </body> tag, and enter the following function inside a pair of script of tags.
<script>
function showUserInput() {
   /* Place the value from the input field in a variable */
   /* Display the value on web page */
}
</script>
At the moment, your new function contains only two comment lines.
Scroll back up to the input box and, just under it, enter this new line with a button and an event handler.
<p><button onclick="showUserInput()">Show user input</button></p>
Your HTML now looks as follows.
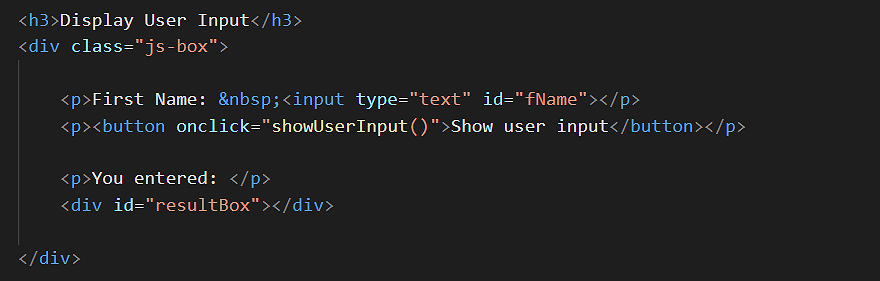
The event handler links the button with the function at the bottom of the web page.
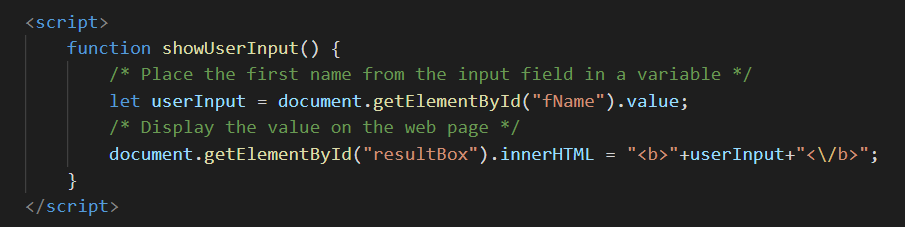
Scroll back down to the function. Under the first comment line, enter the following:
let userInput = document.getElementById("fName").value;
This places the value, entered by the user in the input field with an id of fname, in a variable named userInput.
Next, under the second comment line, enter the following:
document.getElementById("resultBox").innerHTML = "<b>"+userInput+"<\/b>";
This updates the content of the div element with an id of resultBox with whatever value is in the userInput variable.
Your JavaScript code now look as shown below.
Save your web page and reload your web browser.
Test that your code works by entering some text in the input field and clicking the 'Show user input' button'.
You can close the exercise-5.1.html file when finished.
Exercise 5.2 takes you through the steps of assigning a user-entered value to a variable, and then displaying that value on the web page.
Exercise 5.2: Adding a Reset button to your web page
A 'Reset' or 'Clear' button enables user to remove a value they may have entered to the input field. Let's add one to the web page you have worked on in the previous exercise.
In VS Code and your web browser, open the following file.
As you can see, it is just a finished version of exercise-5.1.html.
In the HTML, replace the line that contains the 'Show user input' button and event handler with the following.
<p><button onclick="showUserInput()">Show user input</button>
<button onclick="resetAll()">Reset All</button></p>
Scroll down to the bottom of the web page and enter this new function under the 'showUserInput()' function.
function resetAll() {
   document.getElementById("fName").value = "";
   document.getElementById("resultBox").innerHTML = "";
}
This function resets the input field and displays div by entering a value of 'nothing' to each one.
Save your web page and reload your web browser.
Verify that the 'Reset All' button works.
You can close the exercise-5-2.html file when finished.
Handling user-entered numbers
It is not only strings such as names of email addresses that you will want to capture in HTML forms. You will also want to capture order quantities, financial amounts and other numbers.
Because an HTML text box regards everything entered to it as a string, you need to convert string variables containing numbers to actual numeric variables before using the user-entered values in calculations.
Exercise 5.3 helps you understand why you need to do this type conversion.
Exercise 5.3: Working with numeric user data
In VS Code and your web browser, open the following file.
In the HTML you can see two input fields, two buttons and a single two div box for displaying the sum of the two numbers.
Scroll down to the JavaScript code at the bottom.
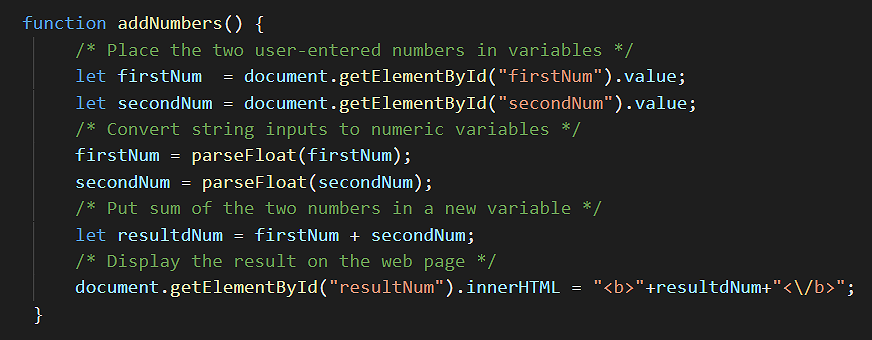
In the 'addNumbers' function, under the '/* Put sum of the two numbers in a new variable */' comment line, enter the following:
let resultdNum = firstNum + secondNum;
Next, under the '/* Display the result on the web page */' comment line, enter the following:
document.getElementById("resultNum").innerHTML = "<b>"+resultdNum+"<\/b>";
Save your file and reload it in your web browser.
Test your code as follows:
- In the First Number input field, enter 12.
- In the Second Number input field, enter 34.
- Click the Add Numbers button.
The result you see is probably not the answer you want.
The parseInt() and parseFloat methods
JavaScript offers two methods for converting string variables to numeric variables.
Method |
Description |
parseInt() |
Converts string variable to a numeric variable. The result is an integer (whole number). Anything after the decimal point is discarded. myVar = parseInt(myVar); |
parseFloat() |
Converts string variable to a numeric variable. The result is a floating point number. Anything after the decimal point is preserved. myVar = parseFloat(myVar); |
Neither method checks whether the variable actually contains a number or not. Even if the variable contains a string, each method still attempt to perform the variable type conversion.
In your JavaScript code, add the following new lines to the 'addNumbers()' function, just after the second variable assignment:
 /* Convert string inputs to numeric variables */
 firstNum = parseFloat(firstNum);
 secondNum = parseFloat(secondNum);
Your complete code should now look as follows.
Save your web page and reload your web browser.
Verify that the code now adds the two numbers correctly.
You can close the exercise-5-3.html file when finished.
Setting decimal places with the toFixed() method
When displaying financial amounts on screen it is conventional to format them so that they have a fixed number of decimal places. Values such as 12.80 and 45.00 look much better than 12.8 and 45. JavaScript provides a toFixed() method for this purpose. You enter the number of decimal places you require in the method's parenthesis. It works only with numeric variables.
If the variable named 'myNum' contains 123.5, for example, the following statement reformats the value in the variable to 123.50.
myNum = myNum.toFixed(2);
Uploading your JavaScript exercise files to GitHub
Follow these steps below to upload your entire 📁 /javascript sub-folder to your website on GitHub.
- Sign in to Github and click the name of the repository (‘repo’) that holds your web pages.
- On the next GitHub screen displayed, click the Add file button near the right of the screen and then choose Upload files from the dropdown list.

- In File Explorer (Windows 10) or Finder (Apple Mac), select your entire 📁 /javascript sub-folder, and drag-and-drop it to your repository on GitHub.
- Scroll down to the bottom of the GitHub screen, and accept or edit the short message (Add files via upload) in the Commit changes box. Finally, click the green Commit changes button to upload your entire 📁 /javascript sub-folder and all the exercise files it contains.
Your uploaded files are published on GitHub at a web address similar to the following, where username is the username you have chosen for your GitHub account:
https://username.github.io/javascript/exercises/5/exercise-5-1.html
https://username.github.io/javascript/exercises/5/exercise-5-2.html
https://username.github.io/javascript/exercises/5/exercise-5-3.html
It may take a few minutes for your uploaded files to appear on GitHub.
Return to Contents.