
Learning Goals
At the end of this Tutorial, you will be able to:
- Recognise the structure of a hyperlink.
- Understand the difference between absolute and relative hyperlinks.
- Add hyperlinks to sample web pages.
You can view the finished version of the sample web page to which you will add hyperlinks in this Tutorial by clicking the link below. The finished sample will each open in a new tab of your web browser.

About hyperlinks
Hyperlinks, or more simply links, enable users to click or tap their way from one web page to another web page, and from one website to another website.
In the next Tutorial, Working with Internal Hyperlinks, you will learn how you can also use hyperlinks to go from one section of a web page to another.
The general format of a hyperlink in HTML is as shown below.

Note the following:
- A hyperlink begins with an opening <a> (for ‘anchor’) tag.
- Hyperlinks end with the closing </a> tag.
- Inside the opening <a> tag is the href attribute that is followed by an equal to sign (=).
- The href attribute holds, within quotation marks, the link destination. This is the location to where the user will be taken when they click or tap on the link.
Hyperlinks typically have the following format:
<p>To learn more, please click <a href="webpage.html">here</a>.</p>
The above HTML tag would produce the following result.

This is an example of a hyperlink placed around an item of text. In this case, the word ‘here’.
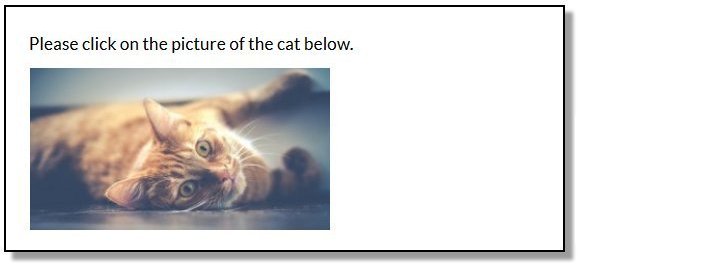
Hyperlinks can also be placed around an image, as follows.
<p>Please click on the picture of a cat below.</p>

<a href="webpage.html"><img src="cat.jpg" alt="cat"></a>
This second example would produce the following result.
Hyperlinks: same or different website?
One way of looking at hyperlinks is to ask: what is the destination of the link? Where will it send the user to?
In terms of their destination, you can think of hyperlinks as of two types:
Hyperlinks with absolute URLs
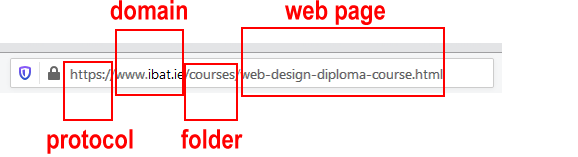
An absolute URL contains the full address of the web page being linked to, and begins with the http:// or https:// protocol.
Absolute URLs will always include the domain (website) name and typically also the name of a particular web page and perhaps too the folder that contains it.
You use absolute URLs when you want to link from one website to a different website – that is, to a website with a different domain name.
Hyperlinks with relative URLs
If you are linking between web pages of the same website, you do not need to include the http:// or https:// protocol or the website domain name.
It is enough to enter only the web page name, such as:
services.html
or
privacy-statement.html
And perhaps also the folder that contains the web page, such as
products/shoes.html
or
services/financial/insurance.html
For example, the relative hyperlink below will take the user to a different page within the same folder of the same website.
<p>Read about our <a href="about-us.html">team members</a>.</p>
You will commonly see relative hyperlinks used in navigation menus that can lead users to the various pages of a website.

Hyperlinks: same or new web browser tab?
You can choose to display a linked-to (‘destination’) web page in the same or in a new tab of your web browser.
Consider the example of a web page named page-1.html that contains a hyperlink to a second web page named page-2.html.
New page, same browser tab
In the first case below, the linked-to web page named page-2.html replaces the current page-1.html web page in the user’s web browser tab.
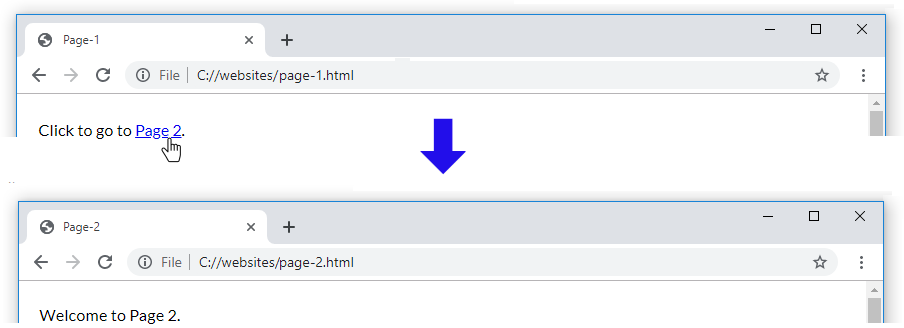
In the page-1.html web page, the HTML link code would be as follows:
<p>Click to go to <a href="page-2.html">Page 2</a>.</p>
New page, new browser tab
In the second case below, the linked-to page-2.html web page opens in a new tab of the user’s web browser. The original web page is still displayed in the original web browser tab.
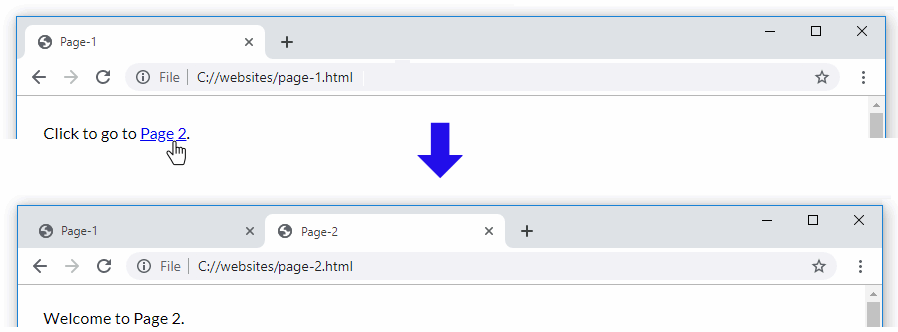
In the page-1.html web page, the HTML code for this open in a new tab link would be as follows:
<p>Click to go to <a href="page-2.html" target="_blank">Page 2</a>.</p>
Your hyperlink now has two attributes:
- The href attribute value contains the destination of the hyperlink.
- The target attribute with its value of "_blank" (within double quotes) forces the new page to open in a tab of the user’s web browser.
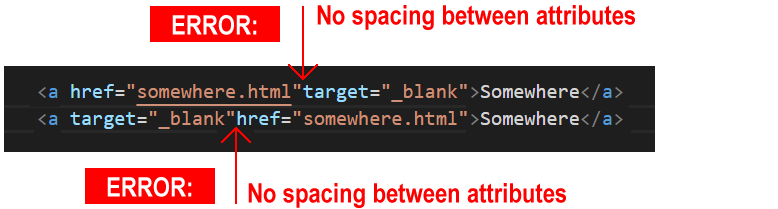
The order of the two attributes inside the opening tag of a hyperlink does not matter.
For example, both of these hyperlinks are correct.

But ensure you separate the two attributes from each other by a single space. For example, both these hyperlinks are correct. And for the same reason.
Preventing web page hijacking
When you open a hyperlink in a new tab of your web browser, JavaScript code in the new web page is able to take control of the original web page you linked from.
See this article from Google: Links to cross-origin destinations are unsafe.
For this reason, a third attribute of rel with a value of "noopener" is a widely-used security feature that is added to hyperlinks which open in a new tab.
<a href="https://www.website.com" target="_blank" rel="noopener">Other Website</a>
Within the opening <a> hyperlink tag, you can place the three attributes in any order. All three hyperlink examples below are valid.

But, again, always enter a single space between the different attributes.
In the next section of this Tutorial you will add hyperlinks to a web page you created previously.
Adding hyperlinks to your van Gogh page
In this section, you will work with the sample page-5.html web page in your websites/exercises folder.
You created this web page and stylesheet in the Working with Images Tutorial, and later updated it in the Working with Google Fonts and Introduction to Fluid Typography Tutorials.
- In Visual Studio Code, open the following file: page-5.html
- In VS Code, display the page-5.html file.
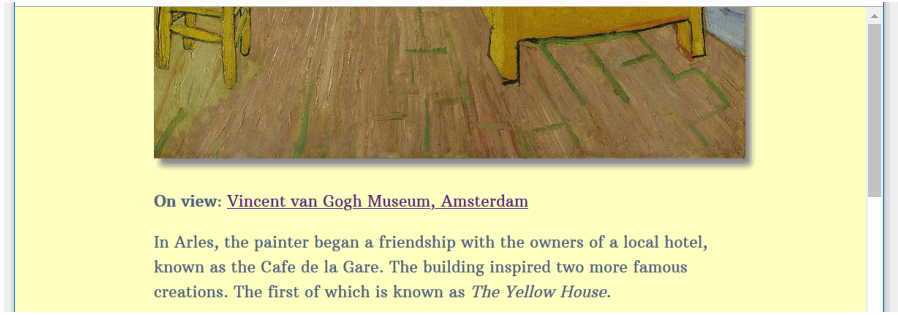
- At about line 30, directly under the first image, “Bedroom in Arles”, copy-and-paste the following new paragraph and empty hyperlink:
<p><b>On view</b>: <a href="">Vincent van Gogh Museum, Amsterdam</a></p>
- Directly under the second image, “The Yellow House” on about line 33, copy-and-paste the following new paragraph and empty hyperlink:
<p><b>On view</b>: <a href="">Vincent van Gogh Museum, Amsterdam</a></p>
- Directly under the third image, “The Cafe Terrace at Night” on about line 38, copy-and-paste the following new paragraph and empty hyperlink:
<p><b>On view</b>: <a href="">Kröller-Müller Museum, Otterlo</a></p>
- And directly under the fourth and final image, “The Starry Night” on about line 44, copy-and-paste the following new paragraph and empty hyperlink:
<p><b>On view</b>: <a href="">The Museum of Modern Art, New York</a></p>
- Save your web page and view the result in your browser. All four images should now have text with empty hyperlinks under them.
- For each of the four hyperlinks, one after the other, add the following values to their href attribute (inside the pair of double quotes):
https://www.vangoghmuseum.nl/en/collection/s0047V1962https://www.vangoghmuseum.nl/en/collection/s0032V1962https://krollermuller.nl/en/vincent-van-gogh-terrace-of-a-cafe-at-night-place-du-forum-1https://www.moma.org/collection/works/79802 - Save your web page and view the result in your browser. Click the four hyperlinks to ensure they all work correctly.
- Finally, add these two attributes and their values inside each of the four opening hyperlink tags:
target="_blank" rel="noopener"
Ensure you enter a single space between the attributes in your hyperlink opening tags. - Save your web page and, in your web browser, verify the four hyperlinks all work correctly.
✅ That’s it. You are now finished working on your sample web page.
Click page-5.html to view a finished sample of this web page in a new tab of your web browser.
Uploading your files to GitHub
After finishing your web page and stylesheet, you are now ready to upload them to your account on GitHub.
- Open a new tab in your web browser and go to GitHub.com. If you are not already signed in to your GitHub account, sign in now.

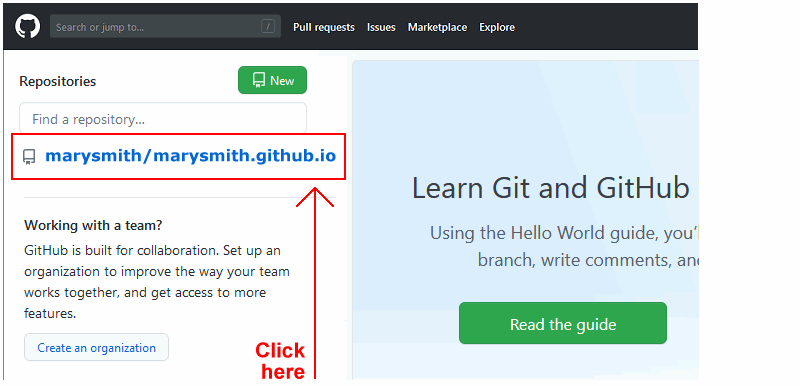
- On your GitHub home page, click the ‘repo’ that holds your web pages. Its name will look as follows, where username is your chosen username on GitHub.
username.github.io
- On the next GitHub screen displayed, near the right of the screen, you can see a button named Add file. Click on it.
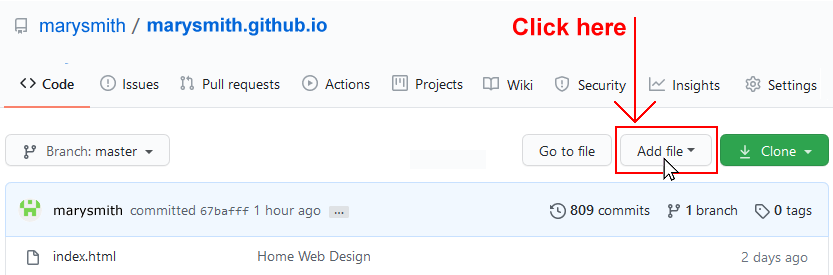
- From the dropdown list displayed, choose the option Upload files.

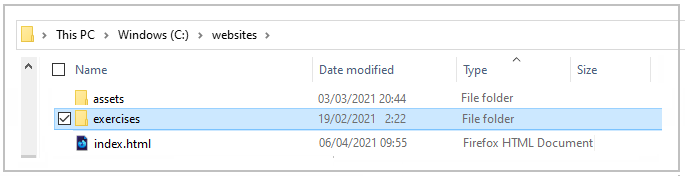
- In File Explorer (Windows 10) or Finder (Apple Mac), drag-and-drop your 📁 exercises sub-folder to upload it to your repository on GitHub.
- Scroll down to the bottom of the GitHub screen, and accept or edit the short message (Add files via upload) in the Commit changes box.
- Finally, click the green Commit changes button to upload your files.
Your updated sample web page are now published on GitHub at web addresses similar to the following:
https://username.github.io/exercises/page-5.html
It may take a few minutes for your uploaded files to appear on GitHub.