
At the end of this Tutorial, you will be able to:
- Add a background image to a hero block.
- Add a shadow effect to the hero text.
- Add a tinted overlay behind the hero text and in front of the background image.
You can view the finished version of the sample web page you will update in this Tutorial by clicking the image below. The finished sample will open in a new tab of your web browser.

About hero full-width hero backgrounds
Hero blocks with full-width background images are a common design choice of web developers. See the examples below.

In this Tutorial, you will learn the techniques for creating them.
Working with your sample files
In this Tutorial, you will update a copy of the sample web page and stylesheet you worked with in the previous Hero Blocks: Text Tutorial.
- In VS Code, open the hero-text.html web page and save it with the new name of hero-image.html.
- Open the hero-text.css stylesheet and save it with the new name of hero-image.css.
- In the new hero-image.html file, edit the name of the linked stylesheet from hero-text.css to hero-image.css, and save the web page.
- Replace the current title and description details with the following:
<title>Hero Block with Image</title>
<meta name="description" content="A hero block with a background image and a tinted overlay.">
- Finally, save the following image to your websites/exercises/assets/img sub-folder:
 business.jpg
You have now saved the files you need for this Tutorial.
Adding the background image
Let's begin by adding the sample background image named business.jpg to the web page. Here are the steps.
- Copy-and-paste the following lines to your hero-image.html web page, to just under the hero-text-container block.
<div class="hero-bg-media">
    <img src="assets/img/business.jpg" alt="sample background image">
</div>
As you can see, the image is a child of a parent container named hero-bg-media. Your web page should now look as shown below in VS Code.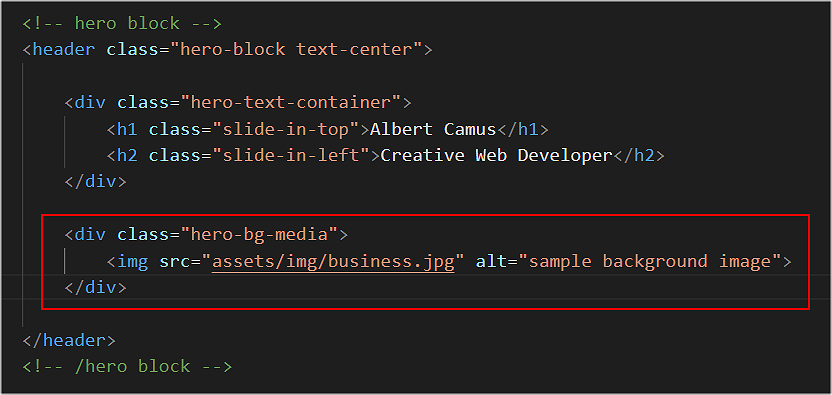
- Save your web page.
Updating the stylesheet
As you can see in your web browser, the image has ‘spilt out’ over the bottom edge of the hero-block container. The image, like its parent container, should not be taller than 80% of the viewport height.
Let's update the stylesheet so that both the text and the image display correctly.
- In the hero-image.css stylesheet, replace the entire hero-block declaration by copying-and-pasting the following.
.hero-block {
    min-height: 500px;
    position: relative;
    display: flex;
    flex-direction: column;
    justify-content: center;
    background-color: gray;
    overflow: none;
}
- On a blank line under the .hero-block-container, copy-and-paste the following two new items to the stylesheet.
.hero-bg-media {
    position: absolute; top: 0; right: 0; bottom: 0; left: 0;
    z-index: 0;
}

.hero-bg-media img {
    object-fit: cover; width: 100%; height: 100%;
}
- Next, to the .hero-block-container, which currently holds only padding values, add the following new style rule.
z-index: 1;
- Save the hero-image.css stylesheet.
- Finally, switch to the hero-image.html web page, and add the following new line to the head, to just before the stylesheet link.
<link rel="preload" href="assets/img/business.jpg" as="image">
This directs the web browser to give priority to the business.jpg hero image when loading the various components of the web page. - Save the hero-image.html file.
In your web browser, the web page should now look as shown below.

Adding a text shadow
To ensure the text in front of the image is easy to read, let's add a drop shadow effect to the h1 main heading and h2 sub-heading.
Here are the steps.
- In the stylesheet, add the following new style to the combined .hero-block h1, .hero-block h2 selector.
text-shadow: 2px 2px #222;
- Save the stylesheet and view the web page in your browser. It should now look as shown below.

Note how the text is now easier to read against the background image.
Adding a semi-opaque overlay
To make the text even easier to read against the background image, let's add a semi-opaque overlay. This will be positioned in front of the image and behind the heading and sub-heading. Follow these steps.
- Copy-and-paste the following new element to the hero-image.html file, to just under the element.
<div class="bg-overlay"></div>
Your complete hero-block container will now look as follows.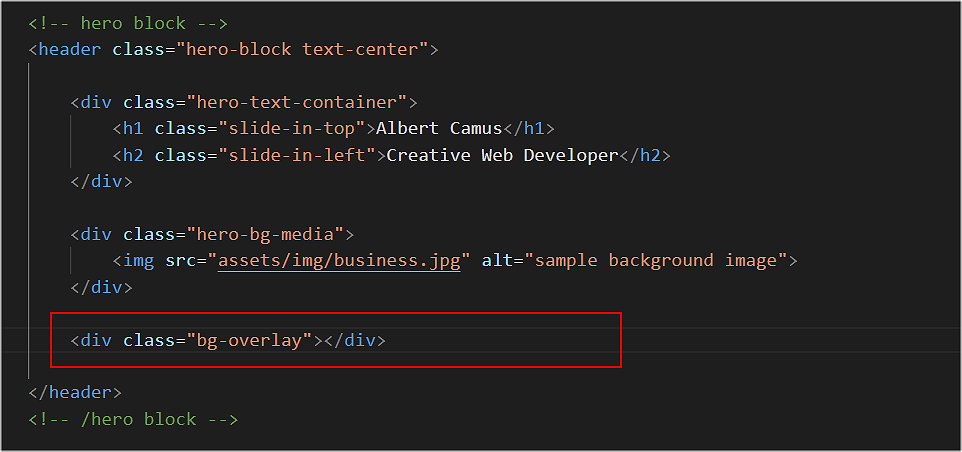
- In the stylesheet, copy-and-paste the following, to just under the .hero-bg-media img selector.
.bg-overlay {
   position: absolute; top: 0; right: 0; bottom: 0; left: 0;
   z-index: 1;
   background-image: linear-gradient(rgba(0,0,0,0.3),rgba(0,0,0,0.3));
}
- In the hero-text-container selector, update the z-index value from 1 to 2.
- Save the hero-image.css stylesheet.
- In your web browser, the web page should now look as shown below.

✅ That’s it. You have now successfully completed this Tutorial.
Click hero-image.html to view a finished sample of this web page in a new tab of your web browser.
Updating your website home page
Now that you have updated and styled a new web page, let’s add a hyperlink to it on the ‘home page’ of your web site. Follow the steps below:
- In VS Code, open this HTML file in your ‘main’ websites folder: index.html
- Copy-and-paste the following new line to your web page at end of current list of web pages.
<p><a href="exercises/hero-image.html">Hero block with background image</a></p>
Save your index.html web page and view the result in your browser.
Uploading your files to GitHub
After finishing your web page and stylesheet, you are now ready to upload them to your account on GitHub.
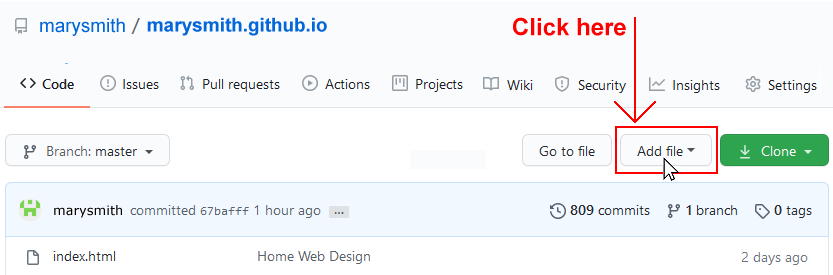
- Open a new tab in your web browser and go to GitHub.com. If you are not already signed in to your GitHub account, sign in now.

- On your GitHub home page, click the ‘repo’ that holds your web pages. Its name will look as follows, where username is your chosen username on GitHub.
username.github.io

- On the next GitHub screen displayed, near the right of the screen, you can see a button named Add file. Click on it.
- From the dropdown list displayed, choose the option Upload files.

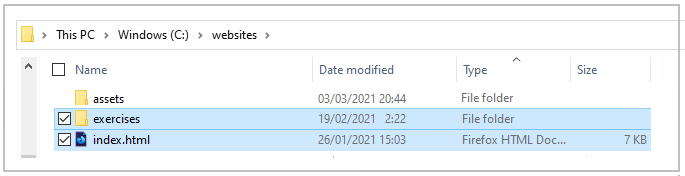
- In File Explorer (Windows 10) or Finder (Apple Mac), drag-and-drop your index.html file and your 📁 exercises sub-folder to upload them to your repository on GitHub.
- Scroll down to the bottom of the GitHub screen, and accept or edit the short message (Add files via upload) in the Commit changes box.
- Finally, click the green Commit changes button to upload your files.
Your updated home page and sample web page are now published on GitHub at web addresses similar to the following:
https://username.github.io/index.html
https://username.github.io/exercises/hero-image.html
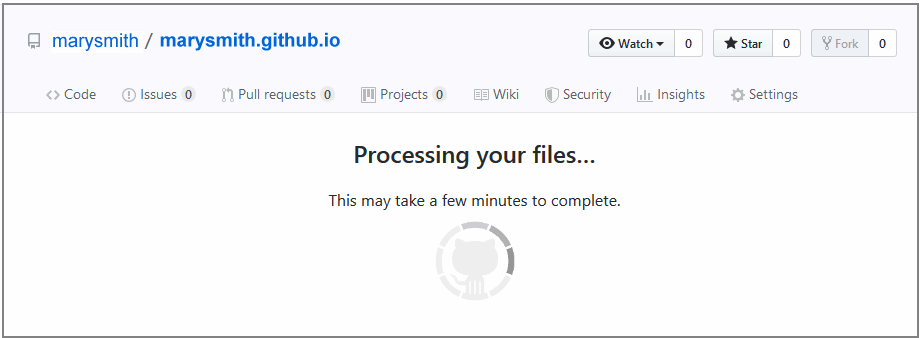
It may take a few minutes for your uploaded files to appear on GitHub.