Learning Goals
At the end of this Tutorial, you will be able to:
- List and describe the container elements in a web page used in modern web design.
- Sub-divide the <main> container in a web page into a number of smaller and different <section> containers.
Web page layout with container tags
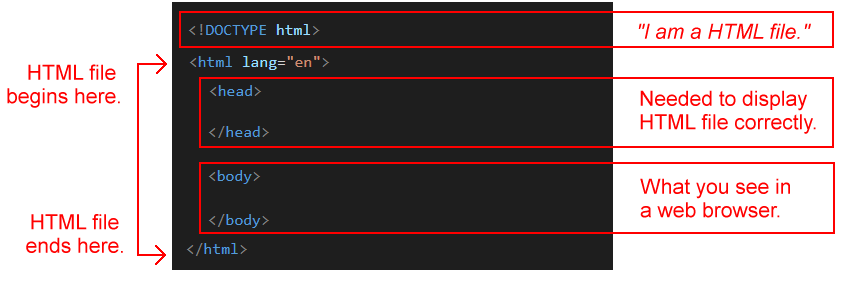
In the Working with HTML Tutorial, you learnt that the simplest possible HTML file has two main parts – the <head> and <body> – and looks as shown below.
Modern web design (HTML5 and CSS3) uses a number of so-called container tags for the content within the <body> of a web page.
- Unlike tags such as <h1>, <h2> and <p>, container tags have no default CSS styles. For example, they do not change the size, appearance or space around text or images.
- The purpose of container tags is not to style web page content but to structure or organise it into ‘blocks’ or ‘chunks’.
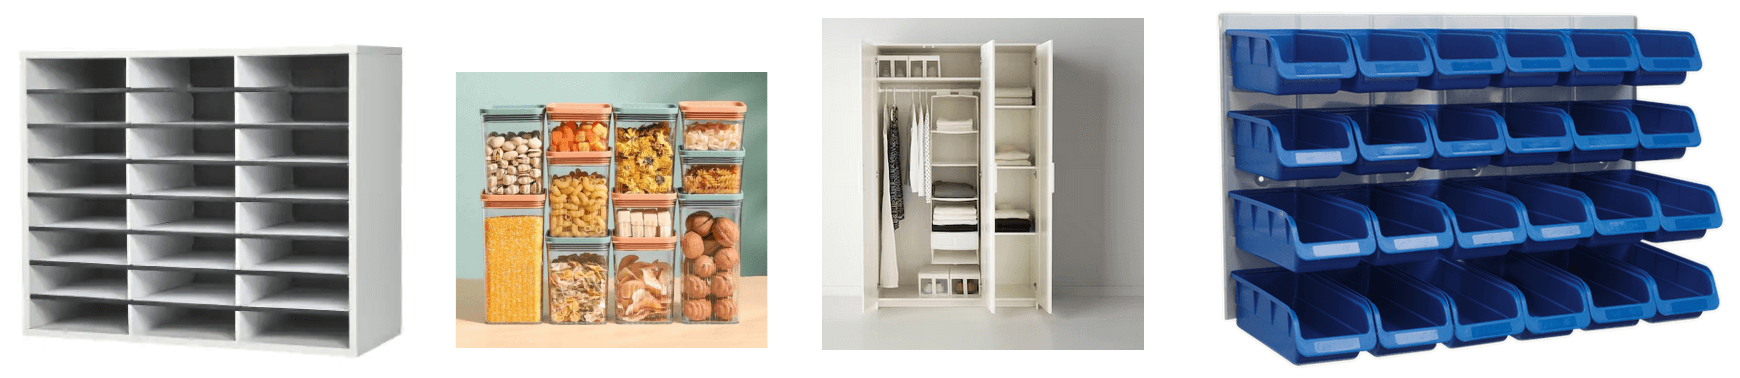
Container tags in a web page play the same role as containers or organisers for documents, food items, clothes, and other physical objects in the real world.
Moreover, container/semantic blocks of content are automatically recognised by screen readers, allowing users with visual impairments to navigate directly to important page sections.
The four major container tags are listed below.
- <nav>
- <header>
- <main>
- <footer>
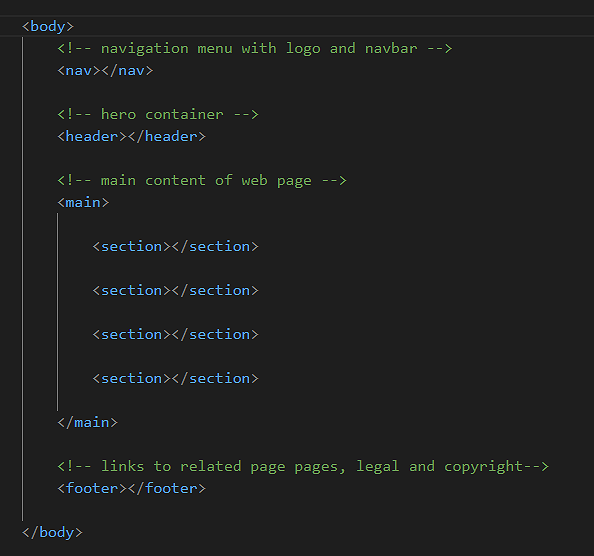
All four tags are placed within the <body> ... </body> of a web page.
You will sometimes see container tags in HTML referred to as semantic tags.
Let’s look at these four container tags in more detail.
The <nav> tag
This tag name is short for navigation. It is most commonly located at the top of a web page where it contains a menu of hyperlinks and the organisation’s logo.

Visual designers refer to this list of menu hyperlinks as the navbar.
The <header> tag
This is generally positioned under the <nav> element at the top of a web page, and usually contains the <h1> heading and some introductory text.

Visual designers refer to this part of a web page as the hero block.
The <main> tag
As its name suggests, this holds the primary content of a web page. In simple terms, this means any content that should not be in the <nav>, <header> or <footer> containers.
The <footer> tag
Located at the bottom of a web page, this contains such content as the organisation’s details, links to related web pages, and legal and copyright information.
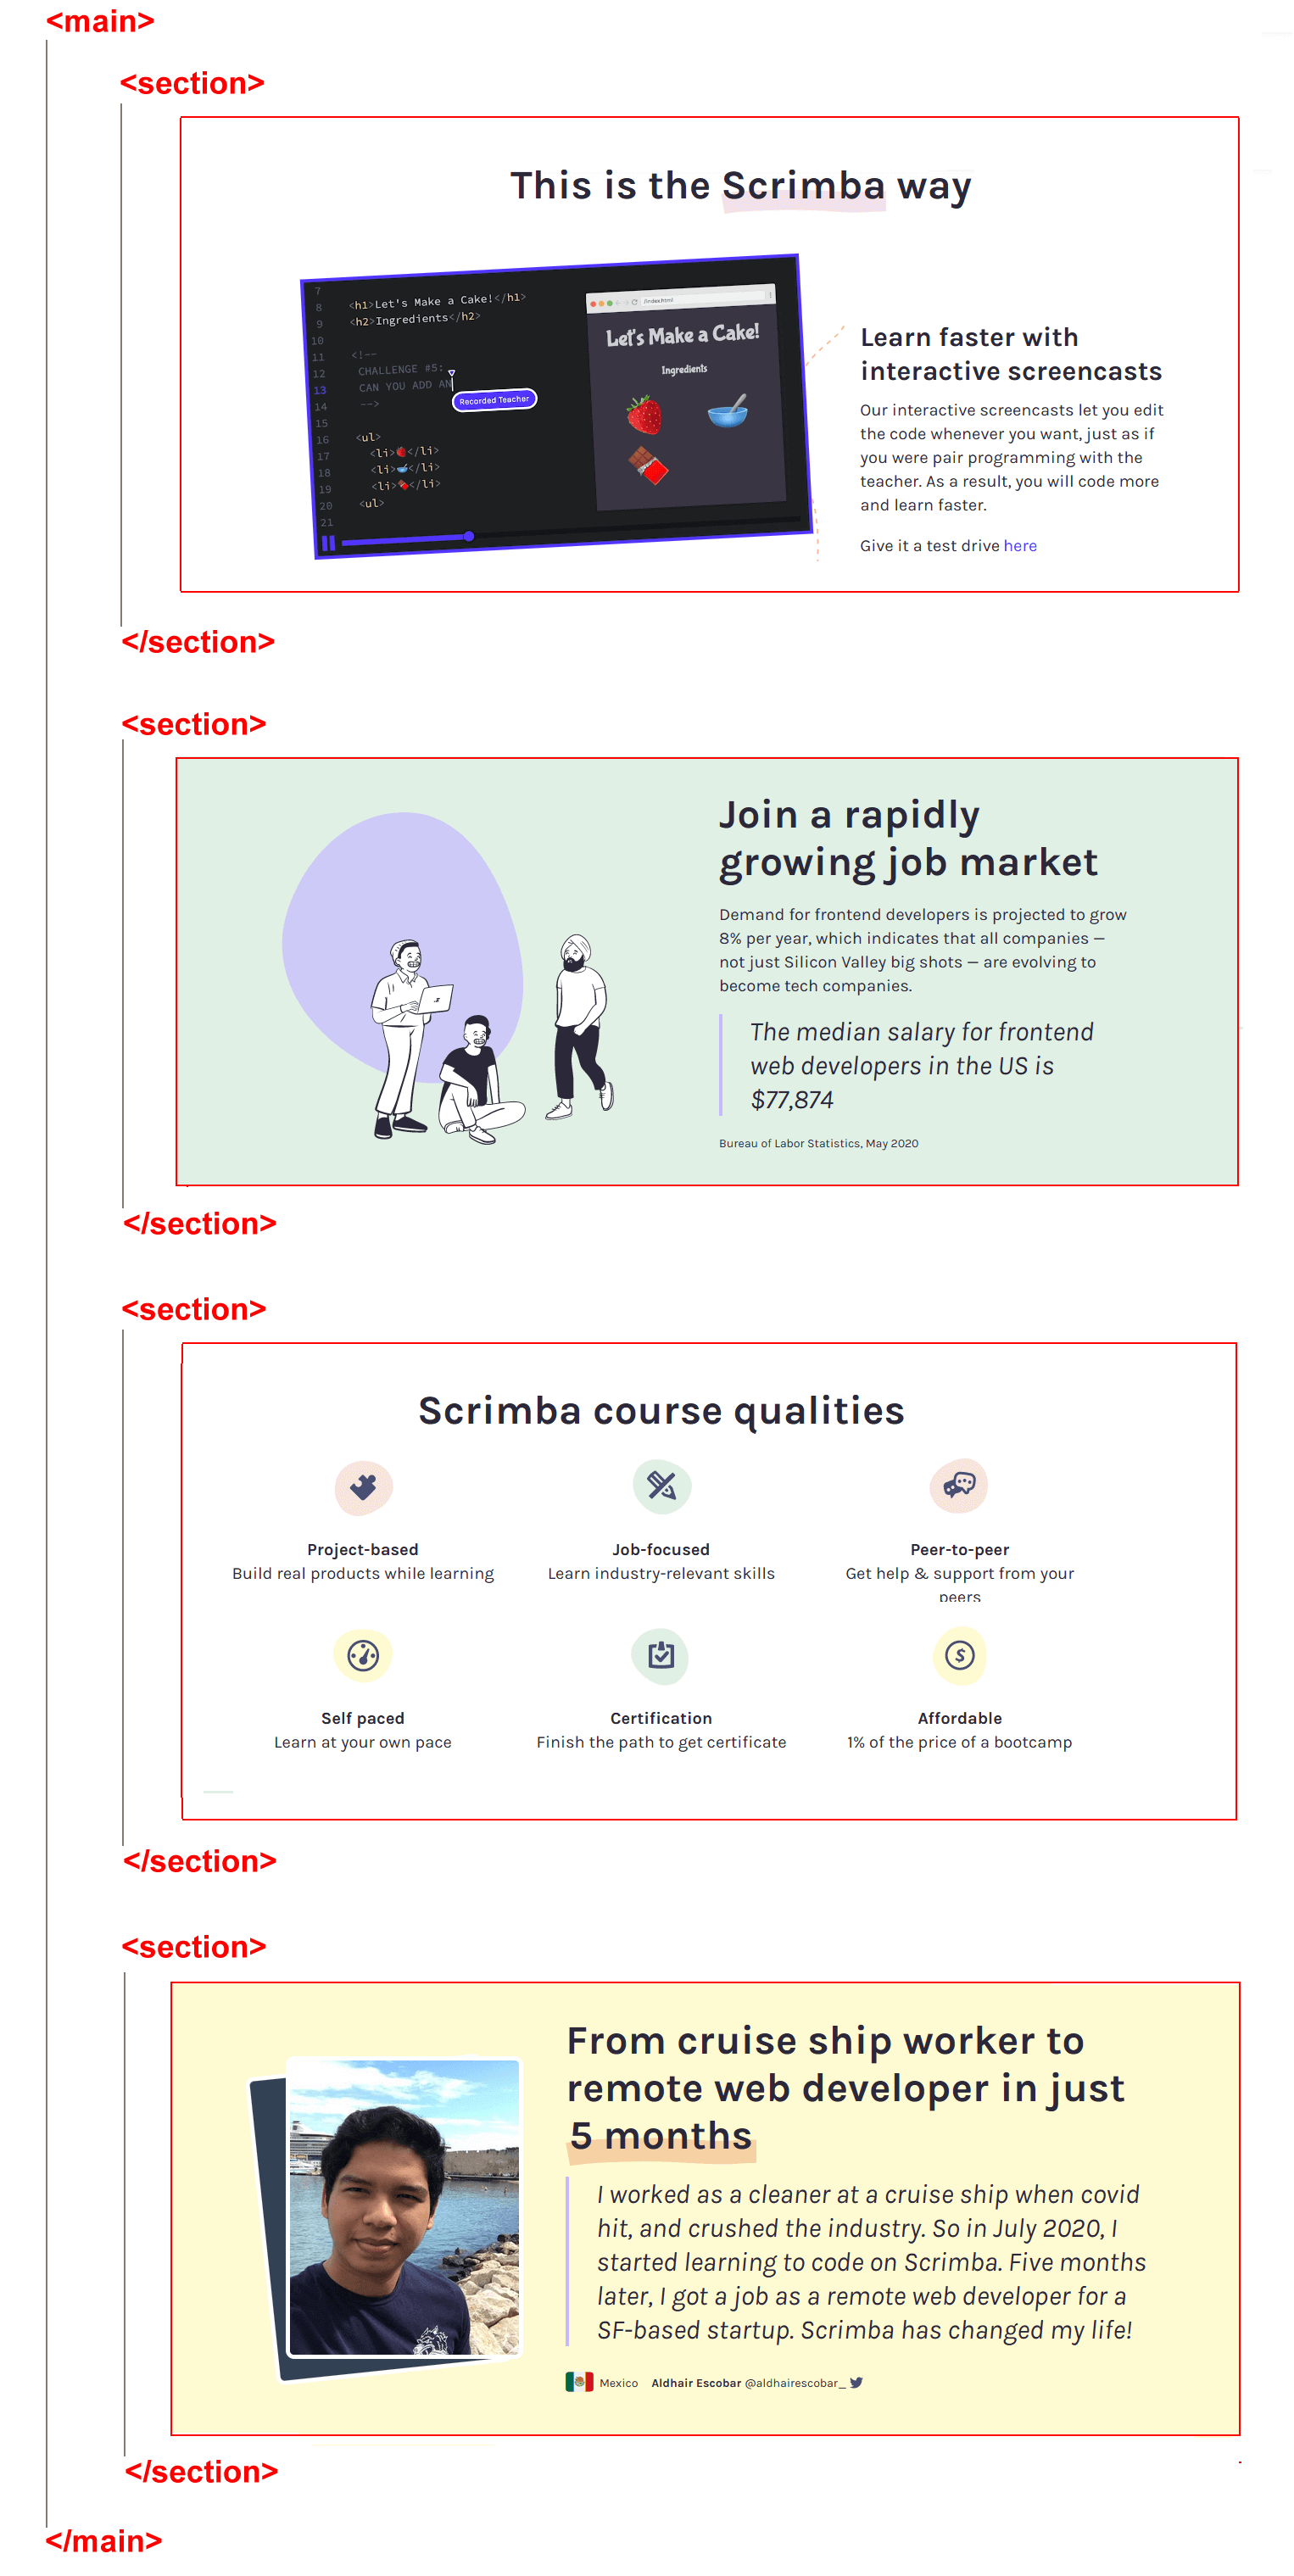
About <section> tags and the <main> tag
In modern web pages, the <main> container is often sub-divided with a number of <section> container tags.
This makes it possible to apply different layouts and styles to different parts of the content inside the <main> container.
For example, different <section> containers may have different background colours and different numbers of columns.
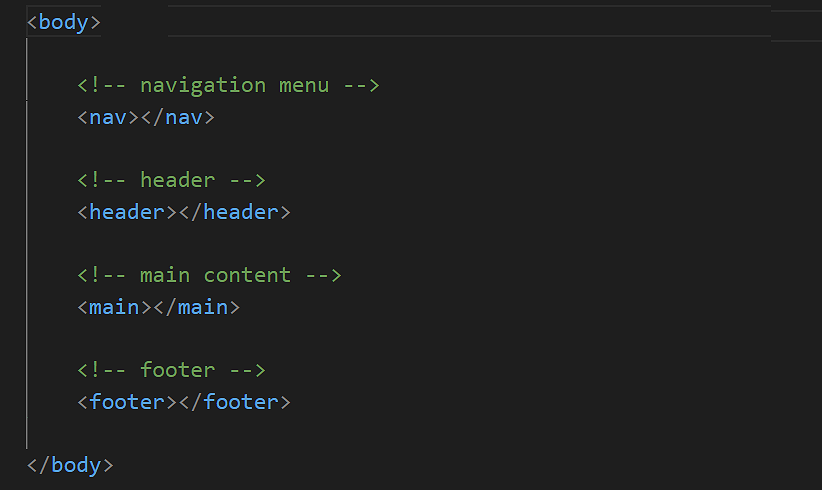
In the web page outline <body> below, you can see that the <main> container is further subdivided into four smaller <section> containers.
Each of the four <section> containers can now have different CSS styles applied to it. See the example below.
Creating your third sample web page
You will now create a third web page. This will have one <main> tag and six <section> tags.
- In VS Code, choose the File | New Text File command.

- Choose the File | Save As... command, and save your file in the 📁 exercises sub-folder of your 📁 websites folder with this name:
page-3.html
Your files and folder structure should now look as shown below.

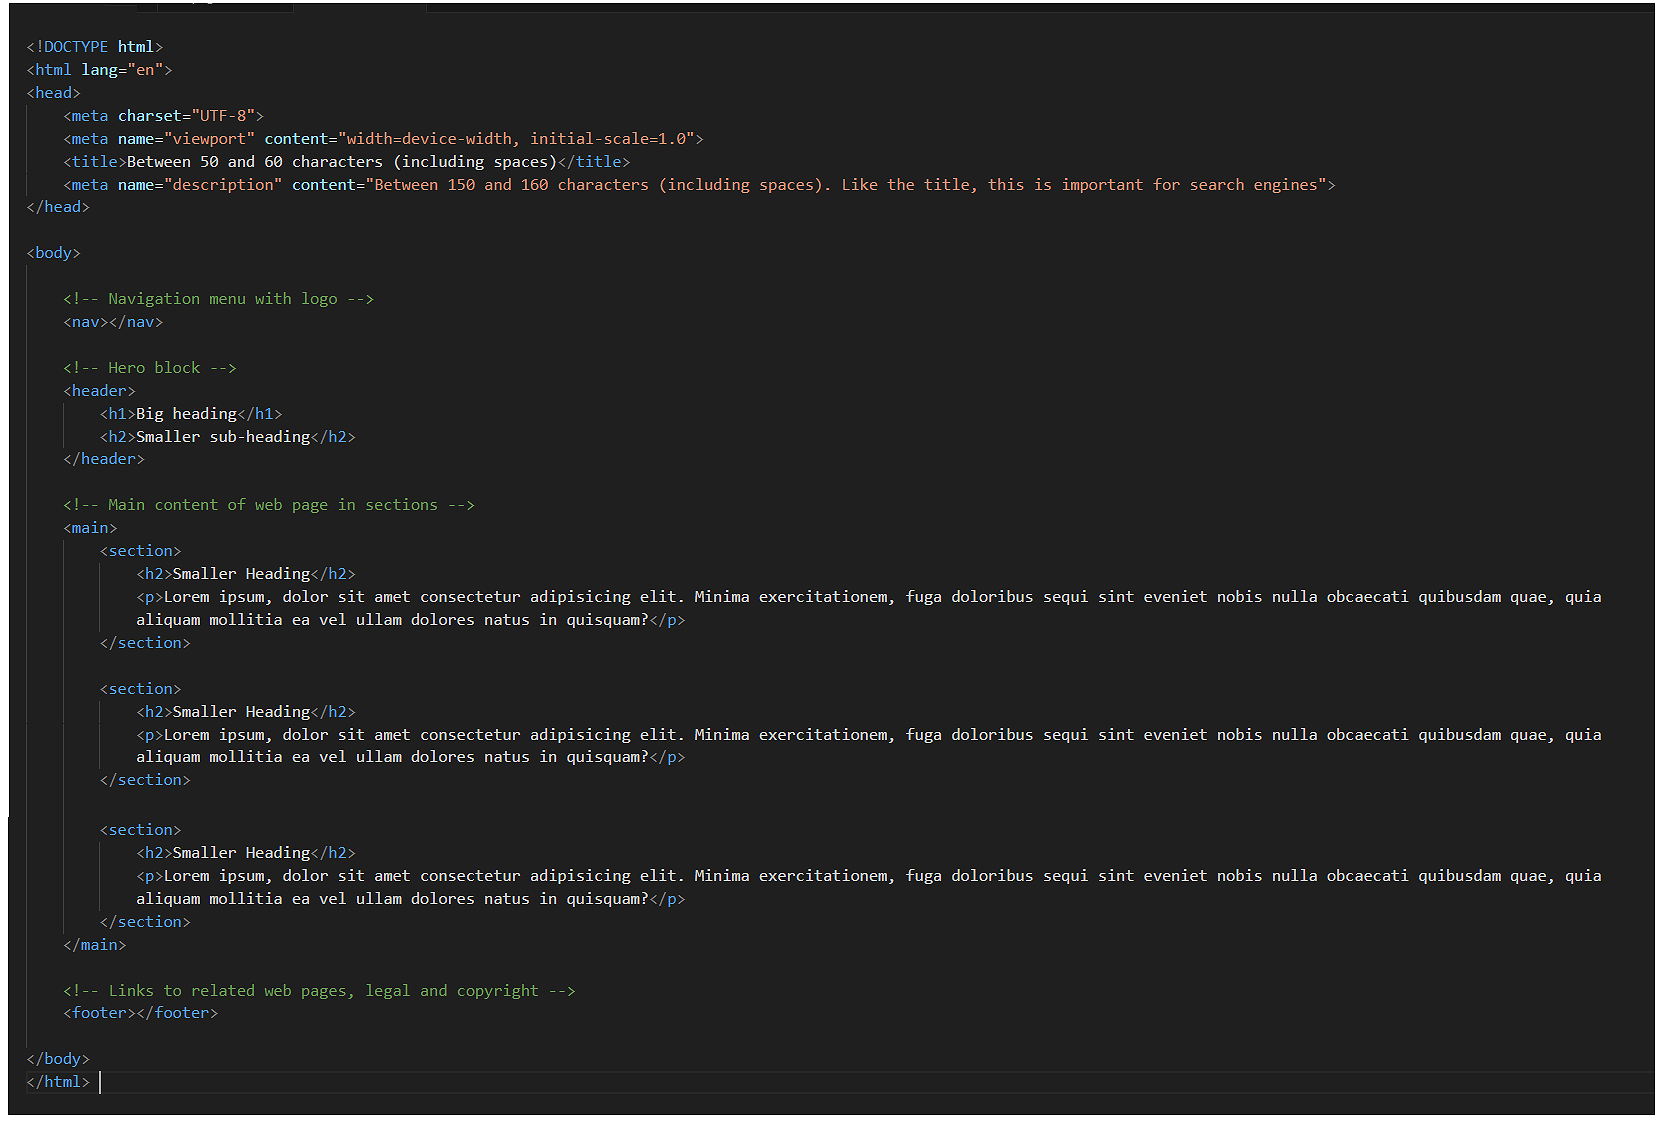
- In VS Code, click at the top of your empty page-3.html file and copy-and-paste in the following.
<!DOCTYPE html>

<html lang="en">


<head>

  <meta charset="UTF-8">

  <meta name="viewport" content="width=device-width, initial-scale=1.0">

  <title>Between 50 and 60 characters (including spaces)</title>

  <meta name="description" content="Between 150 and 160 characters (including spaces). Like the title, this is important for search engines.">


</head>


<body>


 <!-- Navigation menu with logo -->

  <nav></nav>


 <!-- Hero block -->

    <header>

        <h1>Big heading</h1>

        <h2>Smaller sub-heading</h2>

    </header>


    <!-- Main content of web page in sections -->

    <main>


        <section>

            <h2>Smaller Heading</h2>

            <p>Lorem ipsum, dolor sit amet consectetur adipisicing elit. Minima exercitationem, fuga doloribus sequi sint eveniet nobis nulla obcaecati quibusdam quae, quia aliquam mollitia ea vel ullam dolores natus in quisquam?</p>


        </section>


    </main>

    <!-- main content ends here -->


    <!-- Links to related web pages, legal and copyright -->

    <footer></footer>


    </body>

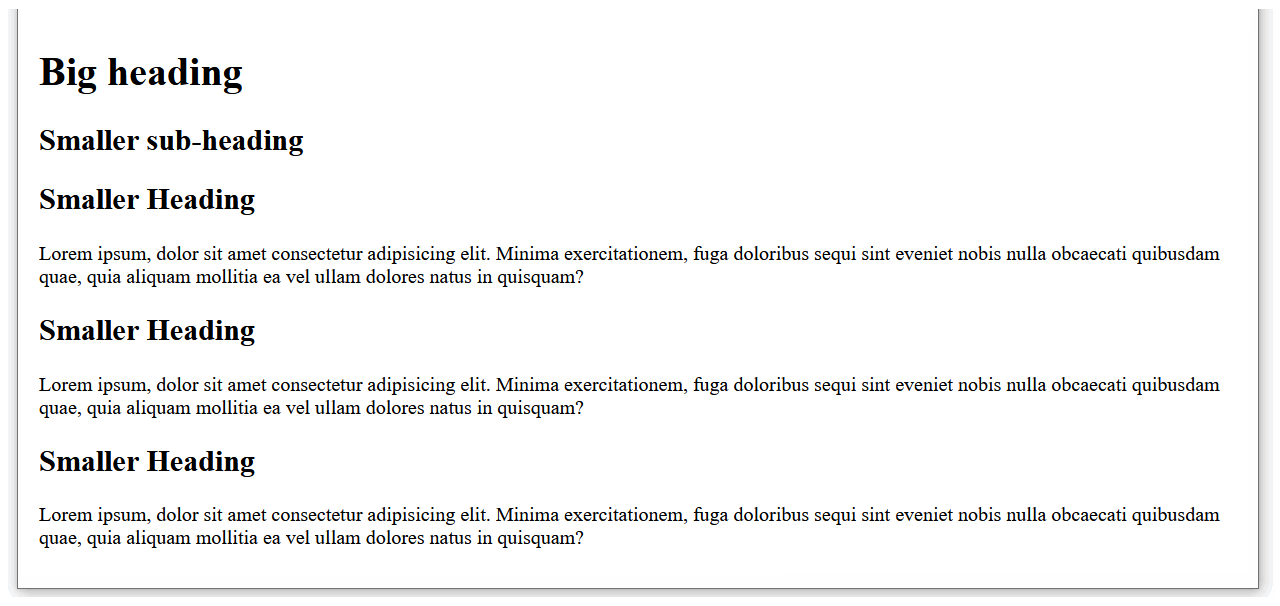
</html> - VS Code now fills your new file with the basic HTML5 structure and some sample text.
- Save page-3.html and view it in a web browser. It should look as shown below.
Updating page-3.html with more lorem ipsum text
Lorem ipsum text is a filler or placeholder text commonly used in design, publishing, and web development to fill a space and show the visual layout of a document or webpage. It mimics the natural flow and structure of real language without conveying meaning. It’s been a standard in the printing industry since the 1500s and remains widely used today.
Here are some websites that provide lorem ipsum or similar:
Follow the steps below to add some more filler text to page-3.html using the built-in lorem ipsum generator in VS Code:
- Open page-3.html in VS Code
- In the first <section> block, click just after the closing </p> tag.

- Press the Enter key twice, and create an empty paragraph <p></p> tag pair.
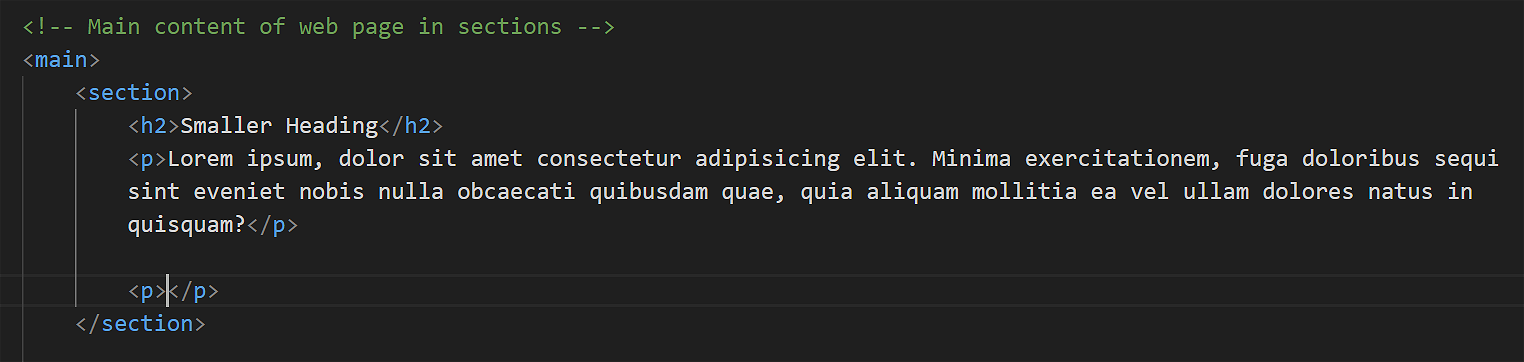
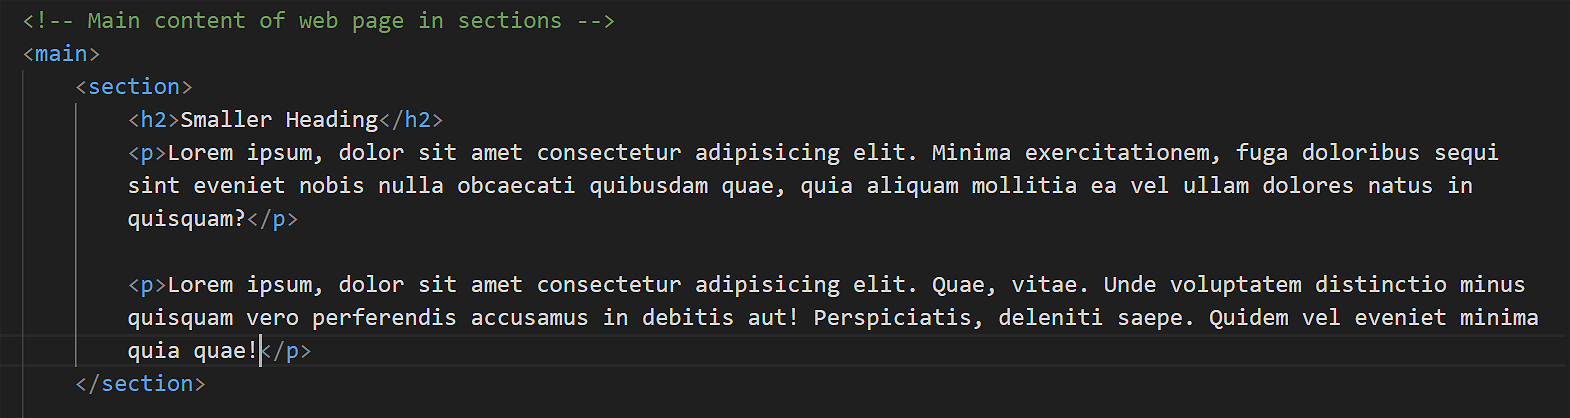
- Inside the empty <p></p> tag pair, type the letters lo.
 When the Emmet Abbreviation menu appears after one or two seconds, click on it or press the Enter key.
VS Code now creates 30 words of Lorem ipsum filler text.
When the Emmet Abbreviation menu appears after one or two seconds, click on it or press the Enter key.
VS Code now creates 30 words of Lorem ipsum filler text.
 Note that you can change the number of words of lorem ipsum generated by typing a number after the word “lorem". For example:
lorem40 or lorem12
Note that you can change the number of words of lorem ipsum generated by typing a number after the word “lorem". For example:
lorem40 or lorem12 - Repeat this step for the second and third <section> container blocks.
- Copy the third <section> block and paste it three times into the web page. Your page-3.html file should now have six sections.
- Near the end of the web page, inside the final closing </section>, copy-and-paste the following line.
The bottom of page-3.html should now look as shown below.<p><a href="../index.html">Back to Home page</a></p>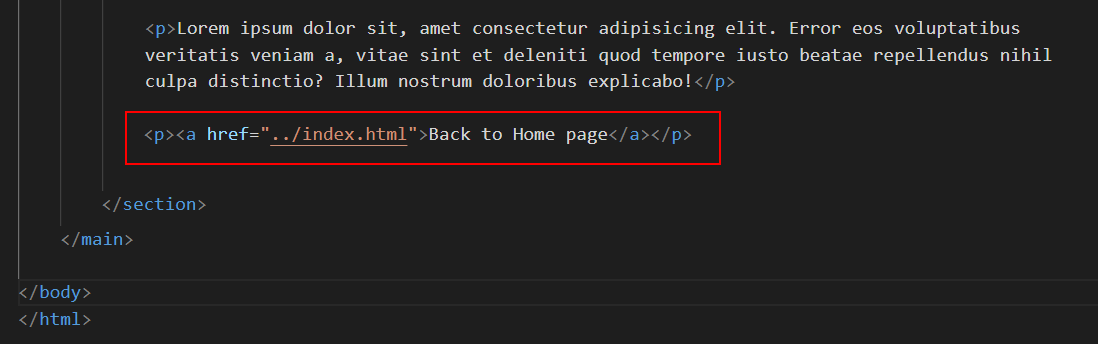
- Update the <head> of your new web page by copying-and-pasting the following two lines.
The <head> of your web page should now look as shown below.<title>Web Page with Sections</title> <meta name="description" content="A sample web page with multiple sections.">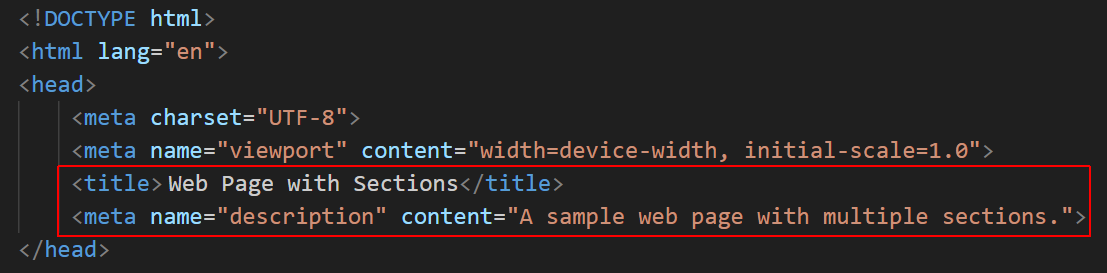
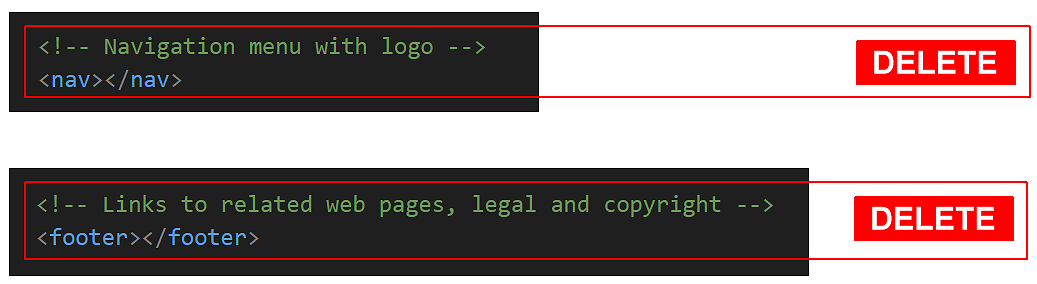
- Finally, delete the <nav> and <footer> container blocks from the web page.
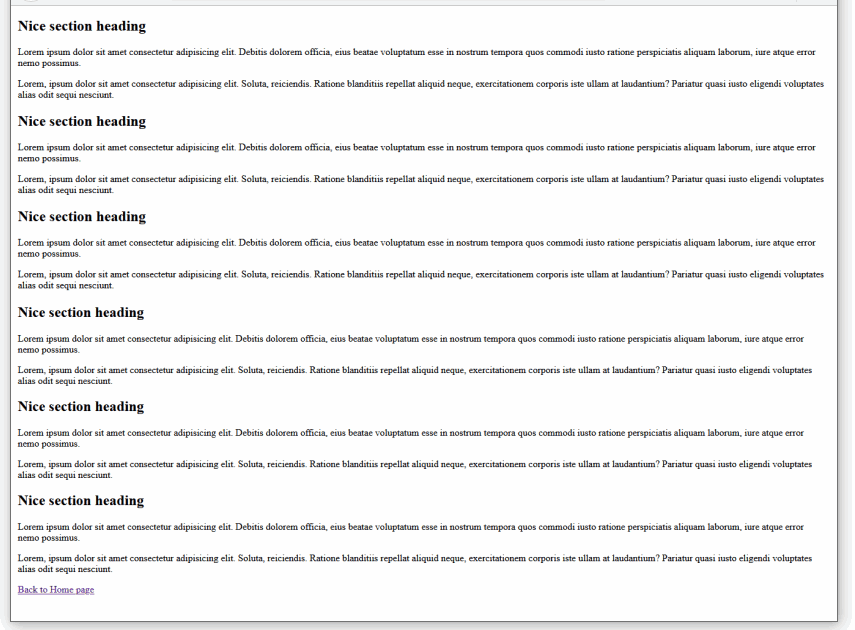
When finished, save your page-3.html web page file. In your web browser, it should look similar to the following.
Adding semantic tags to index.html, page-1.html, and page-2.html
Let's add semantic tags to structure the content of your home web page and your first two exercise web pages.
Each web page will have only one <section> block in its <main> block of content. For simplicity, you can omit the <nav> and <footer> containers.
In VS Code:
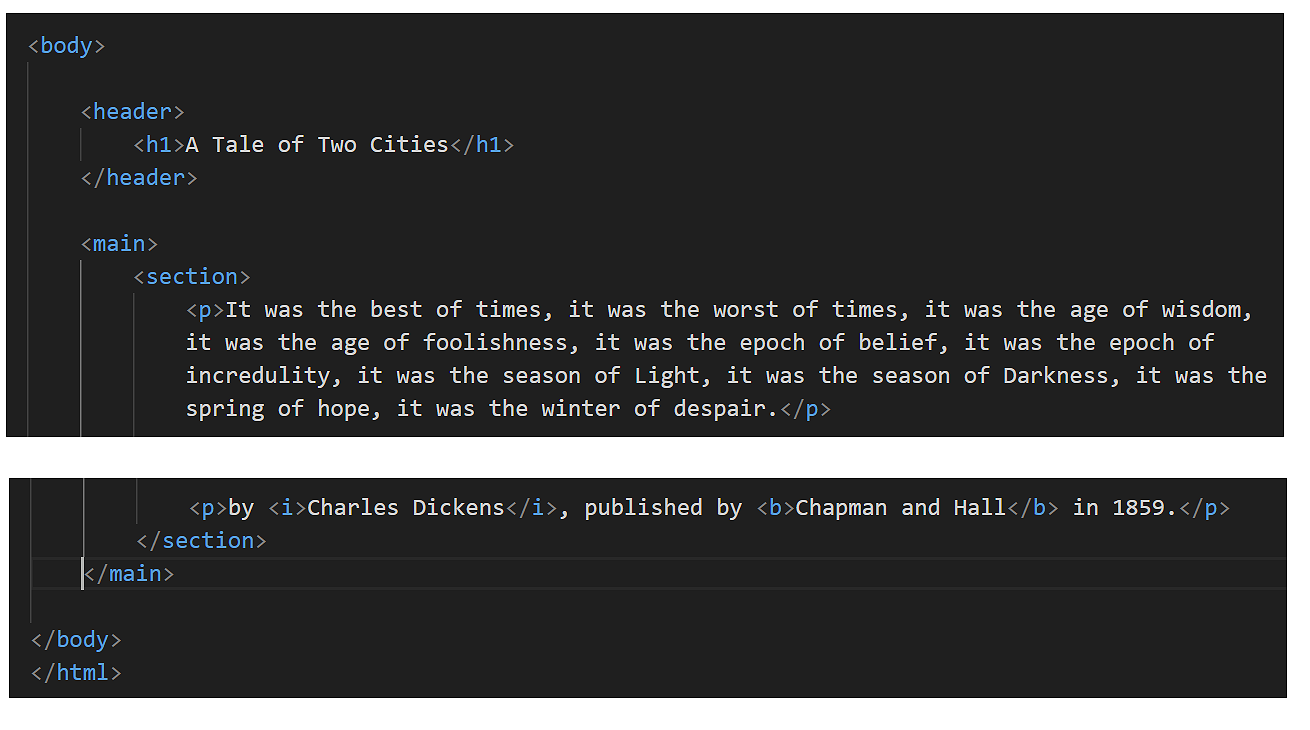
- Open page-1.html and add <header>, <main> and <section> tags as shown below. Save your file when finished.
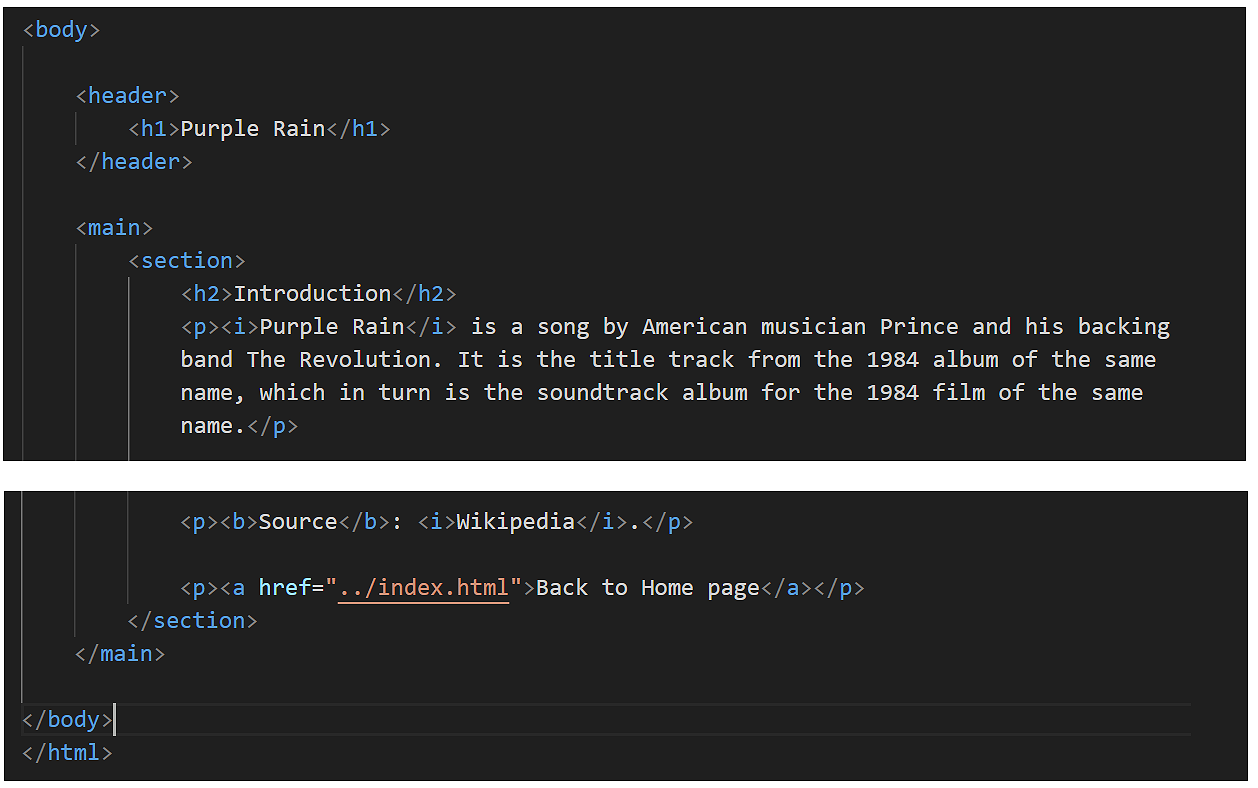
- Open page-2.html and add <header>, <main> and <section> tags as shown below. Save your file when finished.
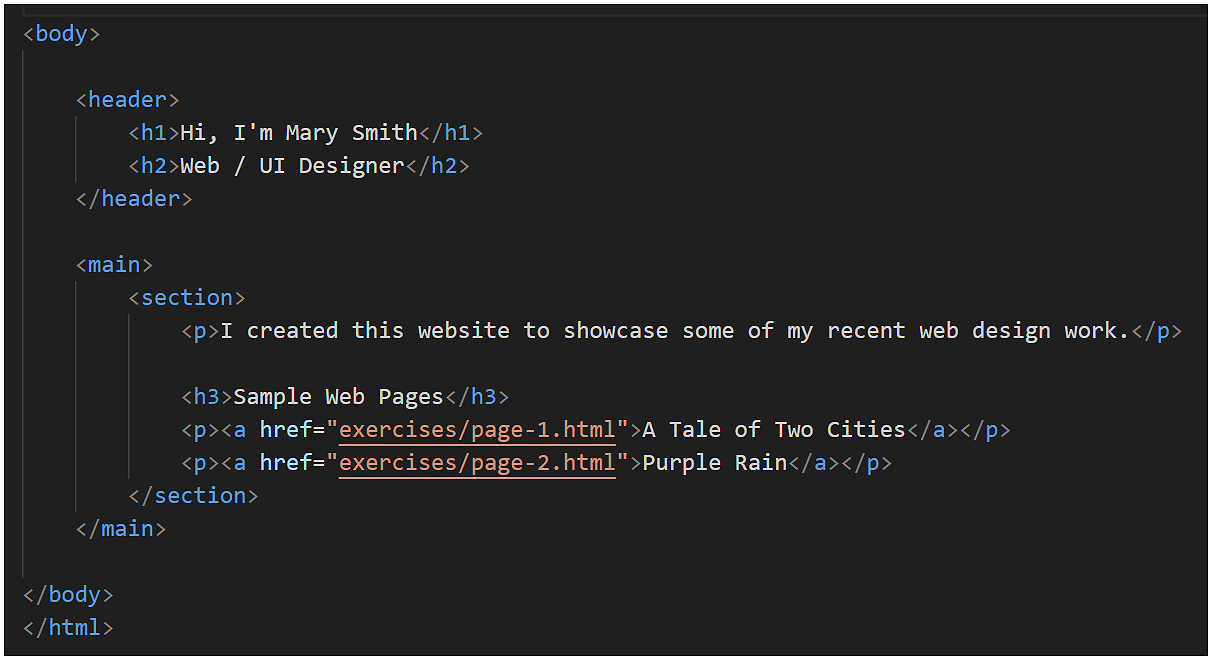
- Open index.html and add <header>, <main> and <section> tags as shown below. Save your file when finished.
Adding a hyperlink to page-3.html in index.html
In VS Code, open your home index.html web page, copy-and-paste the following hyperlink after the current two, and save the file.
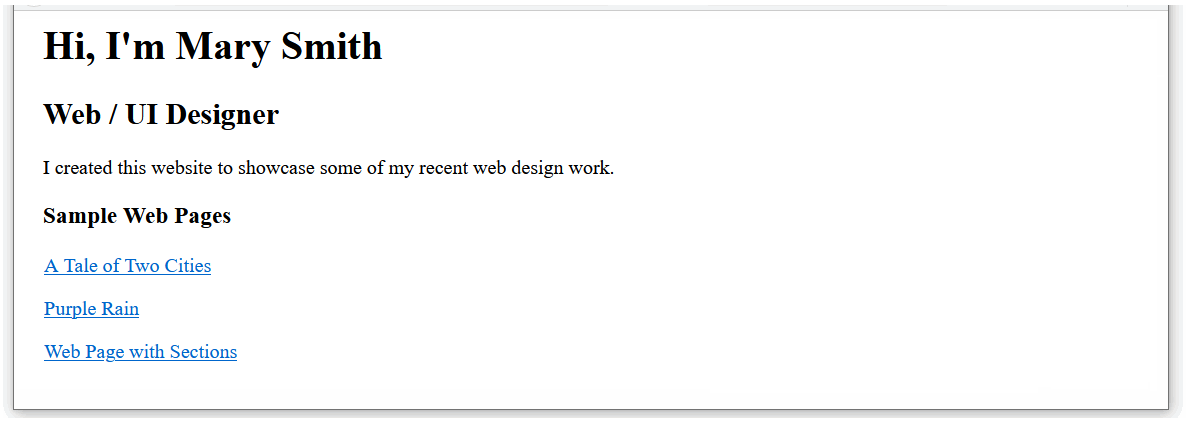
<p><a href="exercises/page-3.html">Web Page with Sections</a></p>Your updated home page should now look as follows in a web browser.
✅ All done.
Uploading your work to GitHub
Your final task is to upload your work to your account on GitHub.
- Open a new tab in your web browser and go to github.com. If you are not already signed in to your GitHub account, sign in now.

- On the next GitHub screen displayed, near the right of the screen, you can see a button named Add file. Click on it.
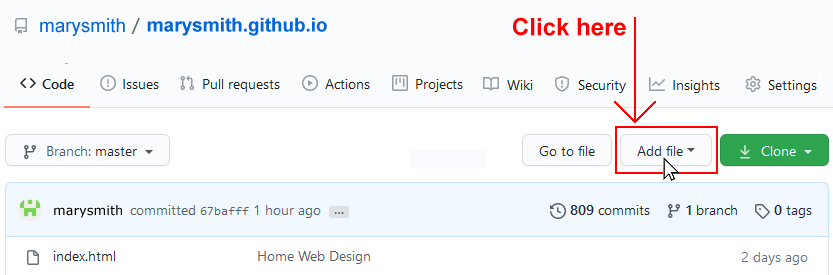
- From the dropdown list displayed, choose the option Upload files.

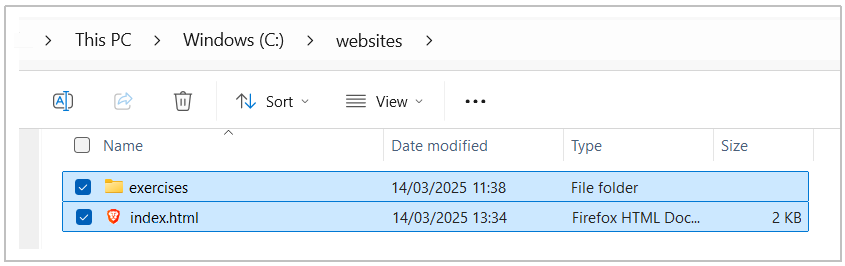
- In File Explorer (Windows) or Finder (Apple Mac), drag-and-drop your index.html file and your 📁 exercises sub-folder to upload them to your repository on GitHub.
 Note: Because your upload includes a folder and not just files, you must use the drag-and-drop method rather than the file select method.
 - Scroll down to the bottom of the GitHub screen, and accept or edit the short message (Add files via upload) in the Commit changes box.
- Finally, click the green Commit changes button to upload your entire exercises sub-folder and all the files it contains.
Your web pages are now published on GitHub at web addresses similar to the following, where username is the username you have chosen for your GitHub account:
https://username.github.io/index.html
Or simply:
https://username.github.io
And:
https://username.github.io/exercises/page-1.html
https://username.github.io/exercises/page-2.html
https://username.github.io/exercises/page-3.html
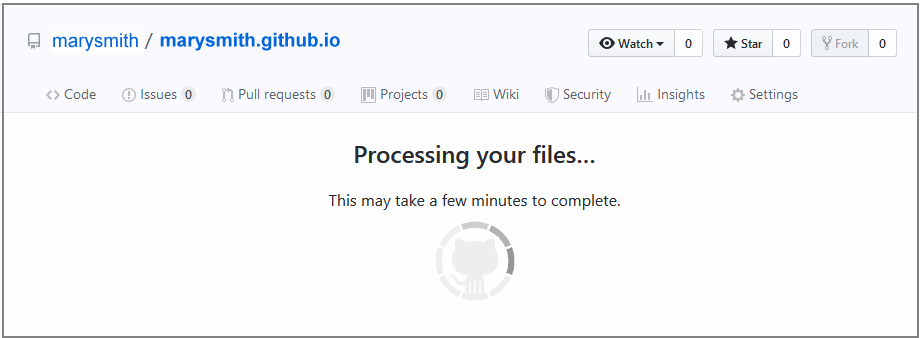
It may take a few minutes for your uploaded files to appear on GitHub.
More learning resources
Tutorial Quiz
Tutorial Podcast
Sample AI prompts
For each one of the following prompts, copy the AI-generated HTML output, open VS Code, choose File | New Text File, and then paste in AI content into the new, empty file.
Choose File | Save to save the file in your 📁 exercises folder. Name your file something.html. (Replace 'something' with a suitable file name.) Do NOT use capital letters or empty spaces in the file name.
Finally, switch to File Explorer (Windows) or Finder (Apple Mac), display your 📁 exercises folder, and double-click on your new HTML file to display it a web browser.
Create the HTML for a home web page of a women's hair dressing salon.


In the <head>, include the UTF-8 charset, a title, description and responsive viewport tags.


In the <body> tag, include semantic <header>, <main> and <section> tags.


You can omit the <nav> and <footer> tags.


In the <header> tag, include a <h1> tag and a sub-heading <h2> tag.


In the <main> tag, include three <section> tags. In each section, include a <h2> tag and two <p> tags in a single-column layout. Each of the three sections should focus on a service offered by the salon. Inside all these tags, include some sample text content.


To make your output easier to read, add an empty line after each closing HTML tag.Create the HTML for a home web page for a maker of scented candles.
In the <head>, include the UTF-8 charset, a title, description and responsive viewport tags.
In the <body> tag, include semantic <header>, <main> and <section> tags. You can omit the <nav> and <footer> tags.
In the <header> tag, include a <h1> tag and a sub-heading <h2> tag.
In the <main> tag, include three <section> tags. In each section, include a <h2> tag and two <p> tags in a single-column layout. Each of the three sections should focus on a particular style of candle offered by the business. Inside all these tags, include some sample text content.
To make your output easier to read, add an empty line after each closing HTML tag.Create the HTML for a home web page for a Sligo-based local animal rescue charity.
In the <head>, include the UTF-8 charset, a title, description and responsive viewport tags.
In the <body> tag, include semantic <header>, <main> and <section> tags.
You can omit the <nav> and <footer> tags.
In the <header> tag, include a <h1> tag and a sub-heading <h2> tag.
In the <main> tag, include three <section> tags. In each section, include a <h2> tag and two <p> tags in a single-column layout. Each of the three sections should focus on a particular service offered by the charity. Inside all these tags, include some sample text content.
To make your output easier to read, add an empty line after each closing HTML tag.Create the HTML for a home web page promoting Hook Head Lighthouse in County Waterford, Ireland.
In the <head>, include the UTF-8 charset, a title, description and responsive viewport tags.
In the <body> tag, include semantic <header>, <main> and <section> tags.
You can omit the <nav> and <footer> tags.
In the <header> tag, include a <h1> tag and a sub-heading <h2> tag.
In the <main> tag, include three <section> tags. In each section, include a <h2> tag and two <p> tags in a single-column layout. Each of the three sections should focus on a particular visitor attraction offered by the location. Inside all these tags, include some sample text content.
To make your output easier to read, add an empty line after each closing HTML tag.