Learning Goals
At the end of this Tutorial, you will be able to:
- Create new HTML elements using document.createElement().
- Add text content to elements using .innerText.
- Add formatted HTML using the .innerHTML tag.
- Add elements to the web page using .appendChild().
- Nest elements inside specific containers (parents) rather than the page body.
- Set attributes for elements, such as the src and alt for images.
For this Tutorial, you will start with an empty HTML file.
In your javascript/exercises folder, create a new HTML file named workfile-5.html.
Create a new empty text file named script-5.js and save it in this same folder.
Add a link to script-5.js in your workfile-5.html file using a <script> tag with the defer attribute.
About the Document Object Model (DOM)
When a web browser accesses a web page – also known as an HTML document – it performs two operations. It:
- Displays (renders) the web page in the browser, using any links in the page to CSS, image, video, font, and other files.
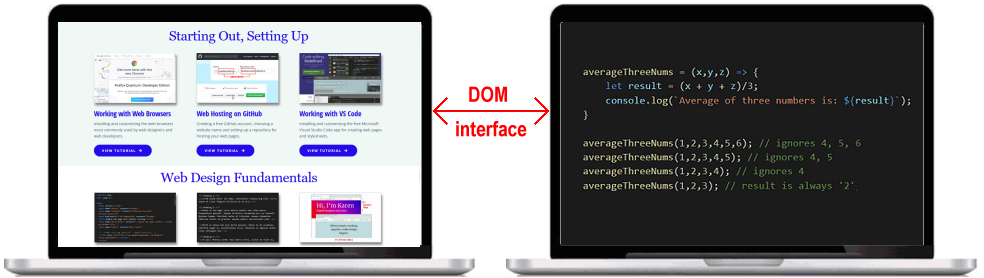
- Creates a Document Object Model (DOM) of the web page that enables the page's content to be accessed and modified by JavaScript code. In effect, the DOM is an interface between and JavaScript.
The three-step process: create, content, append
Adding a new element to a web page with JavaScript always involves the same three steps:
- Create the element in JavaScript code.
- Add Content to the element (usually text, but also CSS classes, or IDs).
- Append (attach) the element to the web page so it becomes visible.
Adding a main heading
Let's add a <h1> heading to your empty web page.
Copy the following code into your script-5.js script file.
// 1. Create the element
const mainHeading = document.createElement("h1");
// 2. Add content
mainHeading.innerText = "Welcome to JavaScript";
// 3. Append to the web page (document.body)
document.body.appendChild(mainHeading);Save the file and open workfile-5.html in your browser. You should see your new heading.
Adding a text paragraph
Now let's add a paragraph of text.
When you use appendChild(), JavaScript adds the new element underneath whatever is already there. It's like stacking bricks: each new one goes on top of the stack (or in web terms, at the bottom of the page).
// 1. Create the element
const introPara = document.createElement("p");
// 2. Add content
introPara.innerText = "This entire page was generated using JavaScript code. No HTML tags were written in the body.";
// 3. Append to the web page
// This will appear UNDER the heading we added previously
document.body.appendChild(introPara);Adding a sub-heading
Let's practice again by adding a sub-heading <h2> with some text.
Add this code to your script file.
// 1. Create
const subHeading = document.createElement("h2");
// 2. Add Content
subHeading.innerText = "About the DOM";
// 3. Append
document.body.appendChild(subHeading);Notice that JavaScript adds each new element to the bottom of the page, in the order your code runs.
Nesting elements inside containers
So far, we have attached everything directly to the <body> of the web page.
However, usually you will want to put elements inside other elements (containers), such as a <section> or a <div>. This is called nesting.
To do this, you simply append the child element to the container instead of the body.
Copy the code below to your script file. It performs the following actions:
- Creates a container <section> and gives it a CSS class.
- Creates a <p> paragraph with text.
- Puts the paragraph inside the <section> container tag.
- Puts the section inside the <body> of the web page.
// === NESTING ELEMENTS ===
// A. Create the container (section)
const heroSection = document.createElement("section");
// B. Create the content (paragraph)
const heroText = document.createElement("p");
heroText.innerText = "This paragraph is nested inside a section.";
// C. Append the paragraph TO THE SECTION
heroSection.appendChild(heroText);
// D. Append the section TO THE BODY
document.body.appendChild(heroSection);Refresh your browser. If you inspect your web page (Right-click -> Inspect), you should see the new text inside a <section> container.
Nesting elements inside containers with IDs
Often your web pages will have multiple container tags of the same type, so you might want to give them unique IDs to identify them.
In the code below, we create a new <section> with an ID of important-note, and then add a paragraph inside it.
// === NESTING ELEMENTS ===
// A. Create the container (section)
const anotherSection = document.createElement("section");
anotherSection.id = "important-note"; // Give it a unique ID
// B. Create the content (paragraph)
const someMessage = document.createElement("p");
someMessage.innerText = "This text message is nested inside a section with a unique ID of important-note.";
// C. Append the paragraph TO THE SECTION
// (We add the child to the specific parent, not the body)
anotherSection.appendChild(someMessage);
// D. Append the section TO THE BODY
// (Now we add the parent (and its children) to the page)
document.body.appendChild(anotherSection);If you inspect your web page (Right-click -> Inspect), you will see the updated HTML structure.
Adding formatted content with .innerHTML
Sometimes you want to add text that includes bolding, italics, or line breaks inside a container. You can do this with the .innerHTML method.
// 1. Create a container
const note = document.createElement("div");
// 2. Add content INCLUDING HTML tags
// The browser will render the <b> and <br> tags correctly
note.innerHTML = "<b>Note:</b> Access is granted.<br>Please proceed to the <i>Lobby</i>.";
// 3. Append to body
document.body.appendChild(note);Note: If you used .innerText in the example above, the tags <b> and <br> would be displayed on screen as plain text rather than being processed as HTML.
Adding images to a web page
Adding an image follows the same process, but instead of setting .innerText, we need to set the image source (src) and description (alt).
// === ADDING AN IMAGE ===
// 1. Create the image element
const myImage = document.createElement("img");
// 2. Set the attributes (Source and Alt text)
myImage.src = "https://placedog.net/500/280";
myImage.alt = "A cute puppy";
// 3. Append to the web page
document.body.appendChild(myImage);Try it yourself
In your workfile...
---
Create a new <h3> heading with the text "My Favorite Links". Append it to the body.
---
Create a <footer> element. Add some copyright text to it. Append it to the bottom of the web page.
More learning resources
Tutorial Quiz
Tutorial Podcast
Sample AI prompts
Explain the concept of the "DOM Tree" to a beginner. How does creating an element like a <div> and then adding a <p> inside it relate to a parent-child relationship?